4. Getting Started
This section is aimed at getting a user to a working state starting with a machine that may never have had ns-3 installed. It covers supported platforms, prerequisites, ways to obtain ns-3, ways to build ns-3, and ways to verify your build and run simple programs.
4.1. Overview
ns-3 is built as a system of software libraries that work together. User programs can be written that links with (or imports from) these libraries. User programs are written in either the C++ or Python programming languages.
ns-3 is distributed as source code, meaning that the target system needs to have a software development environment to build the libraries first, then build the user program. ns-3 could in principle be distributed as pre-built libraries for selected systems, and in the future it may be distributed that way, but at present, many users actually do their work by editing ns-3 itself, so having the source code around to rebuild the libraries is useful. If someone would like to undertake the job of making pre-built libraries and packages for operating systems, please contact the ns-developers mailing list.
In the following, we’ll look at three ways of downloading and building ns-3. The first is to download and build an official release from the main web site. The second is to fetch and build development copies of a basic ns-3 installation. The third is to use an additional build tool to download more extensions for ns-3. We’ll walk through each since the tools involved are slightly different.
Experienced Linux users may wonder at this point why ns-3 is not provided like most other libraries using a package management tool? Although there exist some binary packages for various Linux distributions (e.g. Debian), most users end up editing and having to rebuild the ns-3 libraries themselves, so having the source code available is more convenient. We will therefore focus on a source installation in this tutorial.
For most uses of ns-3, root permissions are not needed, and the use of a non-privileged user account is recommended.
4.2. Prerequisites
The entire set of available ns-3 libraries has a number of dependencies on third-party libraries, but most of ns-3 can be built and used with support for a few common (often installed by default) components: a C++ compiler, an installation of Python, a source code editor (such as vim, emacs, or Eclipse) and, if using the development repositories, an installation of Git source code control system. Most beginning users need not concern themselves if their configuration reports some missing optional features of ns-3, but for those wishing a full installation, the project provides an installation guide for various systems, available at https://www.nsnam.org/docs/installation/html/index.html.
As of the most recent ns-3 release (ns-3.44), the following tools are needed to get started with ns-3:
Prerequisite |
Package/version |
|---|---|
C++ compiler |
|
Python |
|
CMake |
|
Build system |
|
Git |
any recent version (to access ns-3 from GitLab.com) |
tar |
any recent version (to unpack an ns-3 release) |
bunzip2 |
any recent version (to uncompress an ns-3 release) |
To check the default version of Python, type python -V. To check
the default version of g++, type g++ -v. If your installation is
missing or too old, please consult the ns-3
installation guide for guidance.
From this point forward, we are going to assume that the reader is working in Linux, macOS, or a Linux emulation environment, and has at least the above prerequisites.
For example, do not use a directory path such as the below, because one of the parent directories contains a space in the directory name:
$ pwd
/home/user/5G simulations/ns-3-dev
4.2.1. Downloading a release of ns-3 as a source archive
This option is for the new user who wishes to download and experiment with the most recently released and packaged version of ns-3. ns-3 publishes its releases as compressed source archives, sometimes referred to as a tarball. A tarball is a particular format of software archive where multiple files are bundled together and the archive is usually compressed. The process for downloading ns-3 via tarball is simple; you just have to pick a release, download it and uncompress it.
We recommend downloading the most recent release (highest release
number). Prior to the ns-3.45 release, we offered one downloadable
source code archive, called ns-allinone-3.nn.tar.bz2 (where nn
stands for the release number), which contained the network animator
NetAnim, the bake build tool and the ns-3 release. Starting with
ns-3.45, we offer two release archives:
ns-3.45.tar.bz2: Contains only ns-3ns-allinone-3.45.tar.bz2: Contains ns-3 plus some compatible extension modules available in the ns-3 App Store
We will focus on the first option above. The instructions for the second
one are basically the same, except that you will need to change into
the ns-3.nn directory after unpacking it.
Let’s assume that you, as a user, wish to build ns-3 in a local
directory called workspace.
If you adopt the workspace directory approach, you can
get a copy of a release by typing the following into your Linux shell
(substitute the appropriate version numbers, of course)
$ cd
$ mkdir workspace
$ cd workspace
$ wget https://www.nsnam.org/release/ns-3.45.tar.bz2
$ tar xjf ns-3.45.tar.bz2
Notice the use above of the wget utility, which is a command-line
tool to fetch objects from the web; if you do not have this installed,
you can use a browser for this step.
Following these steps, you should change into the directory ns-3.45.
You are now ready to build the base ns-3 distribution and may skip ahead
to the section on building ns-3.
4.3. Downloading ns-3 using Git
The ns-3 code is available in Git repositories on the GitLab.com service
at https://gitlab.com/nsnam/. The group name nsnam organizes the
various repositories used by the open source project.
The simplest way to get started using Git repositories is to fork or clone
the ns-3-dev repository.
If you are new to Git, the terminology of fork and clone
may be foreign to you; if so, we recommend that you simply clone
(create your own replica) of the repository found on GitLab.com, as
follows:
$ cd
$ mkdir workspace
$ cd workspace
$ git clone https://gitlab.com/nsnam/ns-3-dev.git
$ cd ns-3-dev
4.4. Building ns-3
ns-3 is built with
a build tool called CMake, described below. Most users will end up
working most directly with the ns3 command-line wrapper for CMake, for the sake
of convenience.
4.4.1. Building with the ns3 CMake wrapper
The build process consists of two steps: a configuration stage, and then the
actual compilation. The configuration stage is used to enable and disable
compiler optimizations and other options and to control the scope of the build.
The project will be configured
by default using the default build profile, which is an optimized
build with debug information (CMAKE_BUILD_TYPE=relwithdebinfo) version.
Let’s tell the project to make an optimized build.
To maintain a similar interface for command-line users, we include a wrapper script for CMake, ns-3. To tell ns-3 that it should do optimized builds that include the examples and tests, you will need to execute the following commands:
$ ./ns3 clean
$ ./ns3 configure --build-profile=optimized --enable-examples --enable-tests
This runs CMake out of the local directory (which is provided as a convenience
for you). The first command to clean out the previous build is not
typically strictly necessary but is good practice (but see Build Profiles,
below); it will remove the
previously built libraries and object files found in directory build/.
When the project is reconfigured and the build system checks for various
dependencies, you should see
output that looks similar to the following:
$ ./ns3 configure --build-profile=optimized --enable-examples --enable-tests
-- CCache is enabled. Precompiled headers are disabled by default.
-- The CXX compiler identification is GNU 11.2.0
-- The C compiler identification is GNU 11.2.0
-- Detecting CXX compiler ABI info
-- Detecting CXX compiler ABI info - done
-- Check for working CXX compiler: /usr/bin/c++ - skipped
-- Detecting CXX compile features
-- Detecting CXX compile features - done
-- Detecting C compiler ABI info
-- Detecting C compiler ABI info - done
-- Check for working C compiler: /usr/bin/cc - skipped
-- Detecting C compile features
-- Detecting C compile features - done
-- Using default output directory /mnt/dev/tools/source/ns-3-dev/build
-- Found GTK3_GTK: /usr/lib/x86_64-linux-gnu/libgtk-3.so
-- GTK3 was found.
-- LibXML2 was found.
-- LibRT was found.
-- Visualizer requires Python bindings
-- Found Boost: /usr/lib/x86_64-linux-gnu/cmake/Boost-1.74.0/BoostConfig.cmake (found version "1.74.0")
-- Found PkgConfig: /usr/bin/pkg-config (found version "0.29.2")
-- GSL was found.
-- Found Sphinx: /usr/bin/sphinx-build
-- Looking for sys/types.h
-- Looking for sys/types.h - found
-- Looking for stdint.h
-- Looking for stdint.h - found
-- Looking for stddef.h
-- Looking for stddef.h - found
-- Check size of long long
-- Check size of long long - done
-- Check size of int128_t
-- Check size of int128_t - failed
-- Check size of __int128_t
-- Check size of __int128_t - done
-- Performing Test has_hash___int128_t
-- Performing Test has_hash___int128_t - Success
-- Check size of unsigned long long
-- Check size of unsigned long long - done
-- Check size of uint128_t
-- Check size of uint128_t - failed
-- Check size of __uint128_t
-- Check size of __uint128_t - done
-- Performing Test has_hash___uint128_t
-- Performing Test has_hash___uint128_t - Success
-- Looking for C++ include inttypes.h
-- Looking for C++ include inttypes.h - found
-- Looking for C++ include stat.h
-- Looking for C++ include stat.h - not found
-- Looking for C++ include dirent.h
-- Looking for C++ include dirent.h - found
-- Looking for C++ include stdlib.h
-- Looking for C++ include stdlib.h - found
-- Looking for C++ include signal.h
-- Looking for C++ include signal.h - found
-- Looking for C++ include netpacket/packet.h
-- Looking for C++ include netpacket/packet.h - found
-- Looking for getenv
-- Looking for getenv - found
-- Processing src/antenna
-- Processing src/aodv
-- Processing src/applications
-- Processing src/bridge
-- Processing src/brite
-- Brite was not found
-- Processing src/buildings
-- Processing src/click
-- Click was not found
-- Processing src/config-store
-- Processing src/core
-- Looking for C++ include boost/units/quantity.hpp
-- Looking for C++ include boost/units/quantity.hpp - found
-- Looking for C++ include boost/units/systems/si.hpp
-- Looking for C++ include boost/units/systems/si.hpp - found
-- Boost Units have been found.
-- Processing src/csma
-- Processing src/csma-layout
-- Processing src/dsdv
-- Processing src/dsr
-- Processing src/energy
-- Processing src/fd-net-device
-- Looking for C++ include net/ethernet.h
-- Looking for C++ include net/ethernet.h - found
-- Looking for C++ include netpacket/packet.h
-- Looking for C++ include netpacket/packet.h - found
-- Looking for C++ include net/if.h
-- Looking for C++ include net/if.h - found
-- Looking for C++ include linux/if_tun.h
-- Looking for C++ include linux/if_tun.h - found
-- Looking for C++ include net/netmap_user.h
-- Looking for C++ include net/netmap_user.h - not found
-- Looking for C++ include sys/ioctl.h
-- Looking for C++ include sys/ioctl.h - found
-- Checking for module 'libdpdk'
--   No package 'libdpdk' found
-- Processing src/flow-monitor
-- Processing src/internet
-- Processing src/internet-apps
-- Processing src/lr-wpan
-- Processing src/lte
-- Processing src/mesh
-- Processing src/mobility
-- Processing src/netanim
-- Processing src/network
-- Processing src/nix-vector-routing
-- Processing src/olsr
-- Processing src/openflow
-- Openflow was not found
-- Processing src/point-to-point
-- Processing src/point-to-point-layout
-- Processing src/propagation
-- Processing src/sixlowpan
-- Processing src/spectrum
-- Processing src/stats
-- Processing src/tap-bridge
-- Processing src/test
-- Processing src/topology-read
-- Processing src/traffic-control
-- Processing src/uan
-- Processing src/virtual-net-device
-- Processing src/wifi
-- ---- Summary of optional NS-3 features:
Build profile                 : optimized
Build directory               : /mnt/dev/tools/source/ns-3-dev/build
BRITE Integration             : OFF (missing dependency)
DES Metrics event collection  : OFF (not requested)
DPDK NetDevice                : OFF (missing dependency)
Emulation FdNetDevice         : ON
Examples                      : ON
File descriptor NetDevice     : ON
GNU Scientific Library (GSL)  : ON
GtkConfigStore                : ON
MPI Support                   : OFF (not requested)
NS-3 Click Integration        : OFF (missing dependency)
NS-3 OpenFlow Integration     : OFF (missing dependency)
Netmap emulation FdNetDevice  : OFF (missing dependency)
PyViz visualizer              : OFF (missing dependency)
Python Bindings               : OFF (not requested)
Real Time Simulator           : ON
SQLite stats support          : ON
Tap Bridge                    : ON
Tap FdNetDevice               : ON
Tests                         : ON


Modules configured to be built:
antenna                   aodv                      applications
bridge                    buildings                 config-store
core                      csma                      csma-layout
dsdv                      dsr                       energy
fd-net-device             flow-monitor              internet
internet-apps             lr-wpan                   lte
mesh                      mobility                  netanim
network                   nix-vector-routing        olsr
point-to-point            point-to-point-layout     propagation
sixlowpan                 spectrum                  stats
tap-bridge                test                      topology-read
traffic-control           uan                       virtual-net-device
wifi


Modules that cannot be built:
brite                     click                     mpi
openflow                  visualizer


-- Configuring done
-- Generating done
-- Build files have been written to: /mnt/dev/tools/source/ns-3-dev/cmake-cache
Finished executing the following commands:
mkdir cmake-cache
cd cmake-cache; /usr/bin/cmake -DCMAKE_BUILD_TYPE=release -DNS3_NATIVE_OPTIMIZATIONS=ON -DNS3_EXAMPLES=ON -DNS3_TESTS=ON -G Unix Makefiles .. ; cd ..
Note the last part of the above output. Some ns-3 options are not enabled by
default or require support from the underlying system to work properly (OFF (not requested)).
Other options might depend on third-party libraries, which if not found will be disabled
(OFF(missing dependency)).
If this library were not found, the corresponding ns-3 feature
would not be enabled and a message would be displayed. Note further that there is
a feature to use the program sudo to set the suid bit of certain programs.
This is not enabled by default and so this feature is reported as “not enabled.”
Finally, to reprint this summary of which optional features are enabled, use
the show config option to ns3.
Now go ahead and switch back to the debug build that includes the examples and tests.
$ ./ns3 clean
$ ./ns3 configure --build-profile=debug --enable-examples --enable-tests
The build system is now configured and you can build the debug versions of the ns-3 programs by simply typing:
$ ./ns3 build
Although the above steps made you build the ns-3 part of the system twice, now you know how to change the configuration and build optimized code.
A command exists for checking which profile is currently active for an already configured project:
$ ./ns3 show profile
Build profile: debug
Here are a few more introductory tips about CMake.
4.4.1.1. Handling build errors
ns-3 releases are tested against the most recent C++ compilers available in the mainstream Linux and macOS distributions at the time of the release. However, over time, newer distributions are released, with newer compilers, and these newer compilers tend to be more pedantic about warnings. ns-3 configures its build to treat all warnings as errors, so it is sometimes the case, if you are using an older release version on a newer system, that a compiler warning will cause the build to fail.
For instance, ns-3.28 was released prior to Fedora 28, which included a new major version of gcc (gcc-8). Building ns-3.28 or older releases on Fedora 28, when GTK+2 is installed, will result in an error such as:
/usr/include/gtk-2.0/gtk/gtkfilechooserbutton.h:59:8: error: unnecessary parentheses in declaration of '__gtk_reserved1' [-Werror=parentheses]
 void (*__gtk_reserved1);
In releases starting with ns-3.28.1, an option is available in CMake to work around these issues. The option disables the inclusion of the ‘-Werror’ flag to g++ and clang++. The option is ‘–disable-werror’ and must be used at configure time; e.g.:
./ns3 configure --disable-werror --enable-examples --enable-tests
4.4.1.2. Configure vs. Build
Some CMake commands are only meaningful during the configure phase and some commands are valid in the build phase. For example, if you wanted to use the emulation features of ns-3, you might want to enable setting the suid bit using sudo as described above. This turns out to be a configuration-time command, and so you could reconfigure using the following command that also includes the examples and tests.
$ ./ns3 configure --enable-sudo --enable-examples --enable-tests
If you do this, ns3 will have run sudo to change the socket creator programs of the emulation code to run as root.
There are many other configure- and build-time options available in ns3. To explore these options, type:
$ ./ns3 --help
We’ll use some of the testing-related commands in the next section.
4.4.1.3. Build Profiles
We already saw how you can configure CMake for debug or optimized builds:
$ ./ns3 configure --build-profile=debug
There is also an intermediate build profile, release. -d is a
synonym for --build-profile.
The build profile controls the use of logging, assertions, and compiler optimization:
Feature |
Build Profile |
|||
|---|---|---|---|---|
|
|
|
|
|
Enabled Features |
|
|
|
|
Code Wrapper Macro |
|
|
|
|
Compiler Flags |
|
|
|
|
As you can see, logging and assertions are only configured
by default in debug builds, although they can be selectively enabled
in other build profiles by using the --enable-logs and
--enable-asserts flags during CMake configuration time.
Recommended practice is to develop your scenario in debug mode, then
conduct repetitive runs (for statistics or changing parameters) in
optimized build profile.
If you have code that should only run in specific build profiles, use the indicated Code Wrapper macro:
NS_BUILD_DEBUG(std::cout << "Part of an output line..." << std::flush; timer.Start());
DoLongInvolvedComputation();
NS_BUILD_DEBUG(timer.Stop(); std::cout << "Done: " << timer << std::endl;)
By default ns3 puts the build artifacts in the build directory.
You can specify a different output directory with the --out
option, e.g.
$ ./ns3 configure --out=my-build-dir
Combining this with build profiles lets you switch between the different compile options in a clean way:
$ ./ns3 configure --build-profile=debug --out=build/debug
$ ./ns3 build
...
$ ./ns3 configure --build-profile=optimized --out=build/optimized
$ ./ns3 build
...
This allows you to work with multiple builds rather than always overwriting the last build. When you switch, ns3 will only compile what it has to, instead of recompiling everything.
When you do switch build profiles like this, you have to be careful to give the same configuration parameters each time. It may be convenient to define some environment variables to help you avoid mistakes:
$ export NS3CONFIG="--enable-examples --enable-tests"
$ export NS3DEBUG="--build-profile=debug --out=build/debug"
$ export NS3OPT=="--build-profile=optimized --out=build/optimized"

$ ./ns3 configure $NS3CONFIG $NS3DEBUG
$ ./ns3 build
...
$ ./ns3 configure $NS3CONFIG $NS3OPT
$ ./ns3 build
4.4.1.4. Compilers and Flags
In the examples above, CMake uses the GCC C++ compiler, g++, for
building ns-3. However, it’s possible to change the C++ compiler used by CMake
by defining the CXX environment variable.
For example, to use the Clang C++ compiler, clang++,
$ CXX="clang++" ./ns3 configure
$ ./ns3 build
One can also set up ns3 to do distributed compilation with distcc in
a similar way:
$ CXX="distcc g++" ./ns3 configure
$ ./ns3 build
More info on distcc and distributed compilation can be found on it’s
project page
under Documentation section.
To add compiler flags, use the CXXFLAGS_EXTRA environment variable when
you configure ns-3.
4.4.1.5. Install
ns3 may be used to install libraries in various places on the system.
The default location where libraries and executables are built is
in the build directory, and because ns3 knows the location of these
libraries and executables, it is not necessary to install the libraries
elsewhere.
If users choose to install things outside of the build directory, users
may issue the ./ns3 install command. By default, the prefix for
installation is /usr/local, so ./ns3 install will install programs
into /usr/local/bin, libraries into /usr/local/lib, and headers
into /usr/local/include. Superuser privileges are typically needed
to install to the default prefix, so the typical command would be
sudo ./ns3 install. When running programs with ns3, ns3 will
first prefer to use shared libraries in the build directory, then
will look for libraries in the library path configured in the local
environment. So when installing libraries to the system, it is good
practice to check that the intended libraries are being used.
Users may choose to install to a different prefix by passing the --prefix
option at configure time, such as:
./ns3 configure --prefix=/opt/local
If later after the build the user issues the ./ns3 install command, the
prefix /opt/local will be used.
The ./ns3 clean command should be used prior to reconfiguring
the project if ns3 will be used to install things at a different prefix.
In summary, it is not necessary to call ./ns3 install to use ns-3.
Most users will not need this command since ns3 will pick up the
current libraries from the build directory, but some users may find
it useful if their use case involves working with programs outside
of the ns-3 directory.
4.4.1.6. Clean
Cleaning refers to the removal of artifacts (e.g. files) generated or edited by the build process. There are different levels of cleaning possible:
Scope |
Command |
Description |
|---|---|---|
clean |
./ns3 clean |
Remove artifacts generated by the CMake configuration and the build |
distclean |
./ns3 distclean |
Remove artifacts from the configuration, build, documentation, test and Python |
ccache |
ccache -C |
Remove all compiled artifacts from the ccache |
clean can be used if the focus is on reconfiguring the way that ns-3 is presently being compiled. distclean can be used if the focus is on restoring the ns-3 directory to an original state.
The ccache lies outside of the ns-3 directory (typically in a hidden directory at ~/.cache/ccache) and is shared across projects. Users should be aware that cleaning the ccache will cause cache misses on other build directories outside of the current working directory. Cleaning this cache periodically may be helpful to reclaim disk space. Cleaning the ccache is completely separate from cleaning any files within the ns-3 directory.
Because clean operations involve removing files, the option conservatively refuses to remove files if one of the deleted files or directories lies outside of the current working directory. Users may wish to precede the actual clean with a –dry-run, when in doubt about what the clean command will do, because a dry run will print the warning if one exists. For example:
./ns3 clean --dry-run
./ns3 clean
4.4.1.7. One ns3
There is only one ns3 script, at the top level of the ns-3 source tree.
As you work, you may find yourself spending a lot of time in scratch/,
or deep in src/..., and needing to invoke ns3. You could just
remember where you are, and invoke ns3 like this:
$ ../../../ns3 ...
but that gets tedious, and error prone, and there are better solutions.
One common way when using a text-based editor such as emacs or vim is to open two terminal sessions and use one to build ns-3 and one to edit source code.
If you only have the tarball, an environment variable can help:
$ export NS3DIR="$PWD"
$ function ns3f { cd $NS3DIR && ./ns3 $* ; }

$ cd scratch
$ ns3f build
It might be tempting in a module directory to add a trivial ns3
script along the lines of exec ../../ns3. Please don’t. It’s
confusing to newcomers, and when done poorly it leads to subtle build
errors. The solutions above are the way to go.
4.4.2. Building with CMake
The ns3 wrapper script calls CMake directly, mapping Waf-like options
to the verbose settings used by CMake. Calling ./ns3 will execute
a series of commands, that will be shown at the end of their execution.
The execution of those underlying commands can be skipped to just
print them using ./ns3 --dry-run.
Here is are a few examples showing why we suggest the use of the ns3 wrapper script.
4.4.2.1. Configuration command
$ ./ns3 configure --enable-tests --enable-examples -d optimized
Corresponds to
$ cd /ns-3-dev/cmake-cache/
$ cmake -DCMAKE_BUILD_TYPE=release -DNS3_NATIVE_OPTIMIZATIONS=ON -DNS3_ASSERT=OFF -DNS3_LOG=OFF -DNS3_TESTS=ON -DNS3_EXAMPLES=ON ..
4.4.2.2. Build command
To build a specific target such as test-runner we use the following ns3 command:
$ ./ns3 build test-runner
Which corresponds to the following commands:
$ cd /ns-3-dev/cmake-cache/
$ cmake --build . -j 16 --target test-runner # This command builds the test-runner target with the underlying build system
To build all targets such as modules, examples and tests, we use the following ns3 command:
$ ./ns3 build
Which corresponds to:
$ cd /ns-3-dev/cmake-cache/
$ cmake --build . -j 16  # This command builds all the targets with the underlying build system
4.4.2.3. Run command
$ ./ns3 run test-runner
Corresponds to:
$ cd /ns-3-dev/cmake-cache/
$ cmake --build . -j 16 --target test-runner # This command builds the test-runner target calling the underlying build system
$ export PATH=$PATH:/ns-3-dev/build/:/ns-3-dev/build/lib:/ns-3-dev/build/bindings/python # export library paths
$ export LD_LIBRARY_PATH=/ns-3-dev/build/:/ns-3-dev/build/lib:/ns-3-dev/build/bindings/python
$ export PYTHON_PATH=/ns-3-dev/build/:/ns-3-dev/build/lib:/ns-3-dev/build/bindings/python
$ /ns-3-dev/build/utils/ns3-dev-test-runner-optimized # call the executable with the real path
Note: the command above would fail if ./ns3 build was not executed first,
since the examples won’t be built by the test-runner target.
On Windows, the Msys2/MinGW64/bin directory path must be on the PATH environment variable, otherwise the DLL’s required by the C++ runtime will not be found, resulting in crashes without any explicit reasoning.
Note: The ns-3 script adds only the ns-3 lib directory path to the PATH, ensuring the ns-3 DLLs will be found by running programs. If you are using CMake directly or an IDE, make sure to also include the path to ns-3-dev/build/lib in the PATH variable.
If you are using one of Windows’s terminals (CMD, PowerShell or Terminal), you can use the setx command to change environment variables permanently or set to set them temporarily for that shell:
C:\\Windows\\system32>echo %PATH%
C:\\Windows\\system32;C:\\Windows;D:\\tools\\msys64\\mingw64\\bin;

C:\\Windows\\system32>setx PATH "%PATH%;D:\\tools\\msys64\\usr\\bin;" /m

C:\\Windows\\system32>echo %PATH%
C:\\Windows\\system32;C:\\Windows;D:\\tools\\msys64\\mingw64\\bin;
D:\\tools\\msys64\\usr\\bin;
Note: running on an administrator terminal will change the system PATH, while the user terminal will change the user PATH, unless the /m flag is added.
4.4.3. Building with IDEs
With CMake, IDE integration is much easier. We list the steps on how to use ns-3 with a few IDEs.
4.4.3.1. Microsoft Visual Studio Code
Start by downloading VS Code.
Then install it and then install the CMake and C++ plugins.
This can be done accessing the extensions’ menu button on the left.
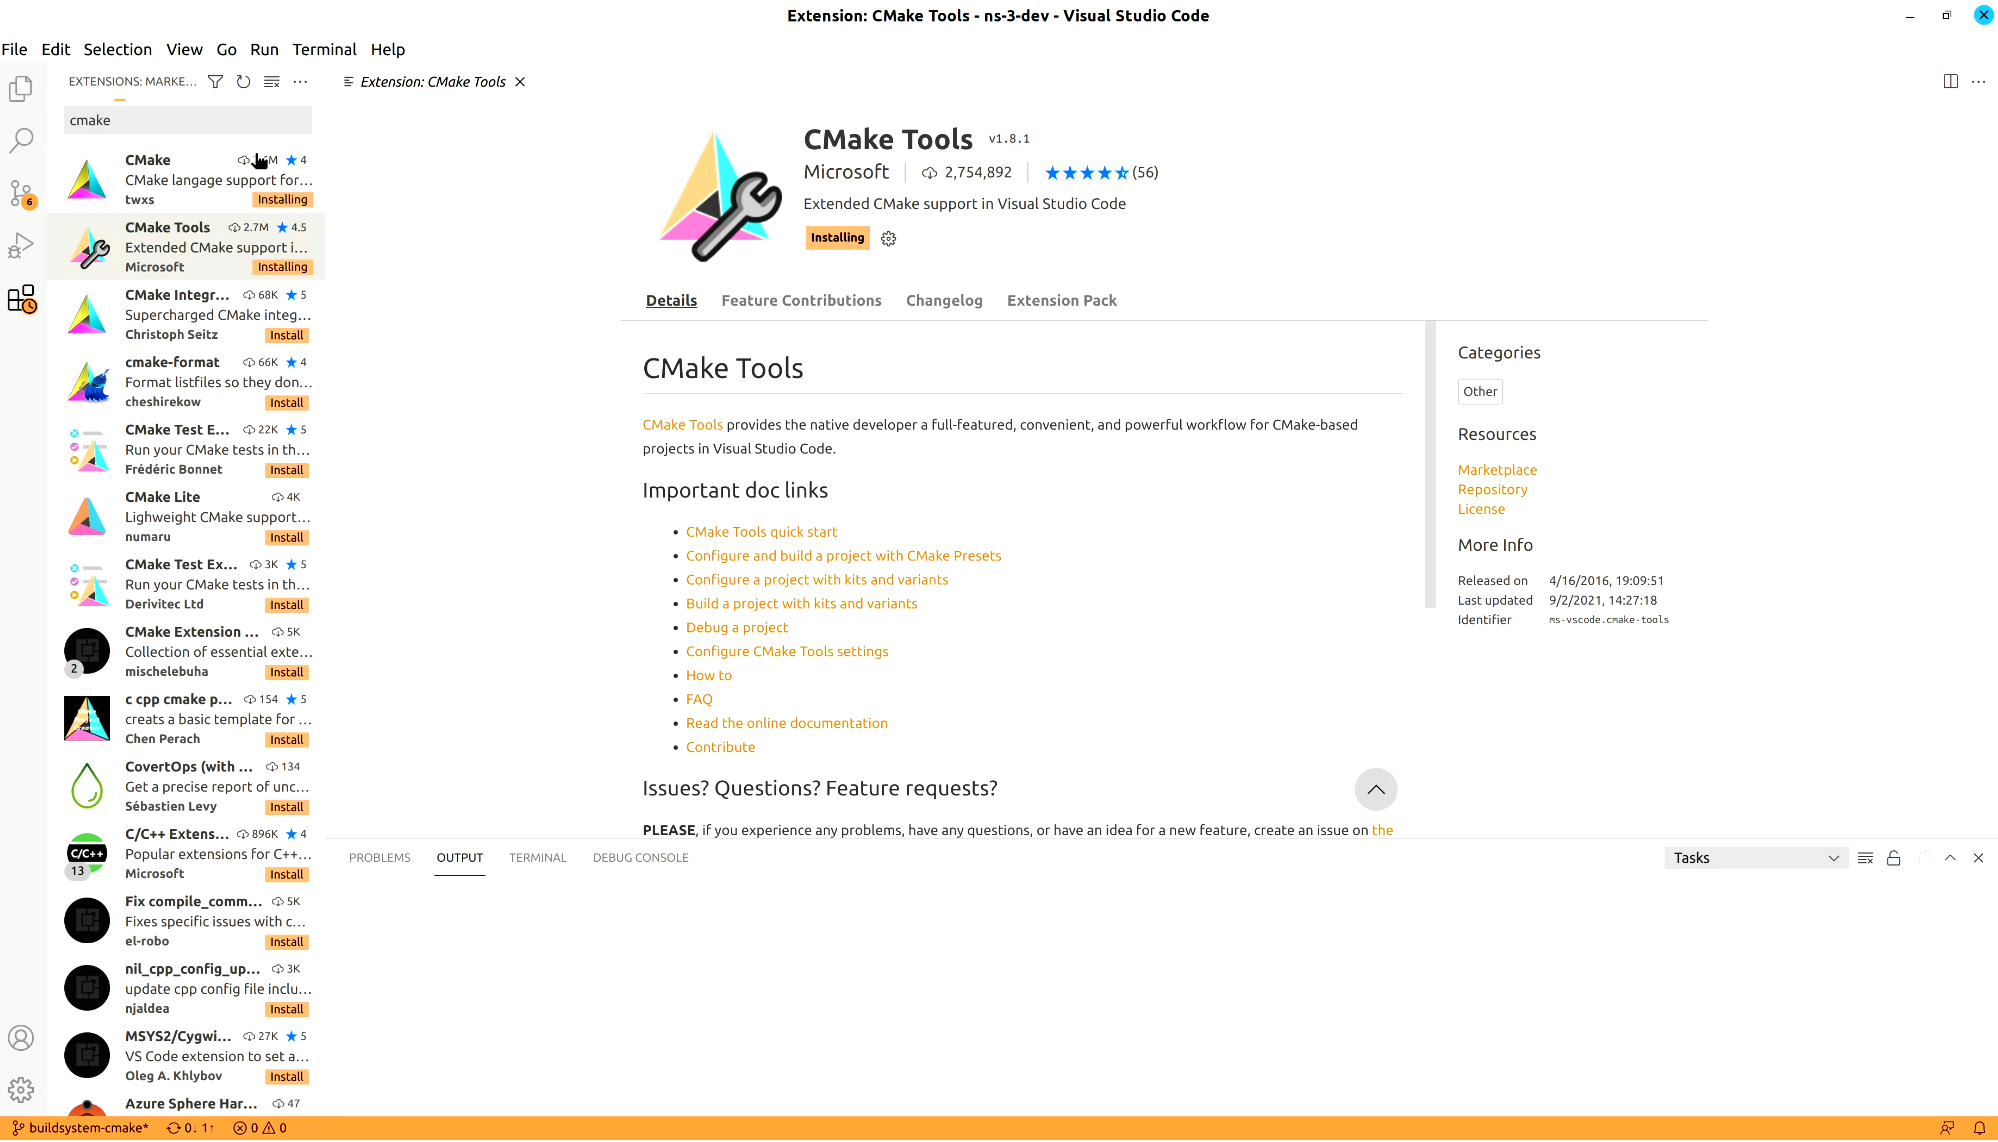
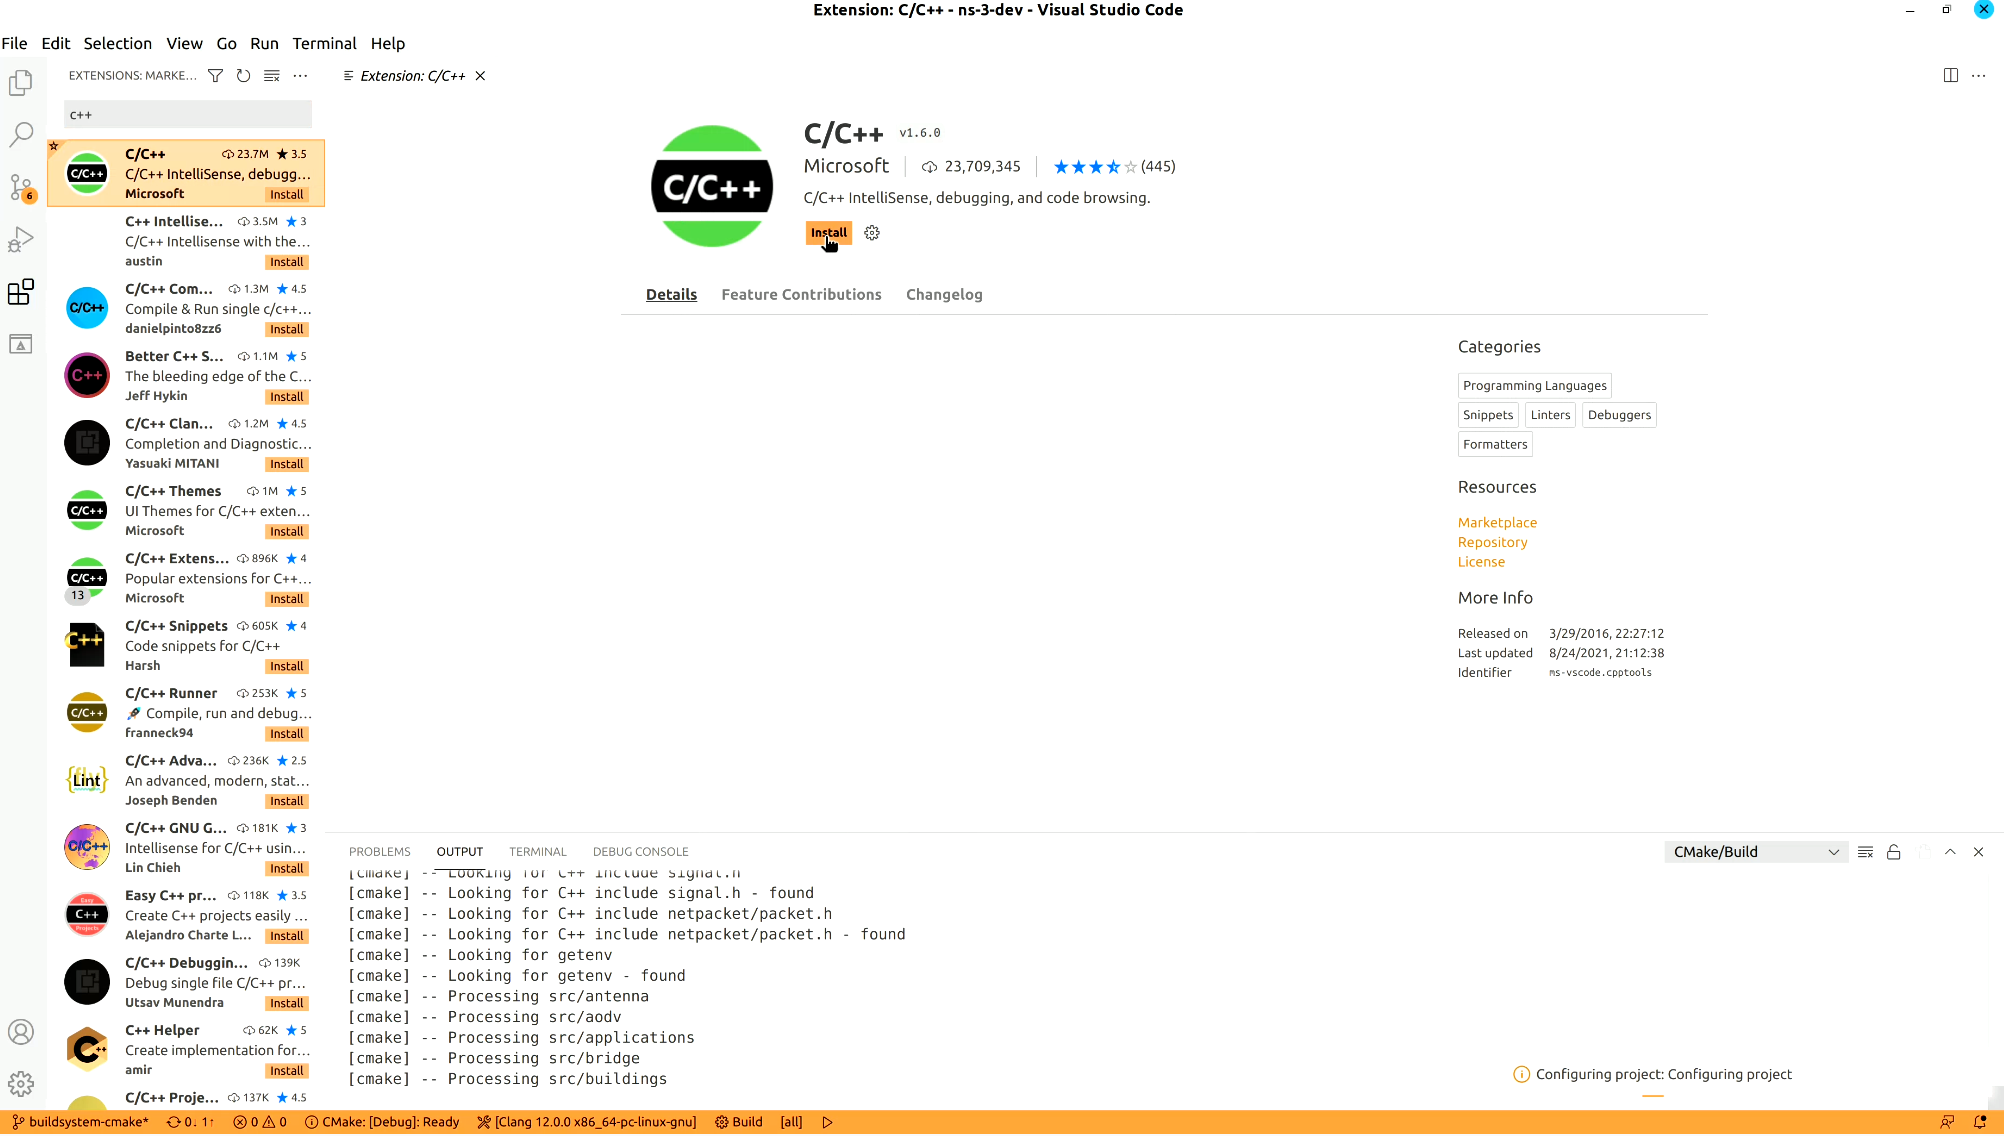
It will take a while, but it will locate the available toolchains for you to use.
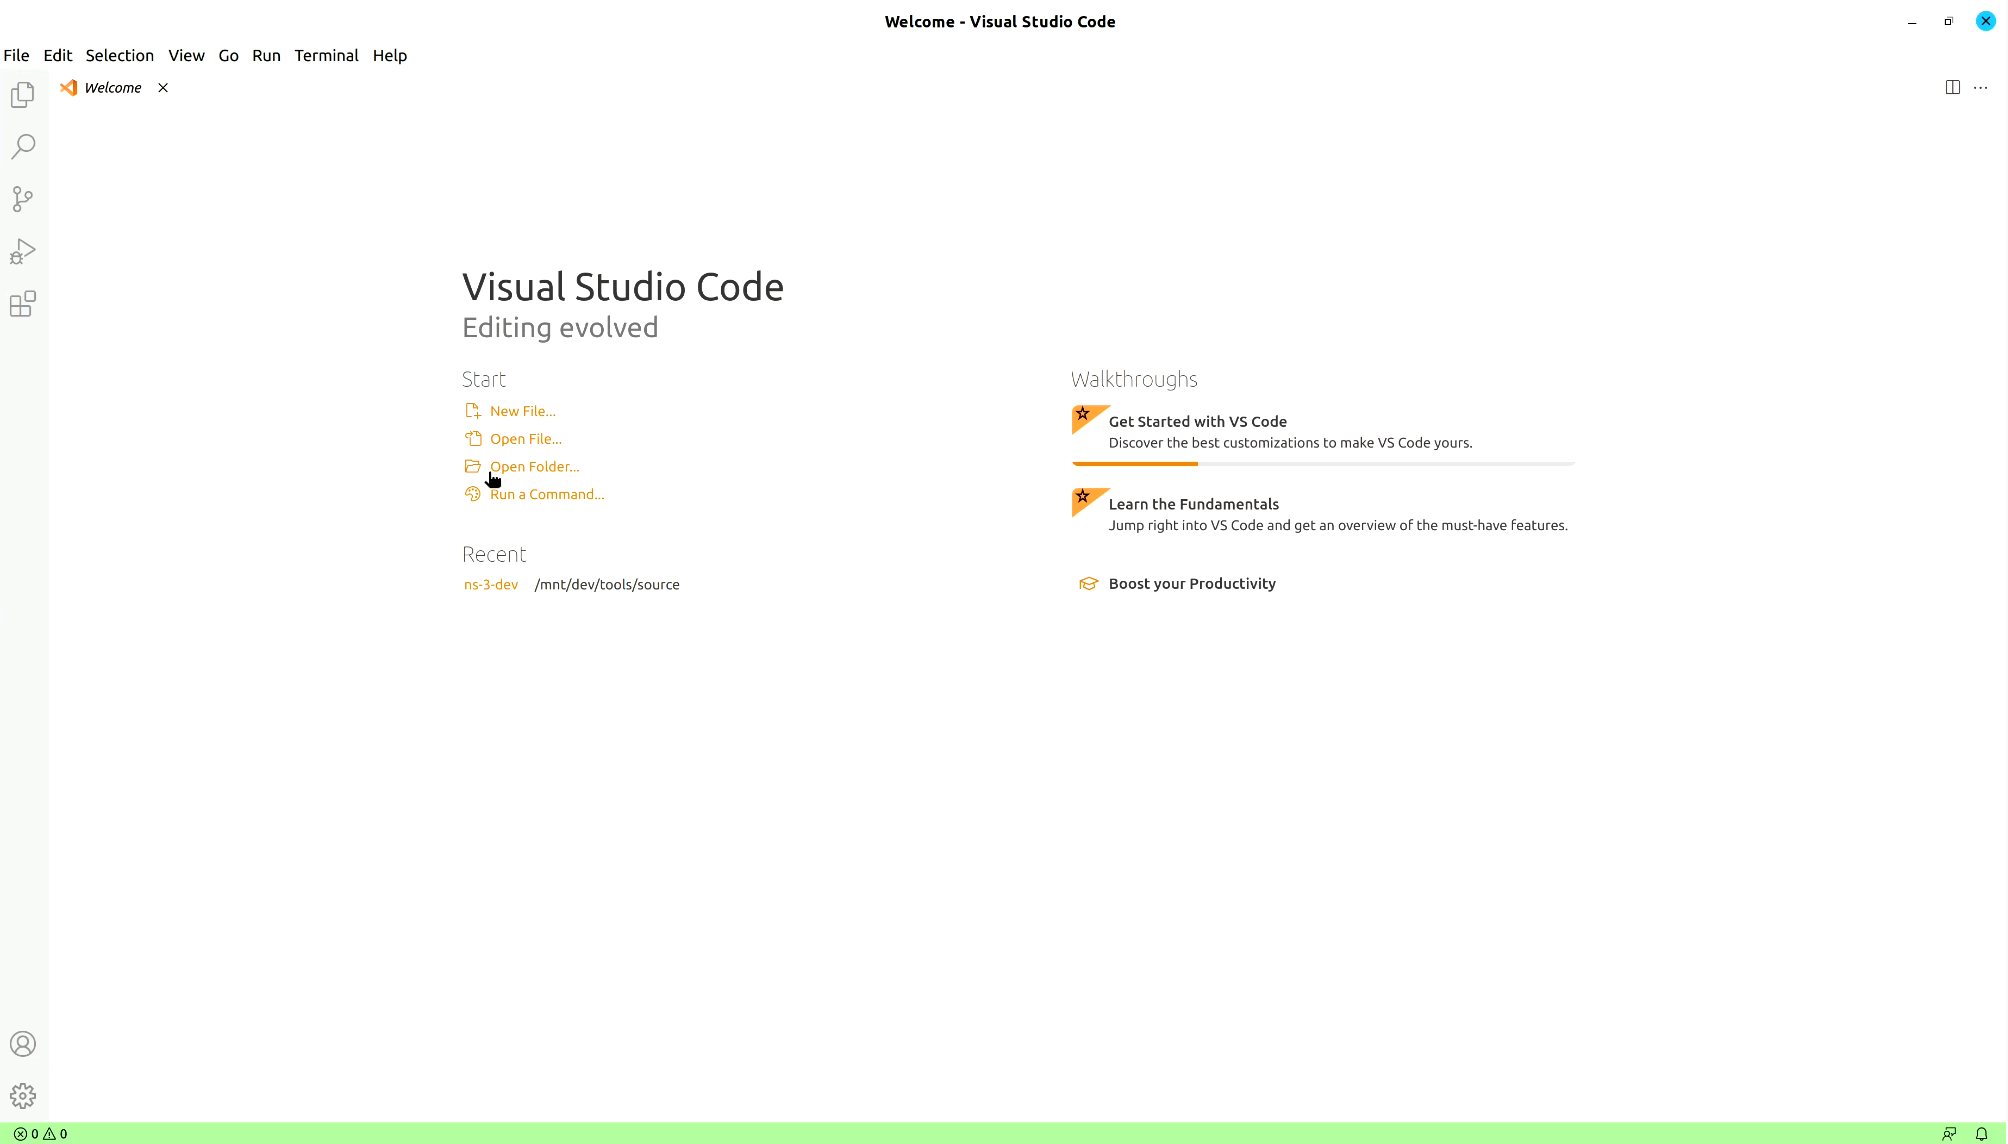
After that, open the ns-3-dev folder. It should run CMake automatically and preconfigure it.
After this happens, you can choose ns-3 features by opening the CMake cache and toggling them on or off.
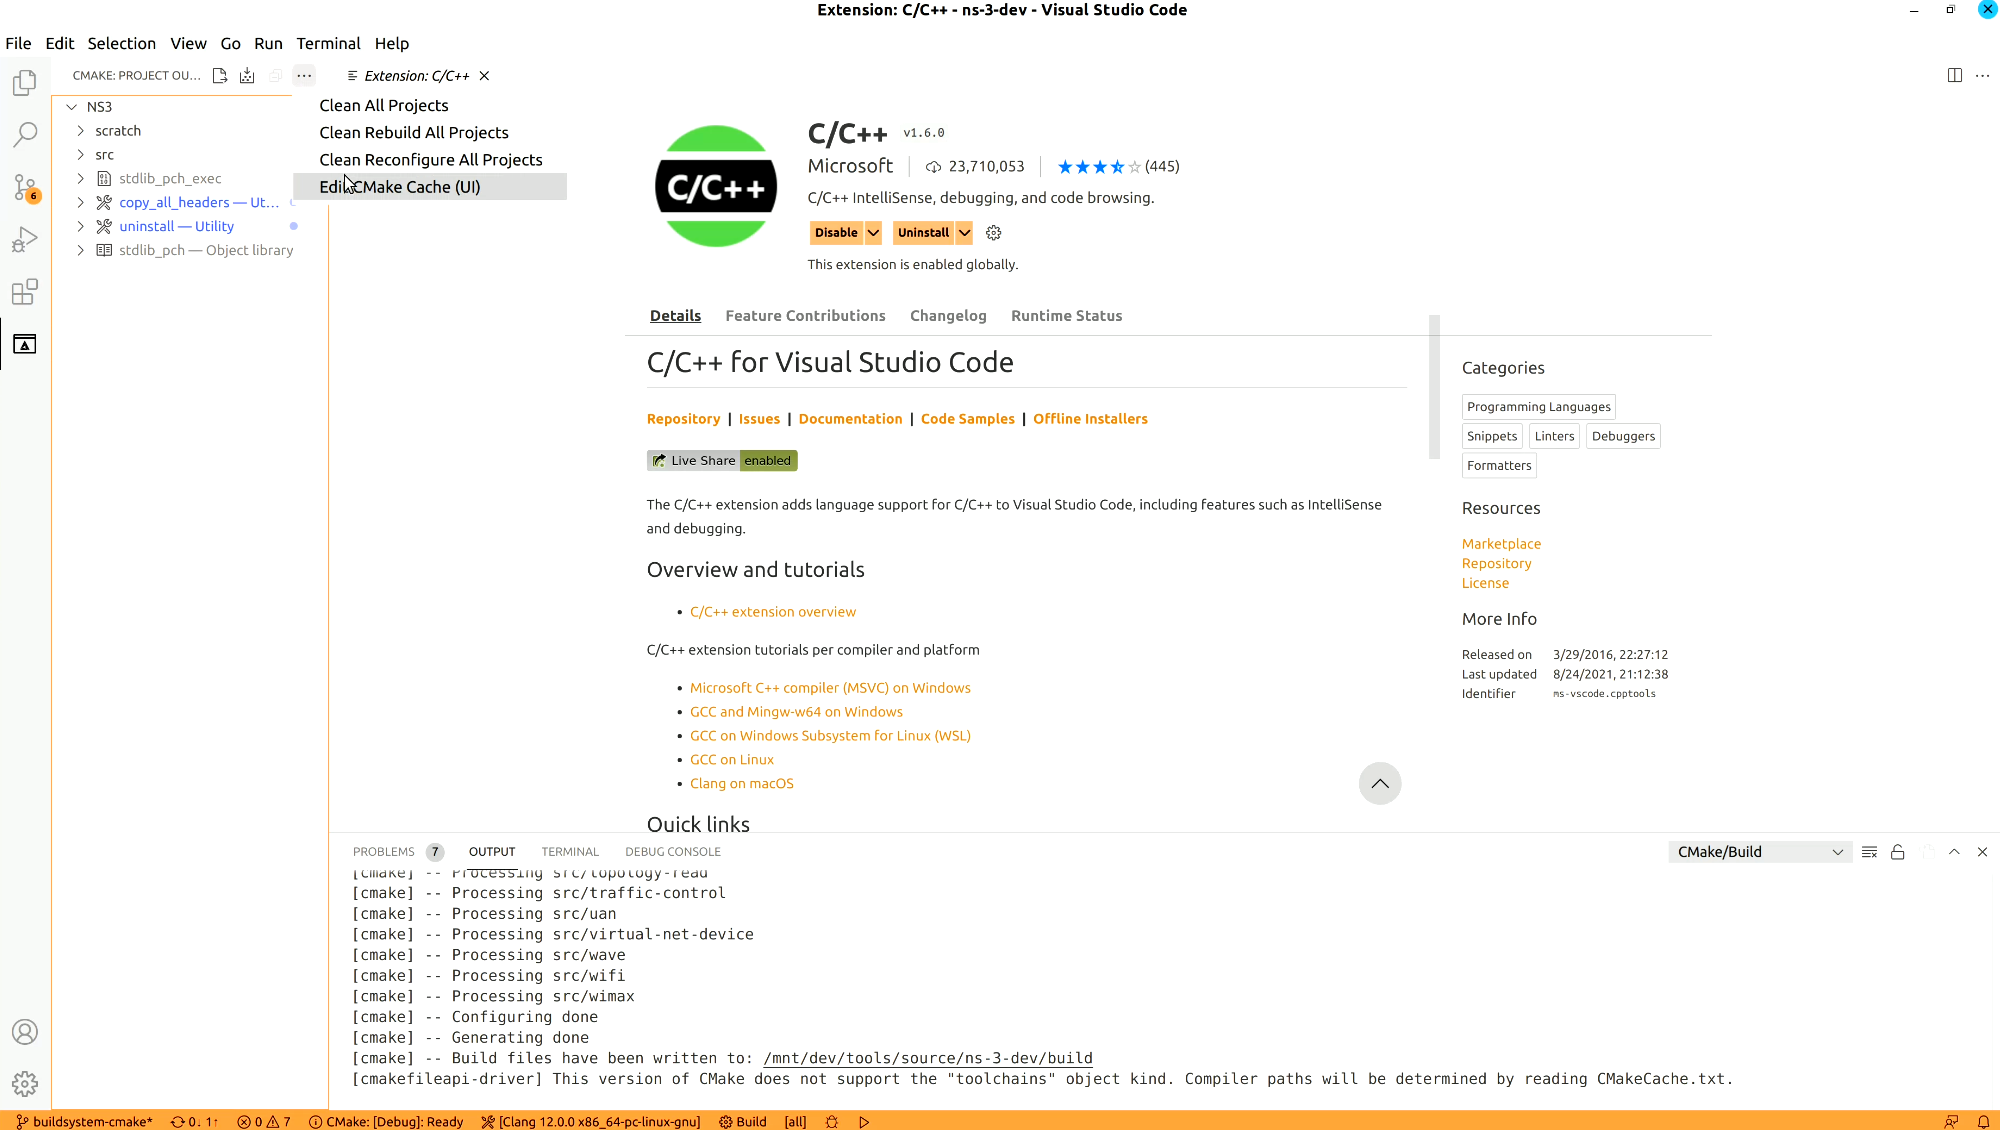
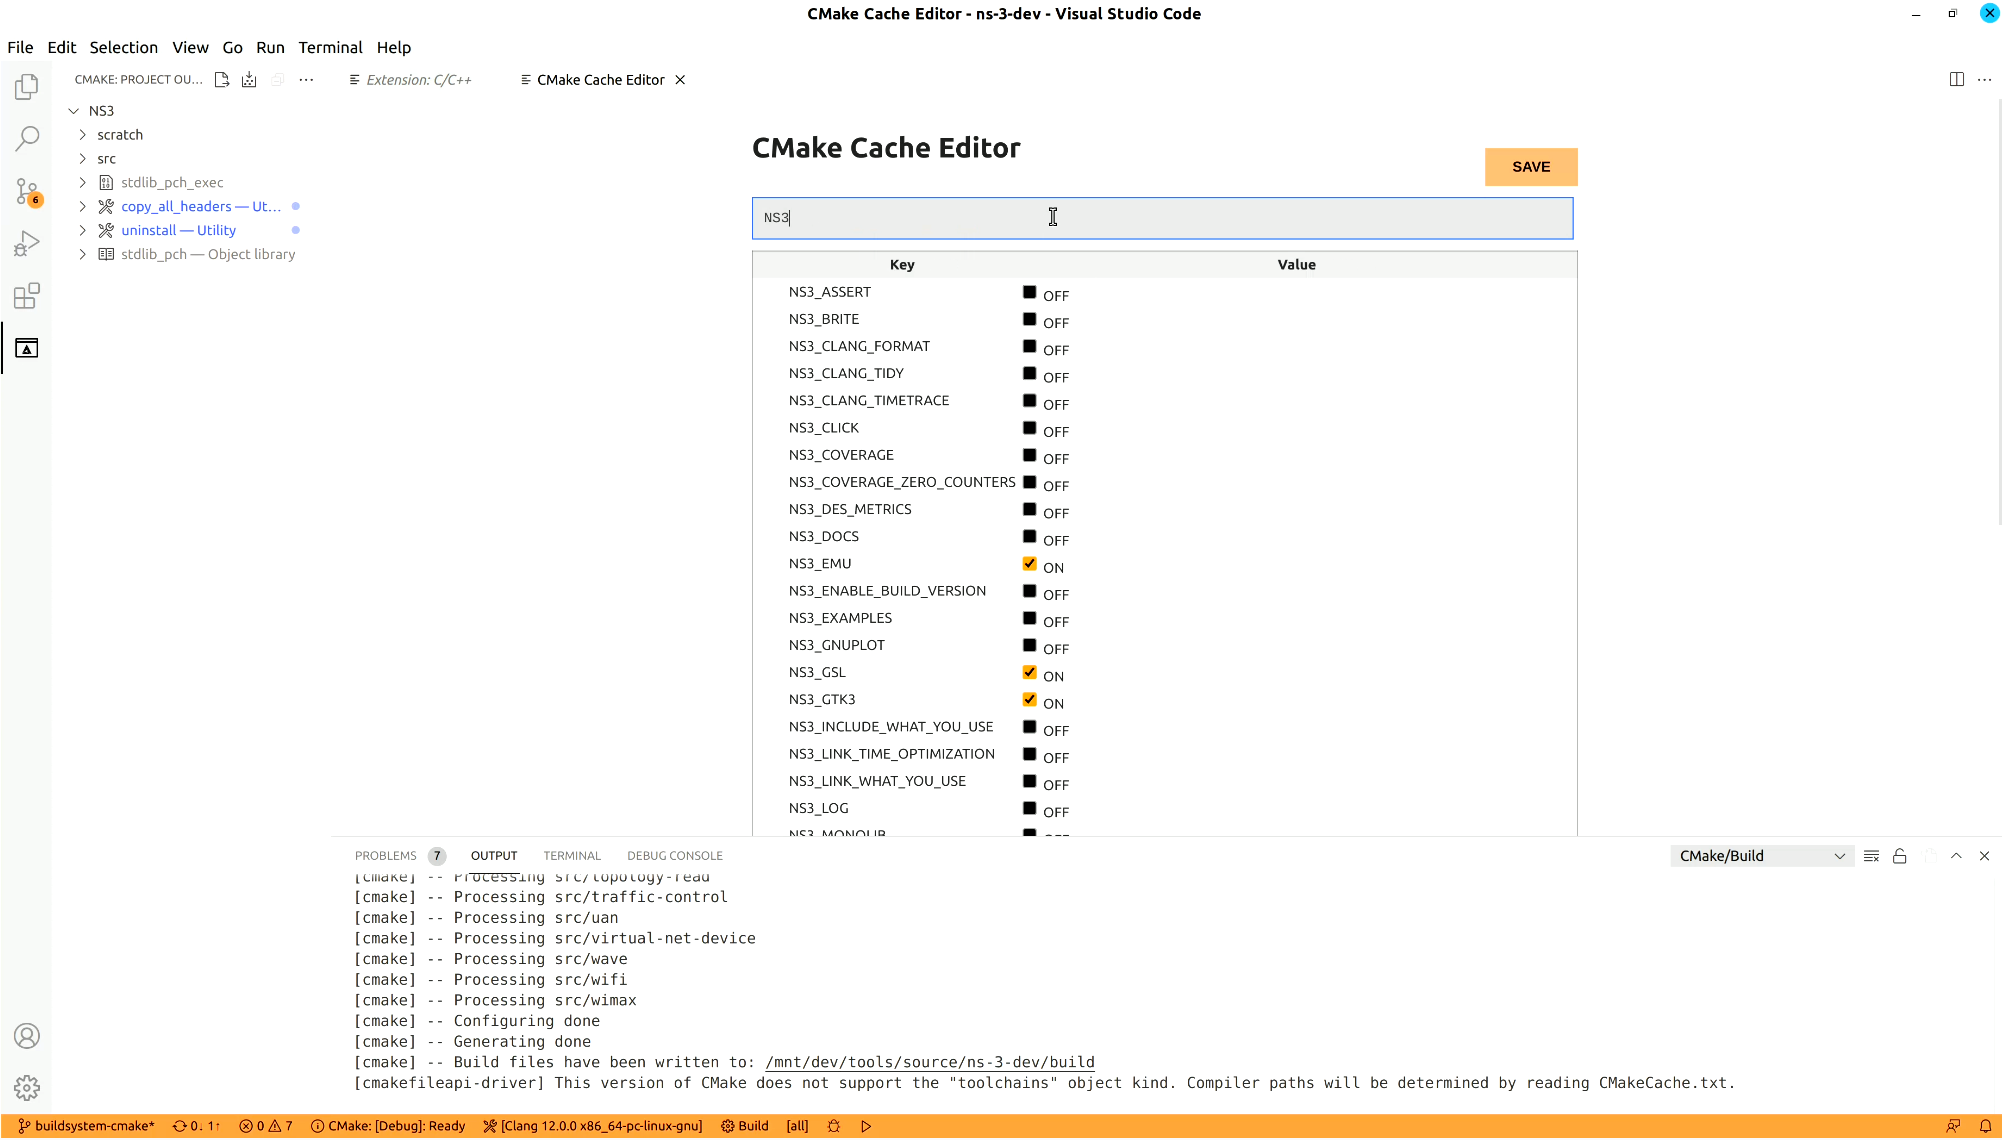
Just as an example, here is how to enable examples
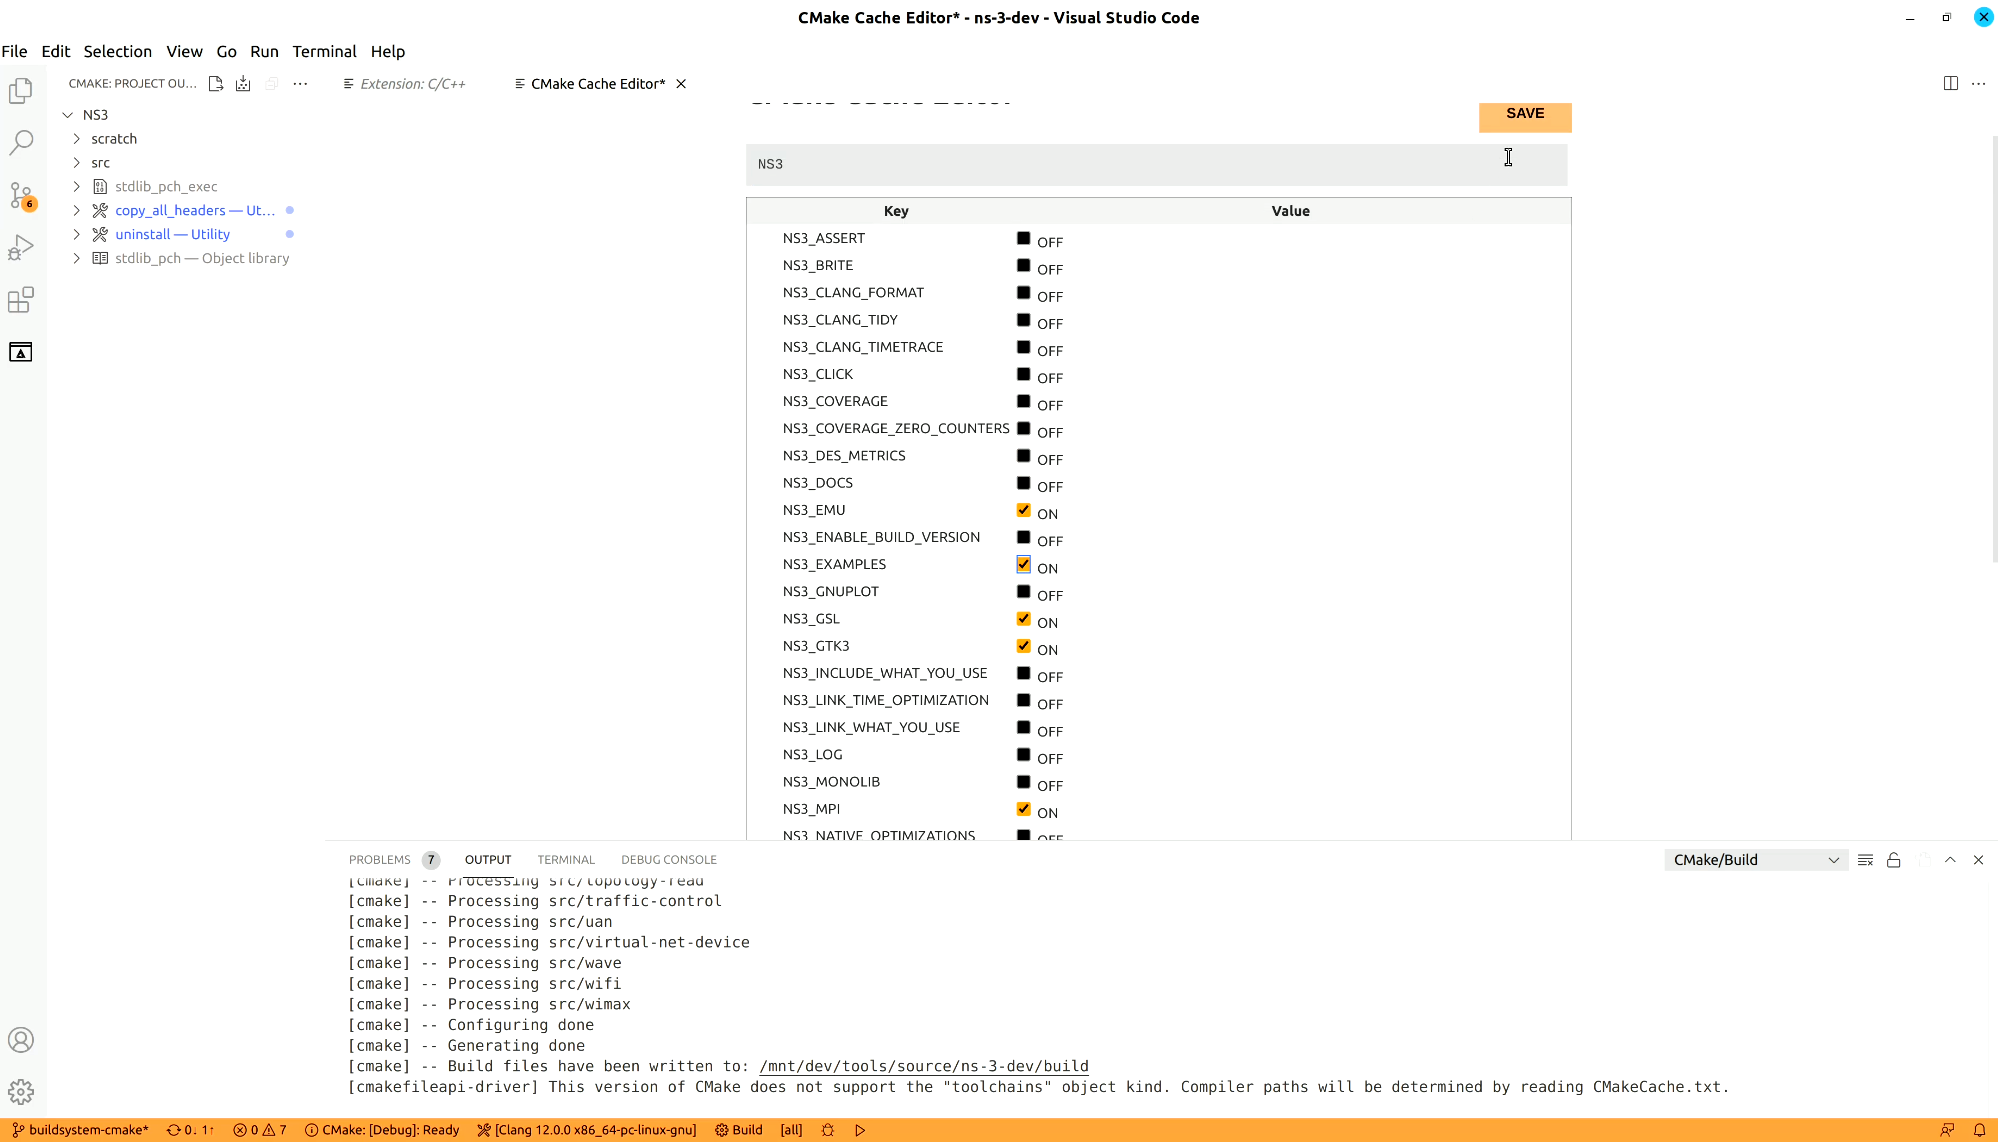
After saving the cache, CMake will run, refreshing the cache. Then VsCode will update its list of targets on the left side of the screen in the CMake menu.
After selecting a target on the left side menu, there are options to build, run or debug it.
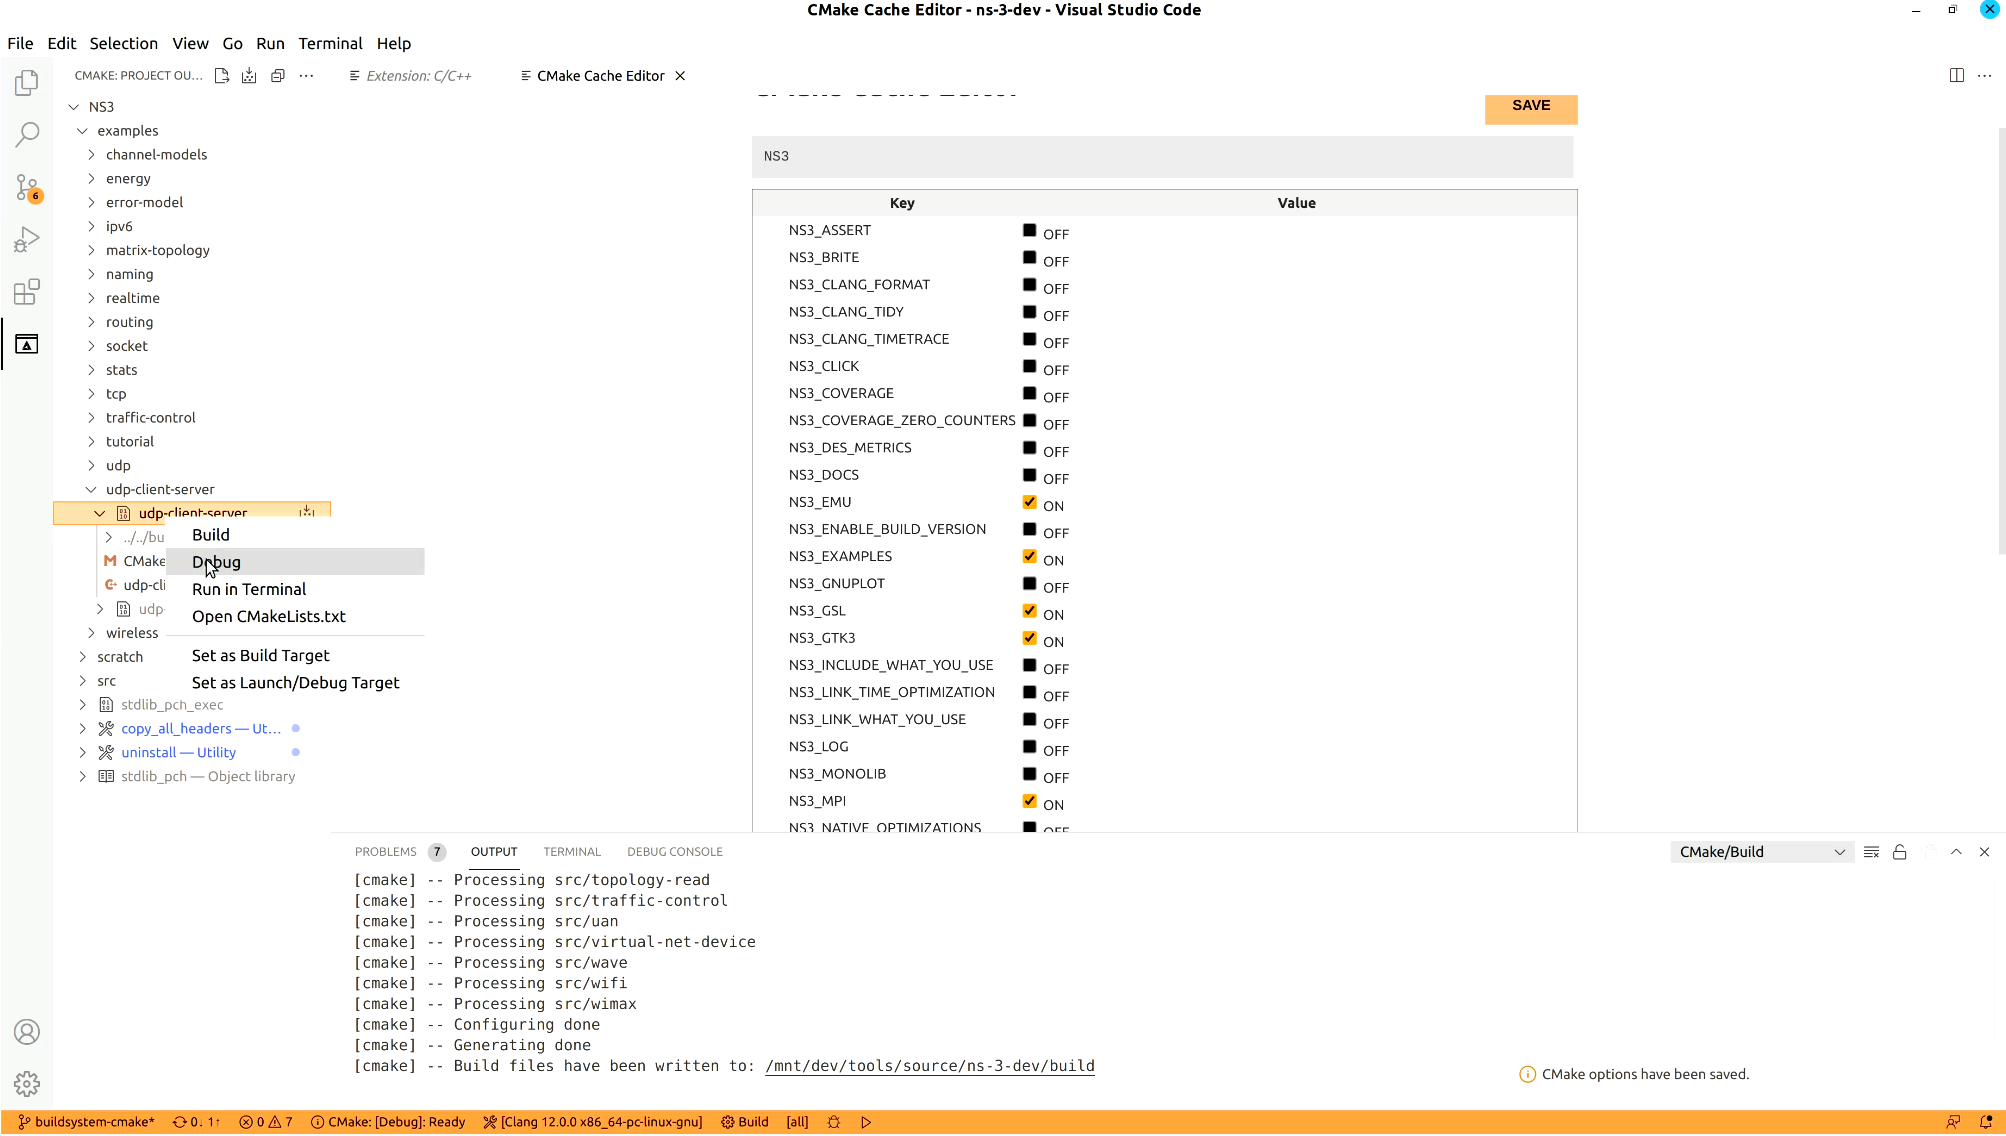
Any of them will automatically build the selected target. If you choose run or debug, the executable targets will be executed. You can open the source files you want, put some breakpoints and then click debug to visually debug programs.

Note: If you are running on Windows, you need to manually add your ns-3 library directory
to the PATH environment variable. This can be accomplished in two ways.
The first, is to set VSCode’s settings.json file to include the following:
"cmake.environment": {
      "PATH": "${env:PATH};${workspaceFolder}/build/lib"
  }
The second, a more permanent solution, with the following command:
> echo %PATH%
C:\Windows\System32\WindowsPowerShell\v1.0\;C:\Windows\system32;C:\Windows;C:\Windows\System32\Wbem;
C:\Windows\System32\OpenSSH\;C:\Program Files\dotnet\;C:\Program Files\PuTTY\;C:\Program Files\VSCodium\bin;
C:\Program Files\Meld\;C:\Windows\System32\WindowsPowerShell\v1.0\;C:\Windows\system32;C:\Windows;
C:\Windows\System32\Wbem;C:\Windows\System32\OpenSSH\;C:\Program Files\dotnet\;C:\Program Files\PuTTY\;
C:\Program Files\VSCodium\bin;C:\Program Files\Meld\;C:\Users\username\AppData\Local\Microsoft\WindowsApps;

> setx PATH "%PATH%;C:\path\to\ns-3-dev\build\lib"

SUCCESS: Specified value was saved.

> echo %PATH%
C:\Windows\System32\WindowsPowerShell\v1.0\;C:\Windows\system32;C:\Windows;C:\Windows\System32\Wbem;
...
C:\Program Files\VSCodium\bin;C:\Program Files\Meld\;C:\Users\username\AppData\Local\Microsoft\WindowsApps;
C:\tools\source\ns-3-dev\build\lib;
If you do not setup your PATH environment variable, you may end up having problems to debug that
look like the following:
=thread-group-added,id="i1"
GNU gdb (GDB) 14.1
Copyright (C) 2023 Free Software Foundation, Inc.
License GPLv3+: GNU GPL version 3 or later <http://gnu.org/licenses/gpl.html>
...
ERROR: Unable to start debugging. GDB exited unexpectedly.
The program 'C:\tools\source\ns-3-dev\build\examples\wireless\ns3-dev-wifi-he-network-debug.exe' has exited with code 0 (0x00000000).

ERROR: During startup program exited with code 0xc0000135.
Or
=thread-group-added,id="i1"
GNU gdb (GDB) 14.1
Copyright (C) 2023 Free Software Foundation, Inc.
License GPLv3+: GNU GPL version 3 or later <http://gnu.org/licenses/gpl.html>
...
ERROR: Unable to start debugging. Unexpected GDB output from command "-exec-run". During startup program exited with code 0xc0000135.
The program 'C:\tools\source\ns-3-dev\build\examples\wireless\ns3-dev-wifi-he-network-debug.exe' has exited with code 0 (0x00000000).
4.4.3.2. JetBrains CLion
Start by downloading CLion.
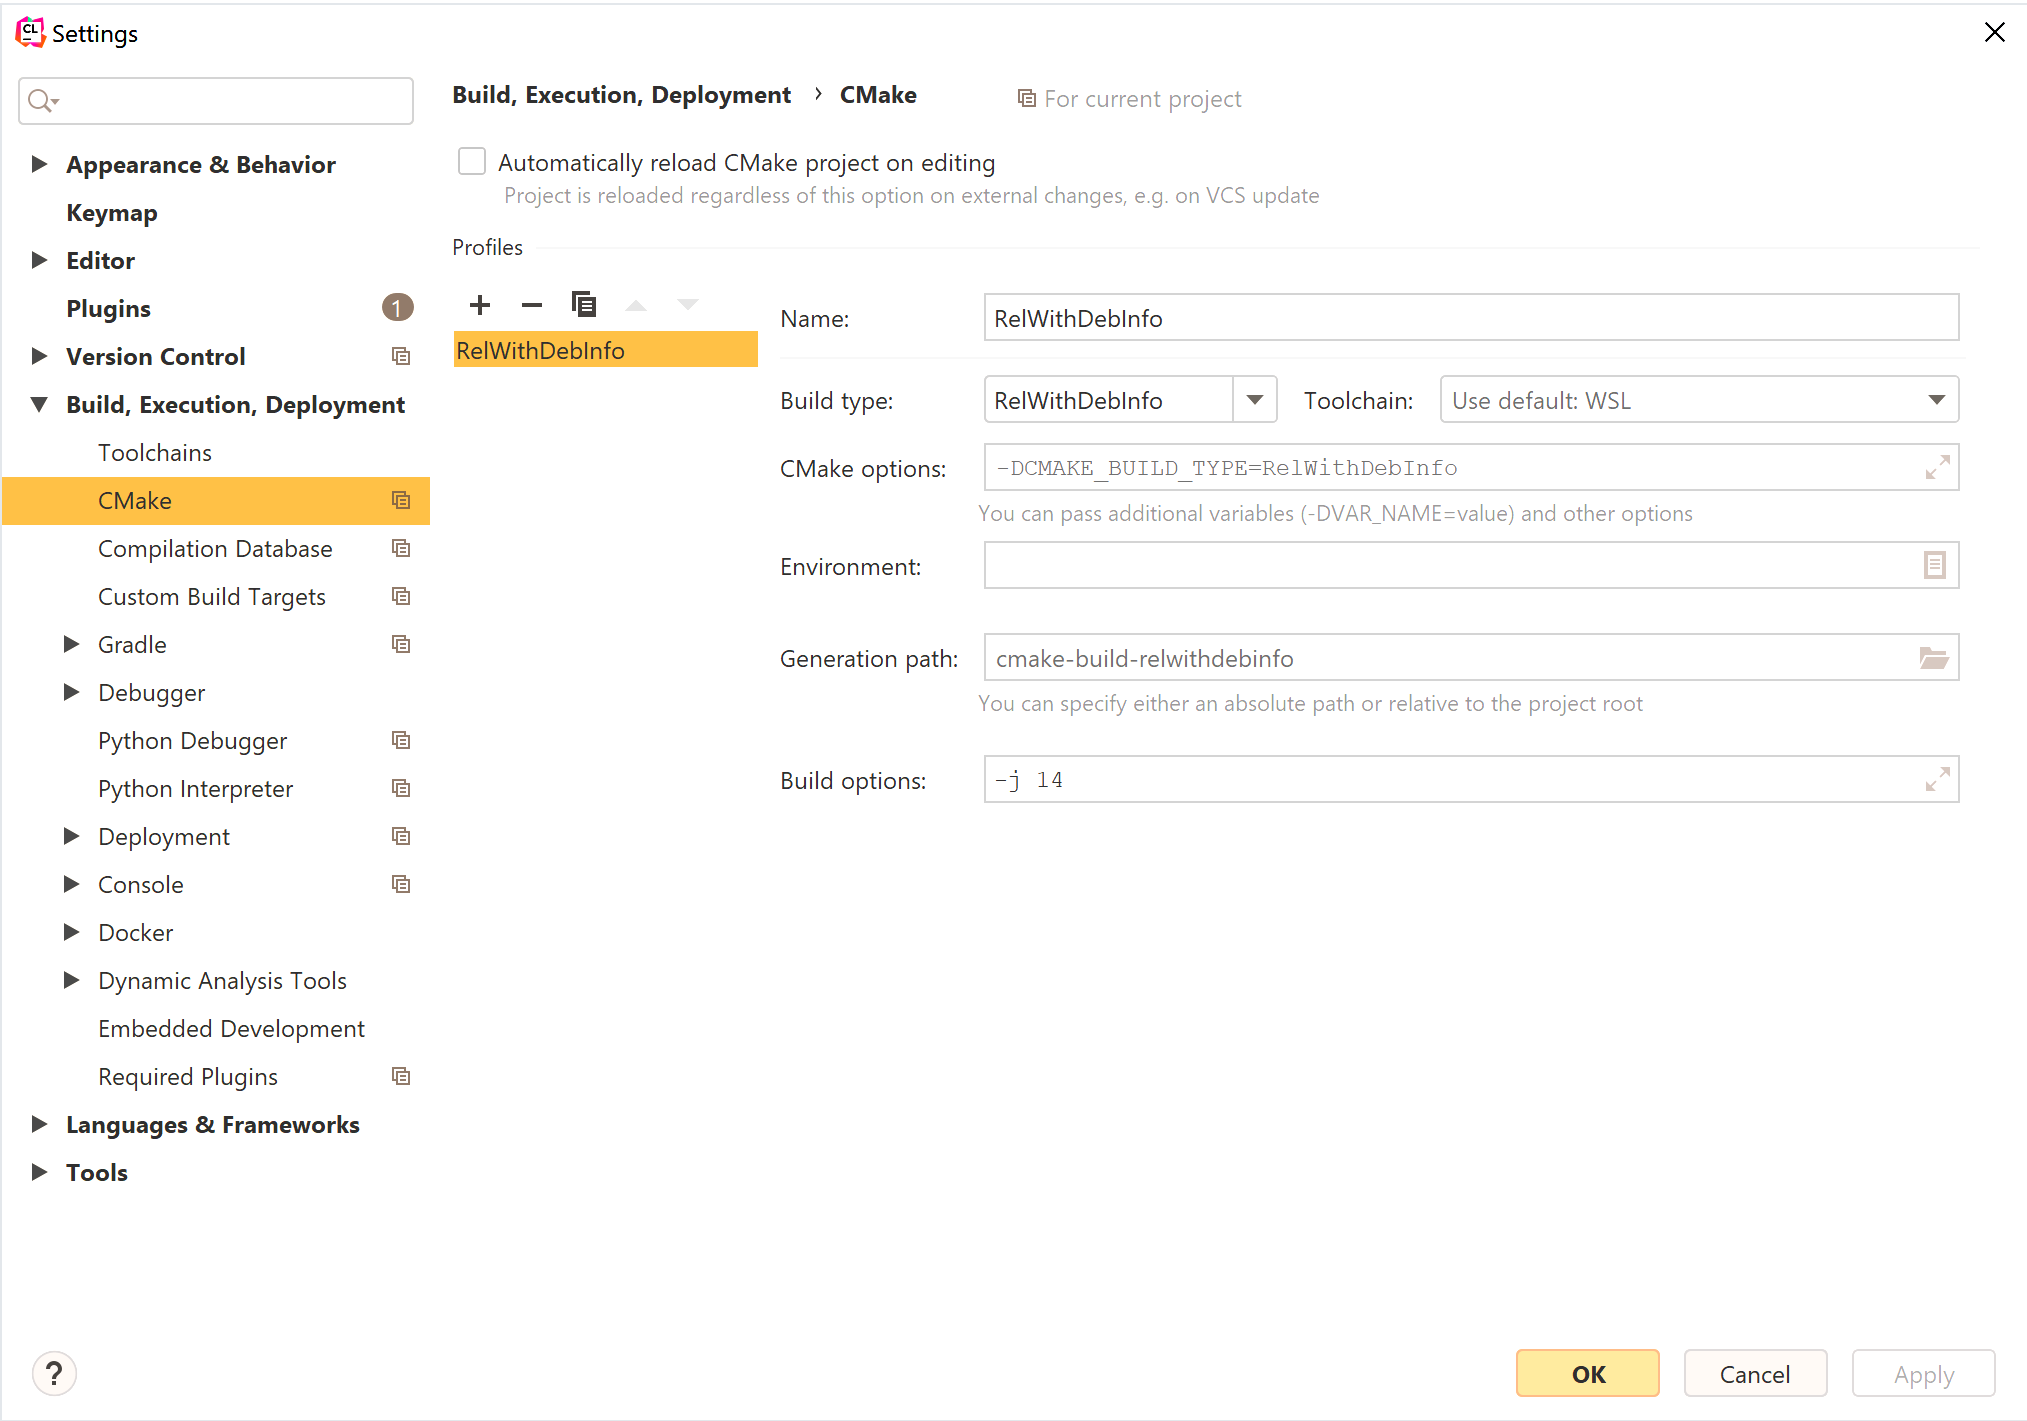
The following image contains the toolchain configuration window for CLion running on Windows (only WSLv2 is currently supported).
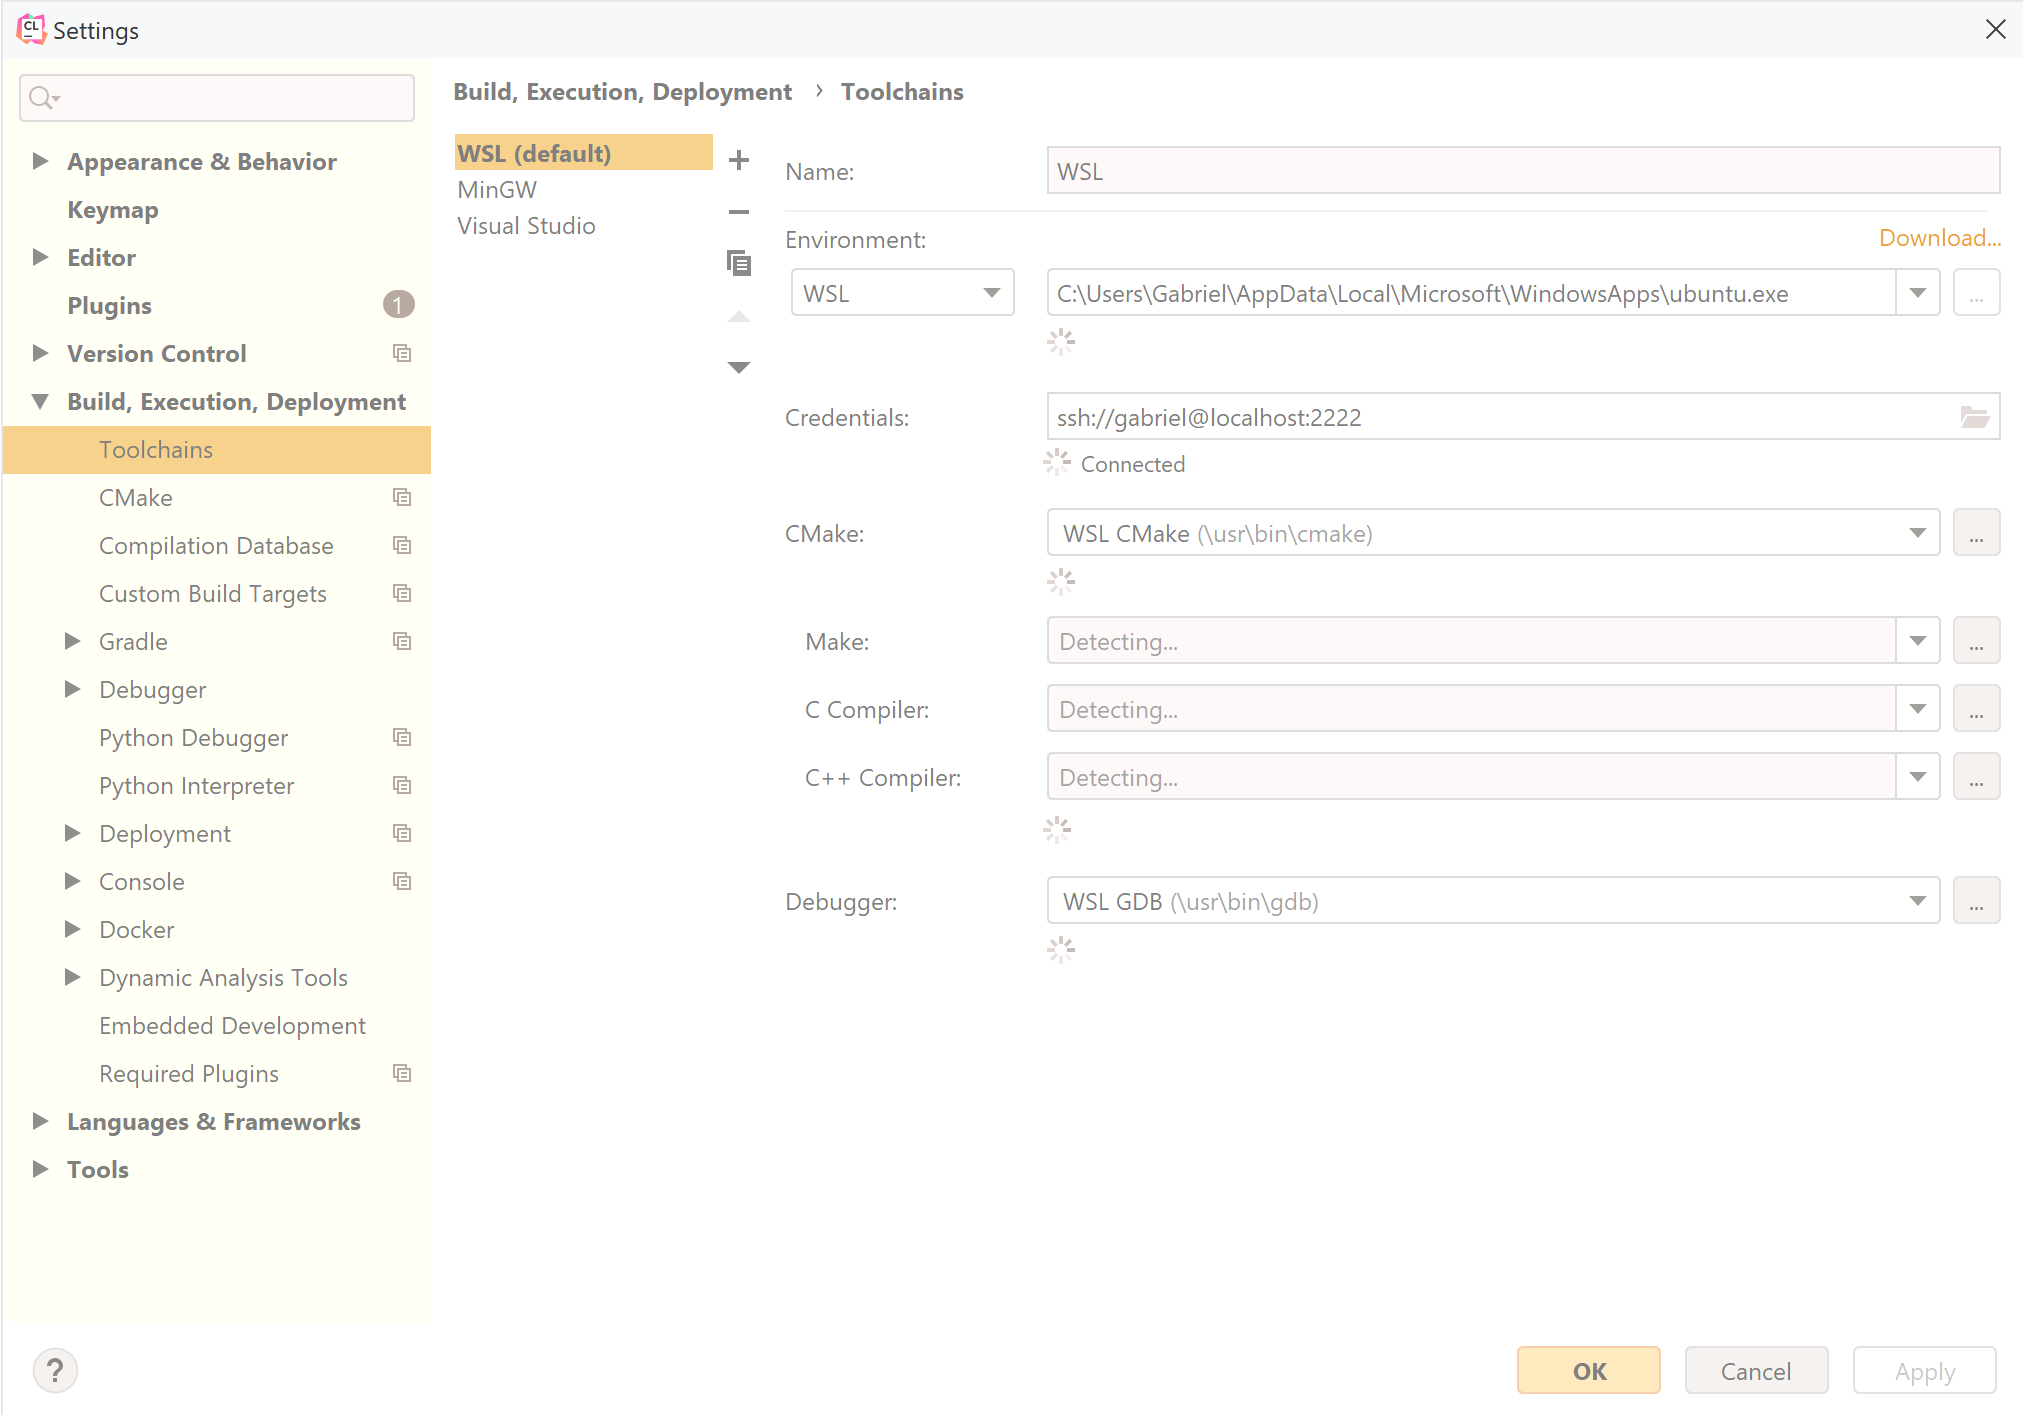
CLion uses Makefiles for your platform as the default generator. Here you can choose a better generator like ninja by setting the cmake options flag to -G Ninja. You can also set options to enable examples (-DNS3_EXAMPLES=ON) and tests (-DNS3_TESTS=ON).
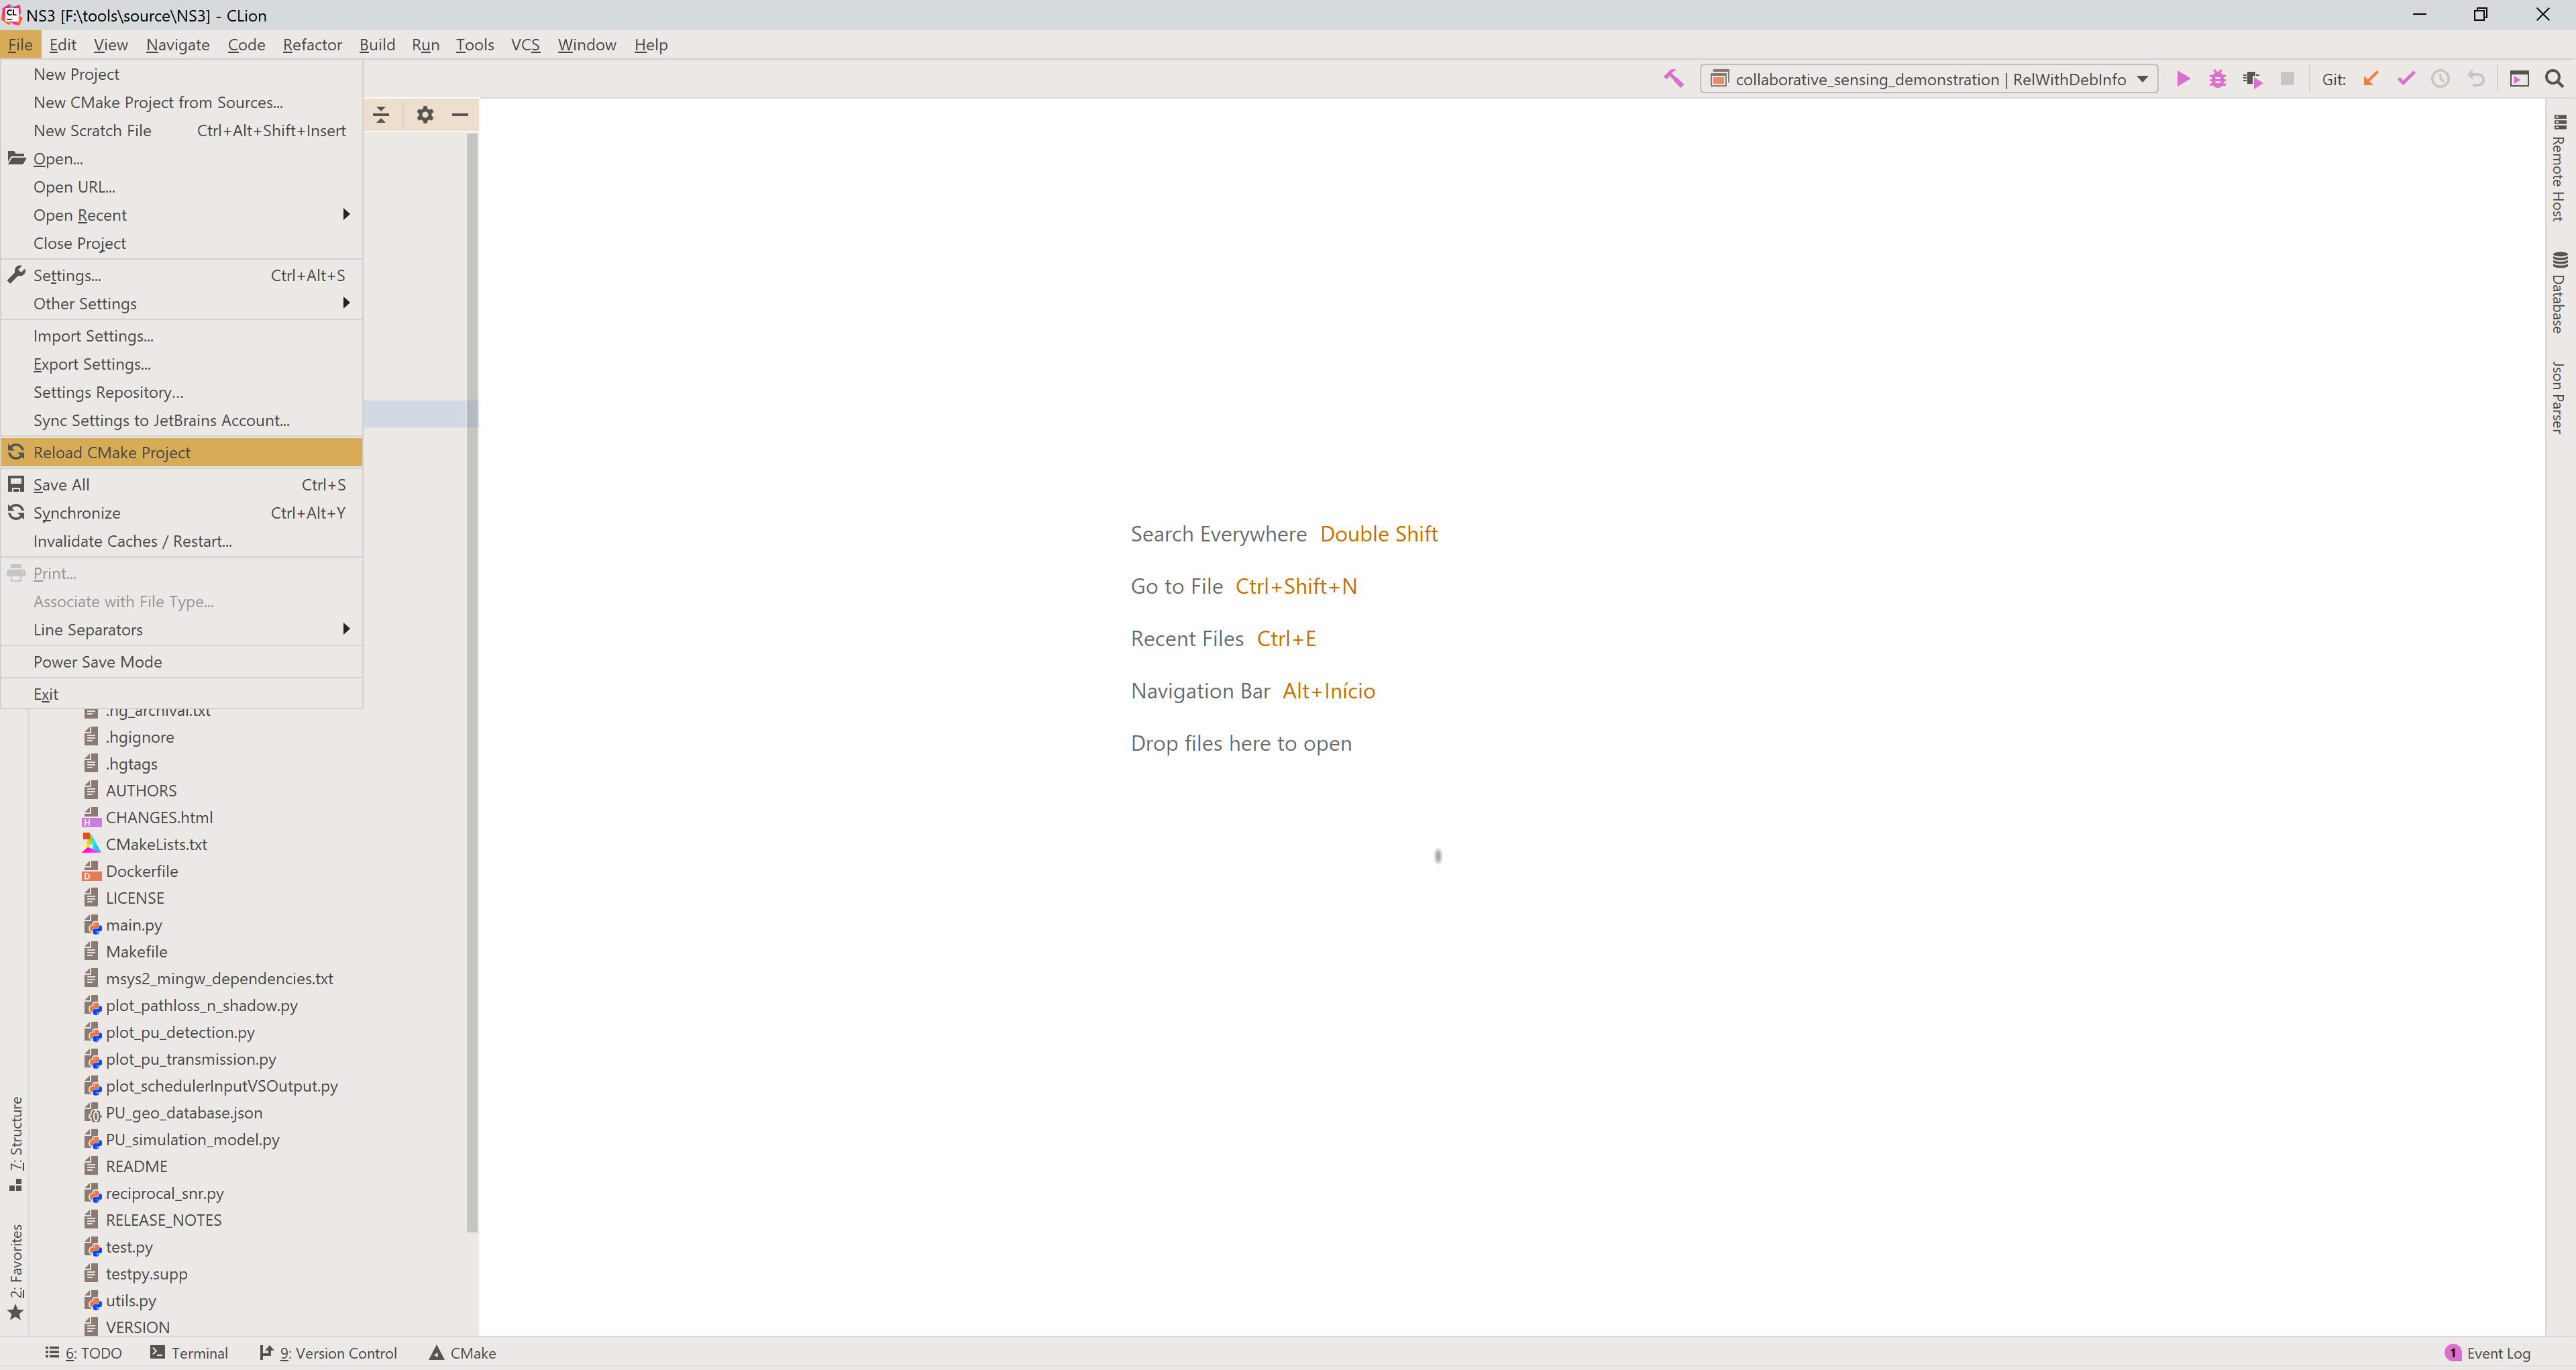
To refresh the CMake cache, triggering the discovery of new targets (libraries, executables and/or modules), you can either configure to re-run CMake automatically after editing CMake files (pretty slow and easily triggered) or reload it manually. The following image shows how to trigger the CMake cache refresh.
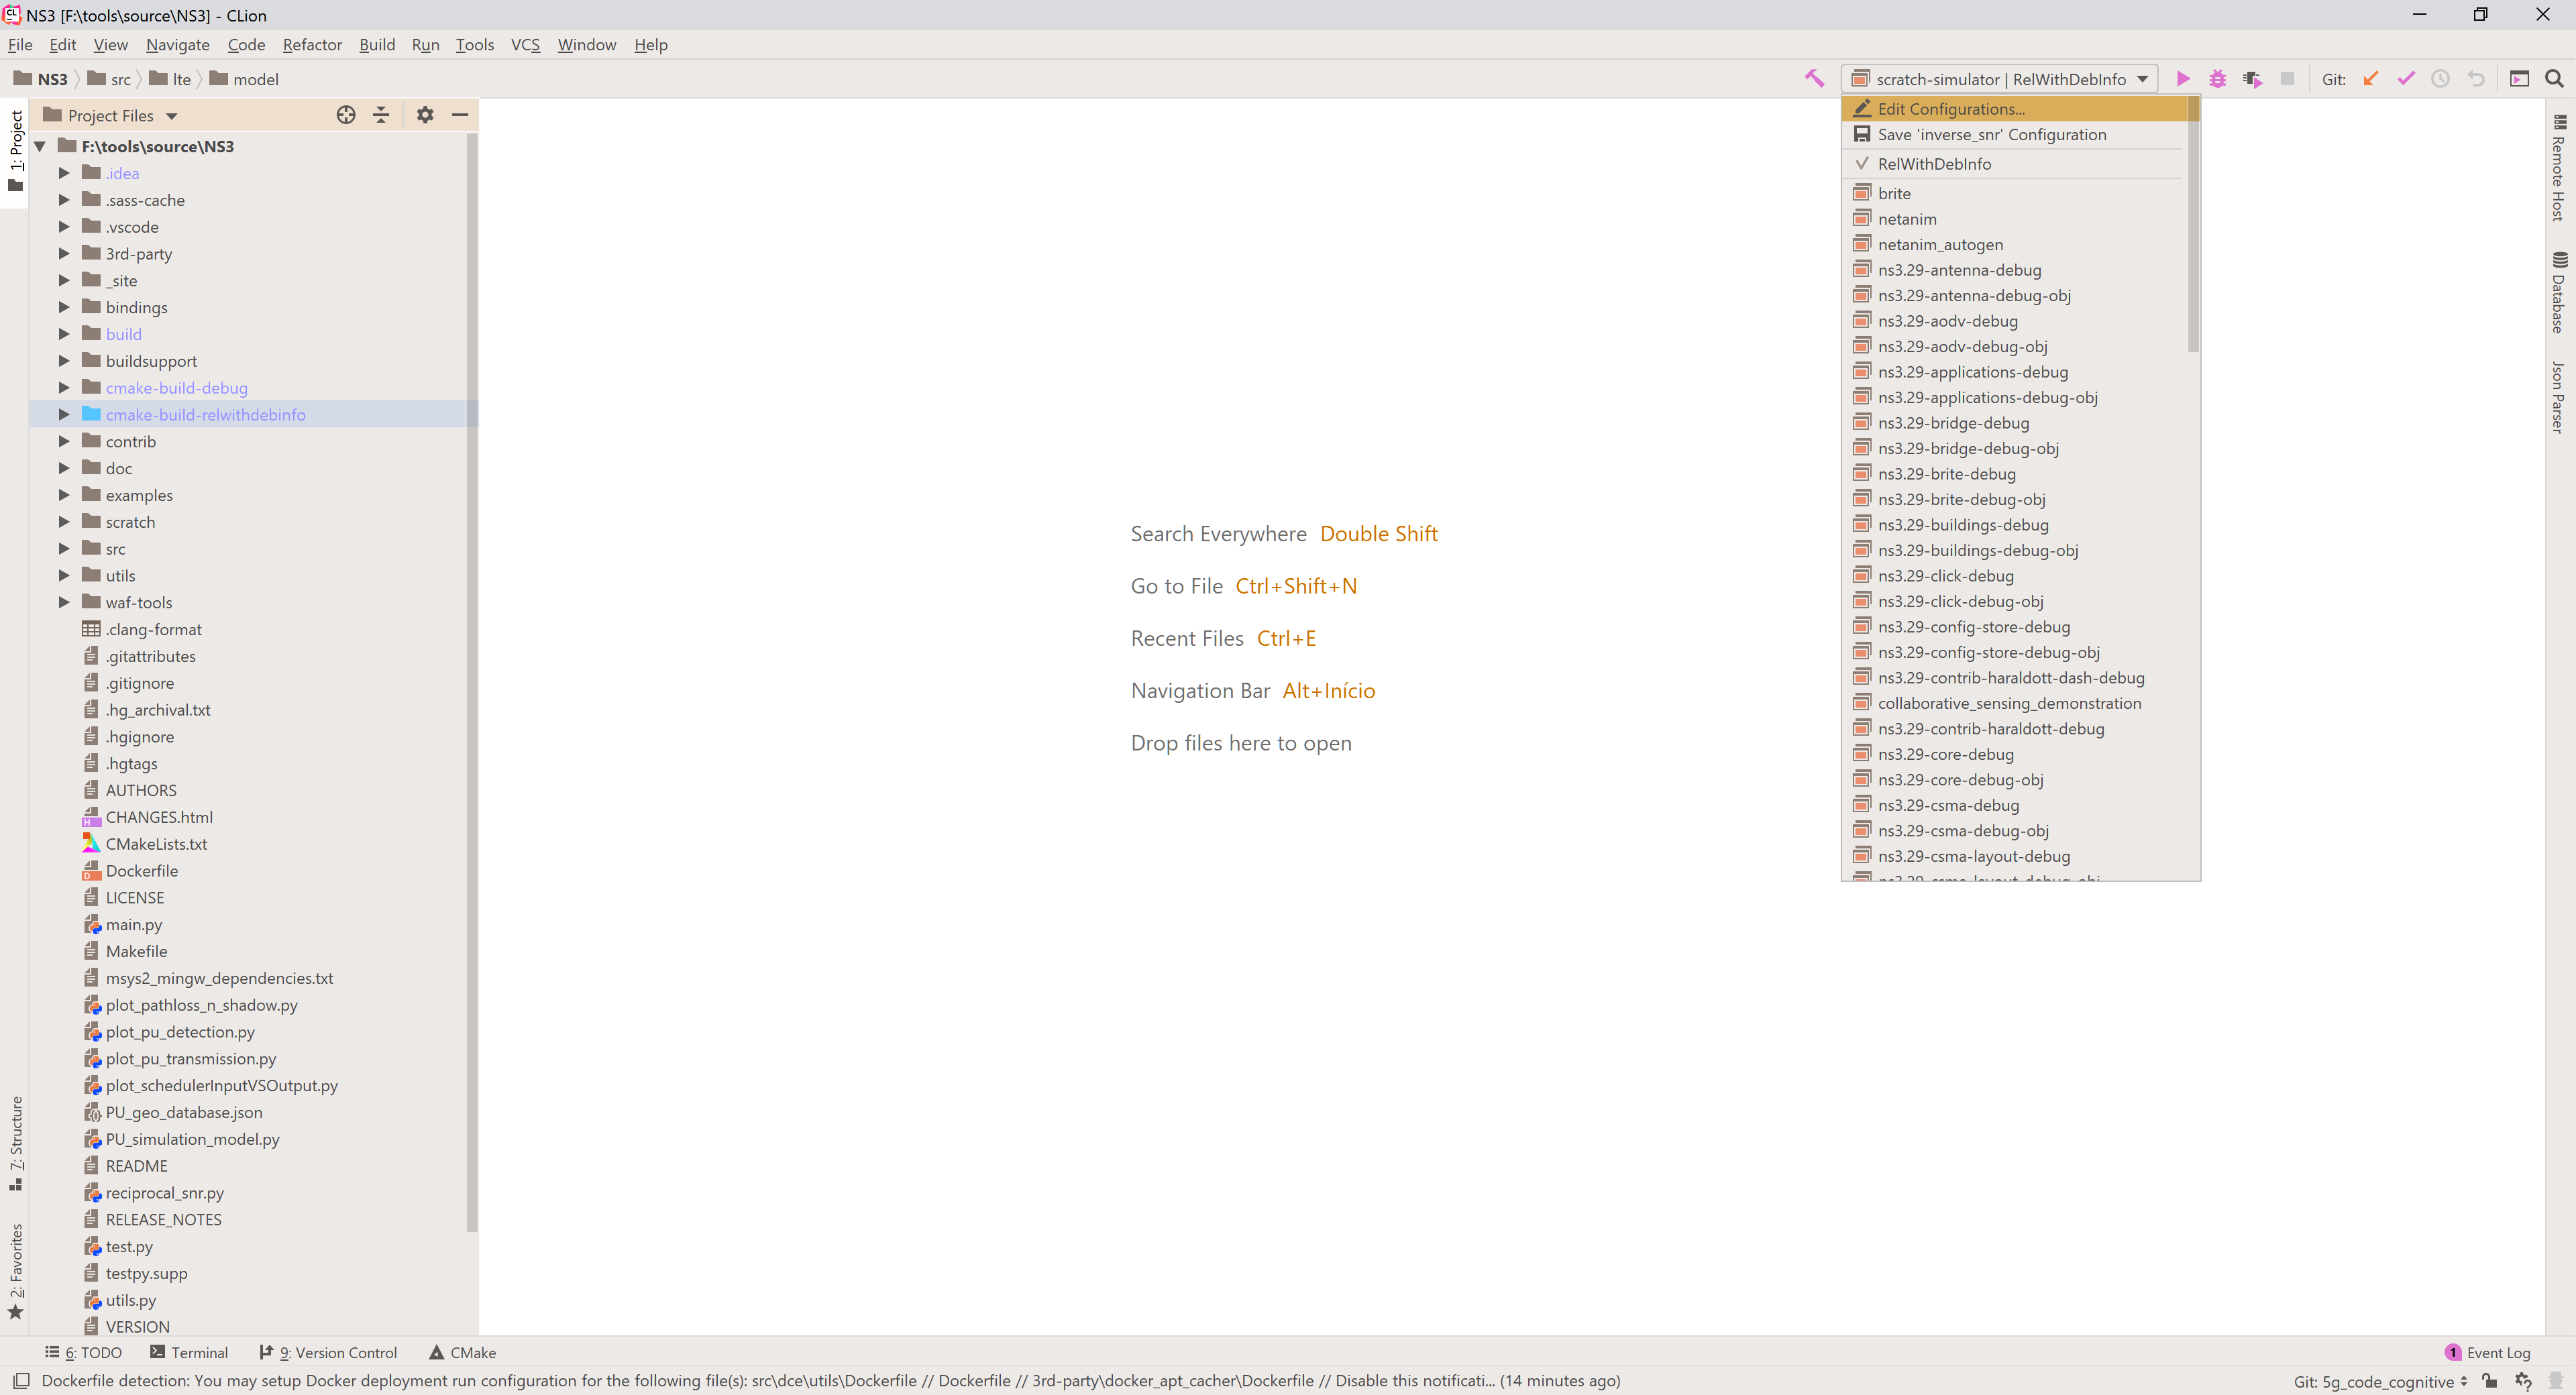
After configuring the project, the available targets are listed in a drop-down list on the top right corner. Select the target you want and then click the hammer symbol to build, as shown in the image below.
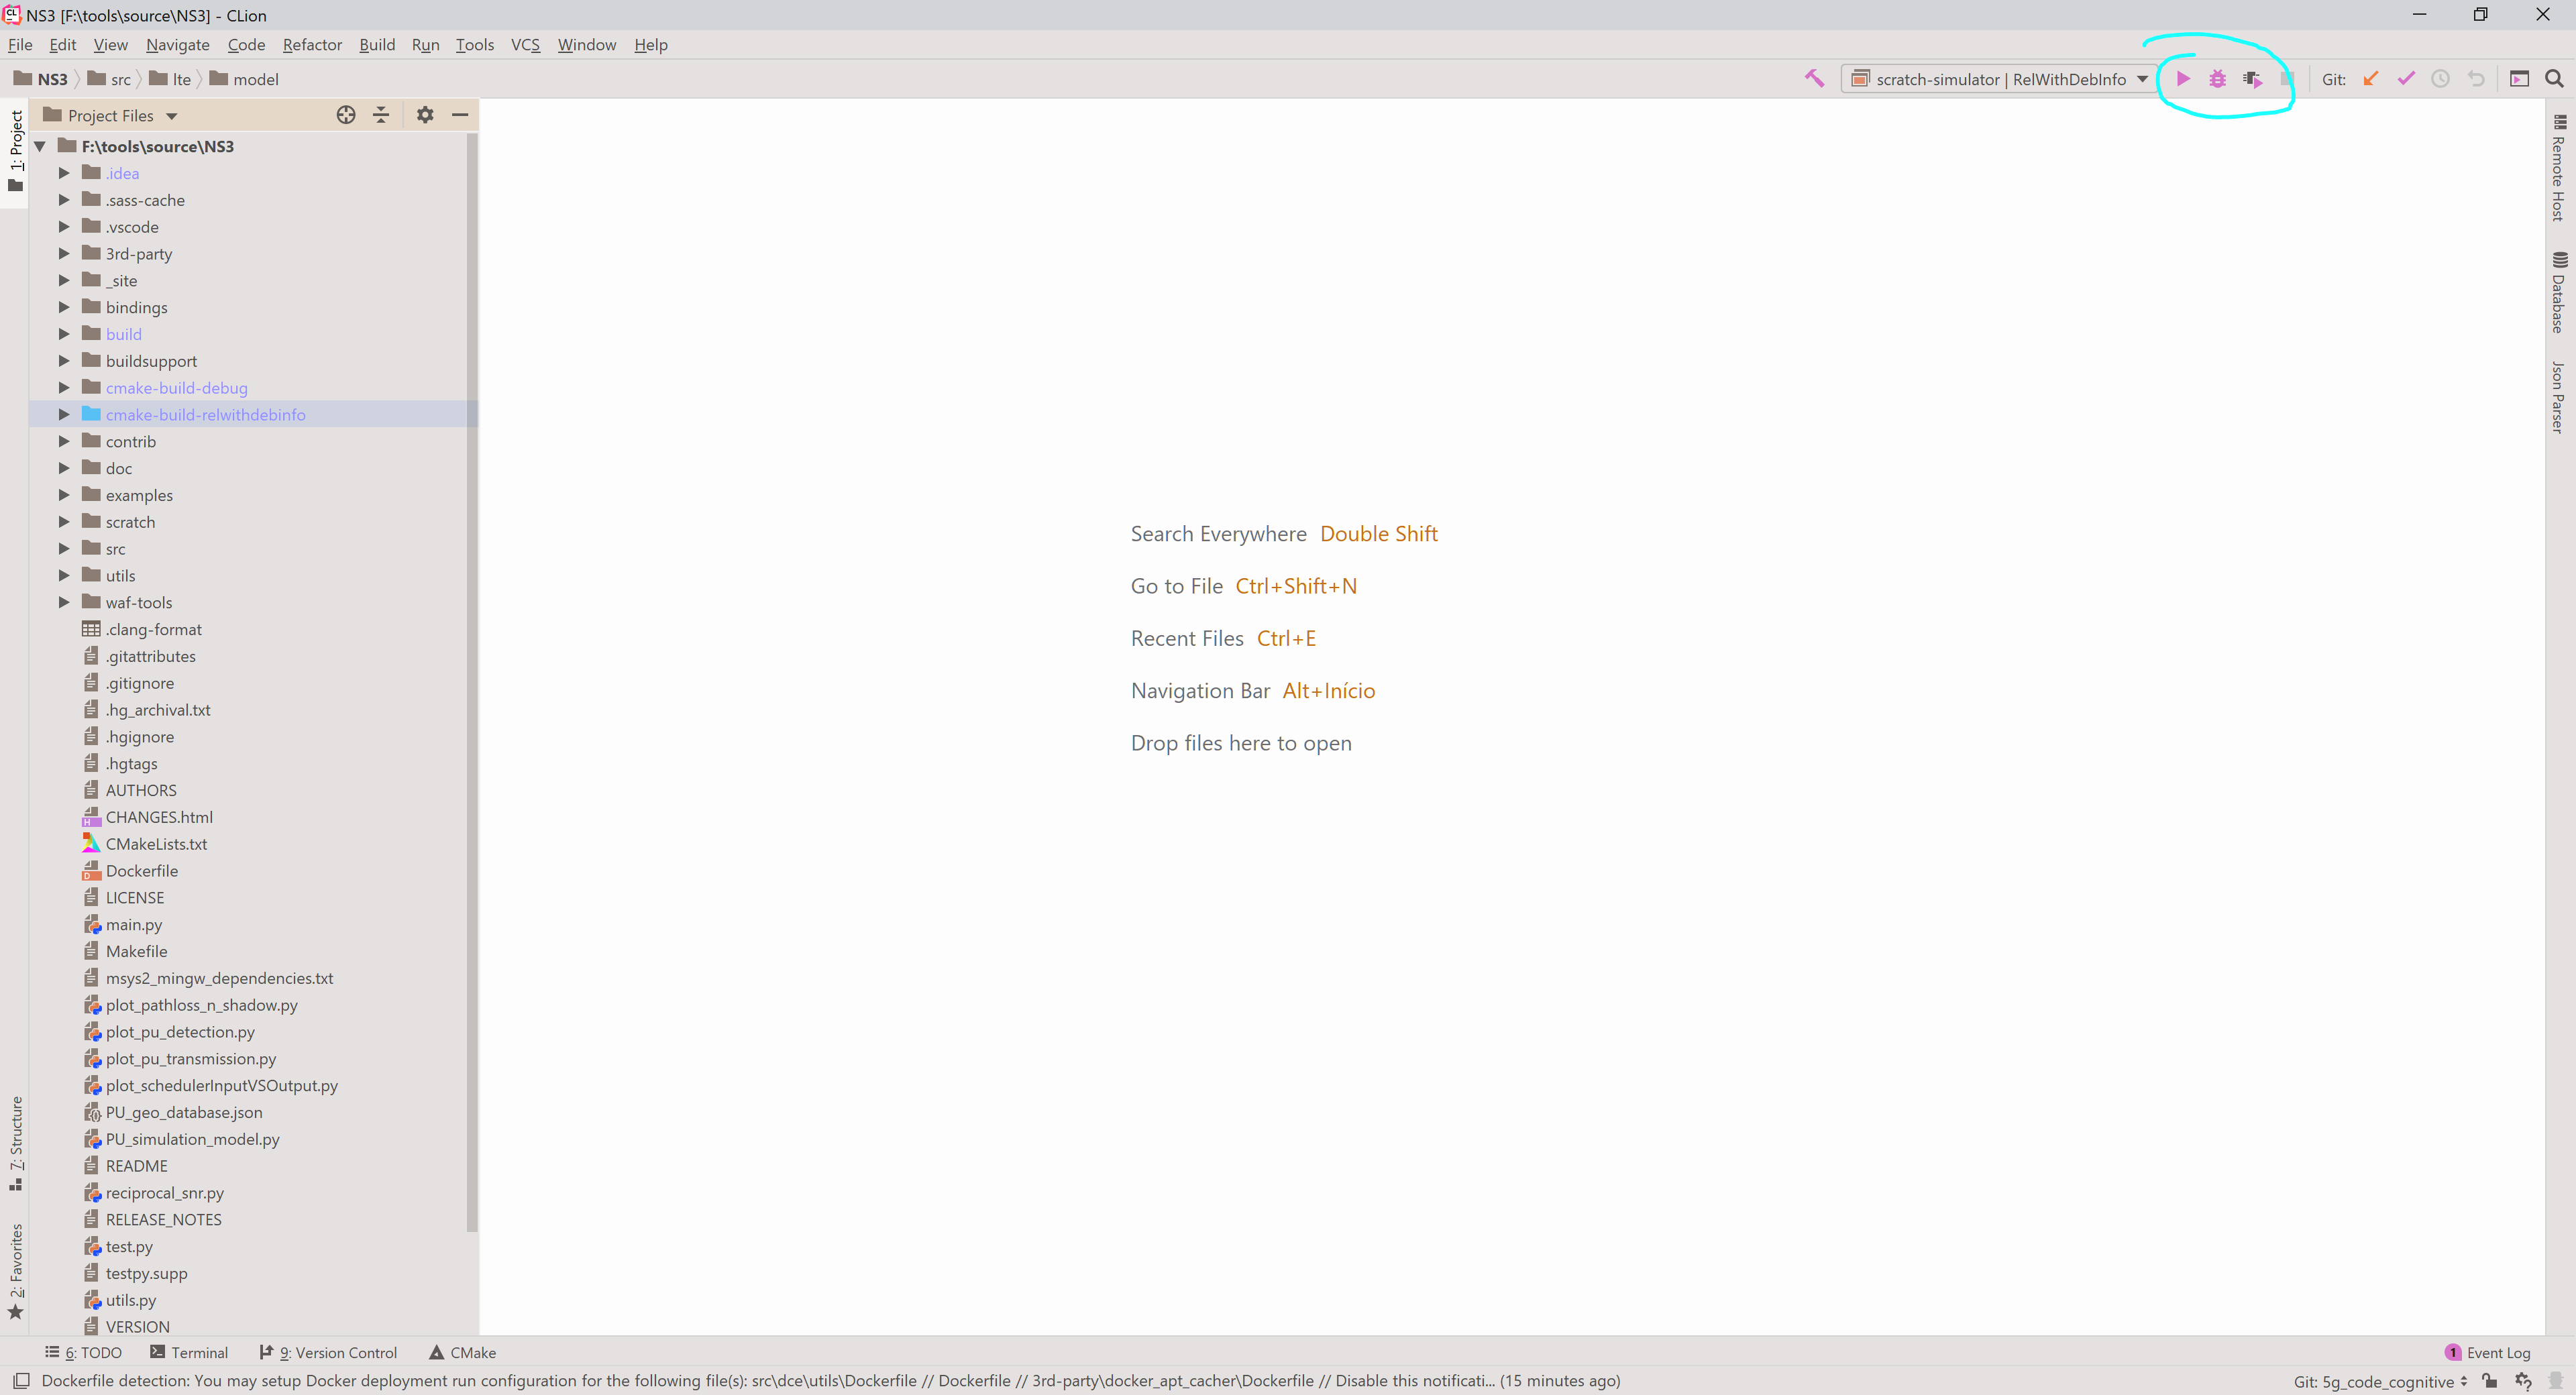
If you have selected and executable target, you can click either the play button to execute the program; the bug to debug the program; the play button with a chip, to run Valgrind and analyze memory usage, leaks and so on.
4.4.3.3. Code::Blocks
Start by installing Code::Blocks.
Code::Blocks does not support CMake project natively, but we can use the corresponding CMake generator to generate a project in order to use it. The generator name depends on the operating system and underlying build system. https://cmake.org/cmake/help/latest/generator/CodeBlocks.html
$ ./ns3 configure -G"CodeBlocks - Ninja" --enable-examples

...

$ -- Build files have been written to: /ns-3-dev/cmake-cache
There will be a NS3.cbp file inside the cache folder used during configuration (in this case cmake-cache). This is a Code::Blocks project file that can be opened by the IDE.
When you first open the IDE, you will be greeted by a window asking you to select the compiler you want.
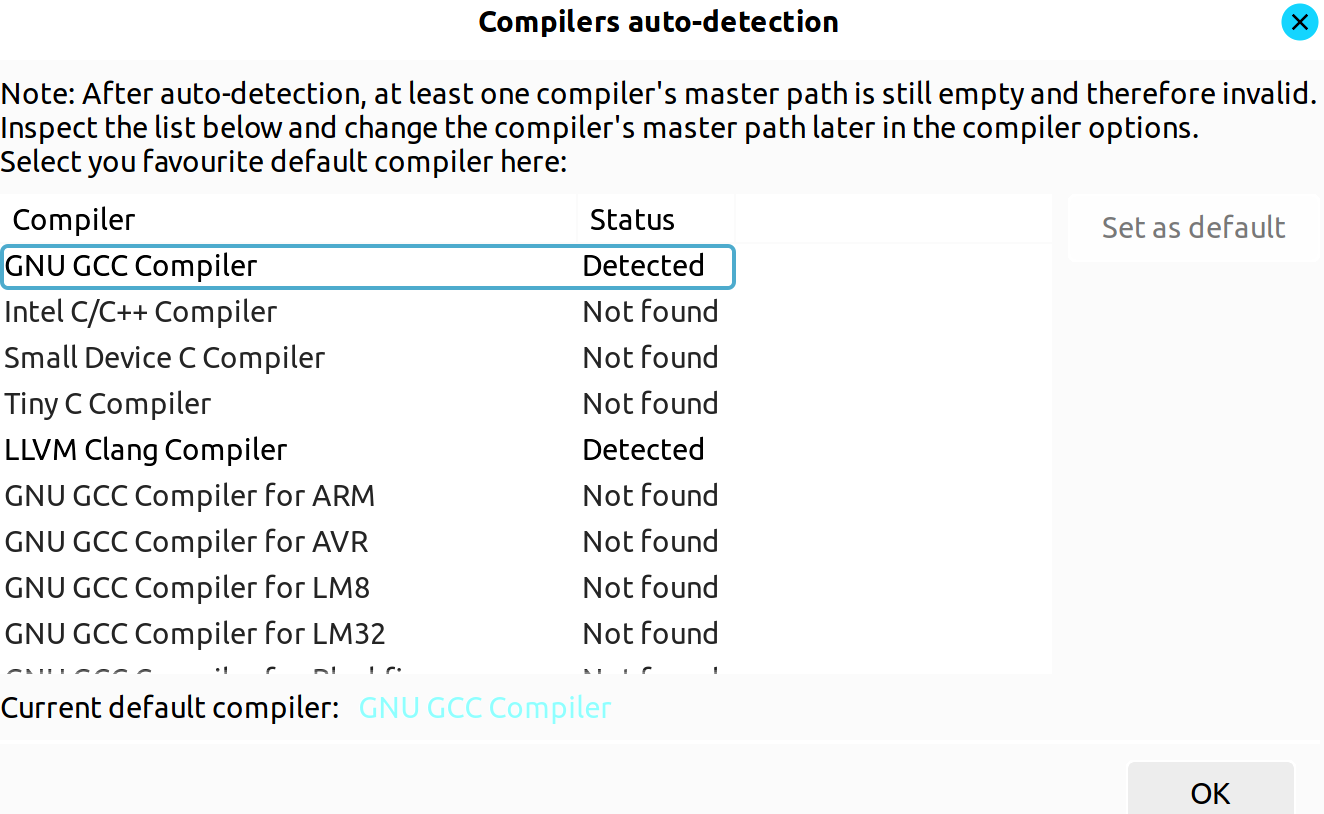
After that you will get into the landing page where you can open the project.

Loading it will take a while.
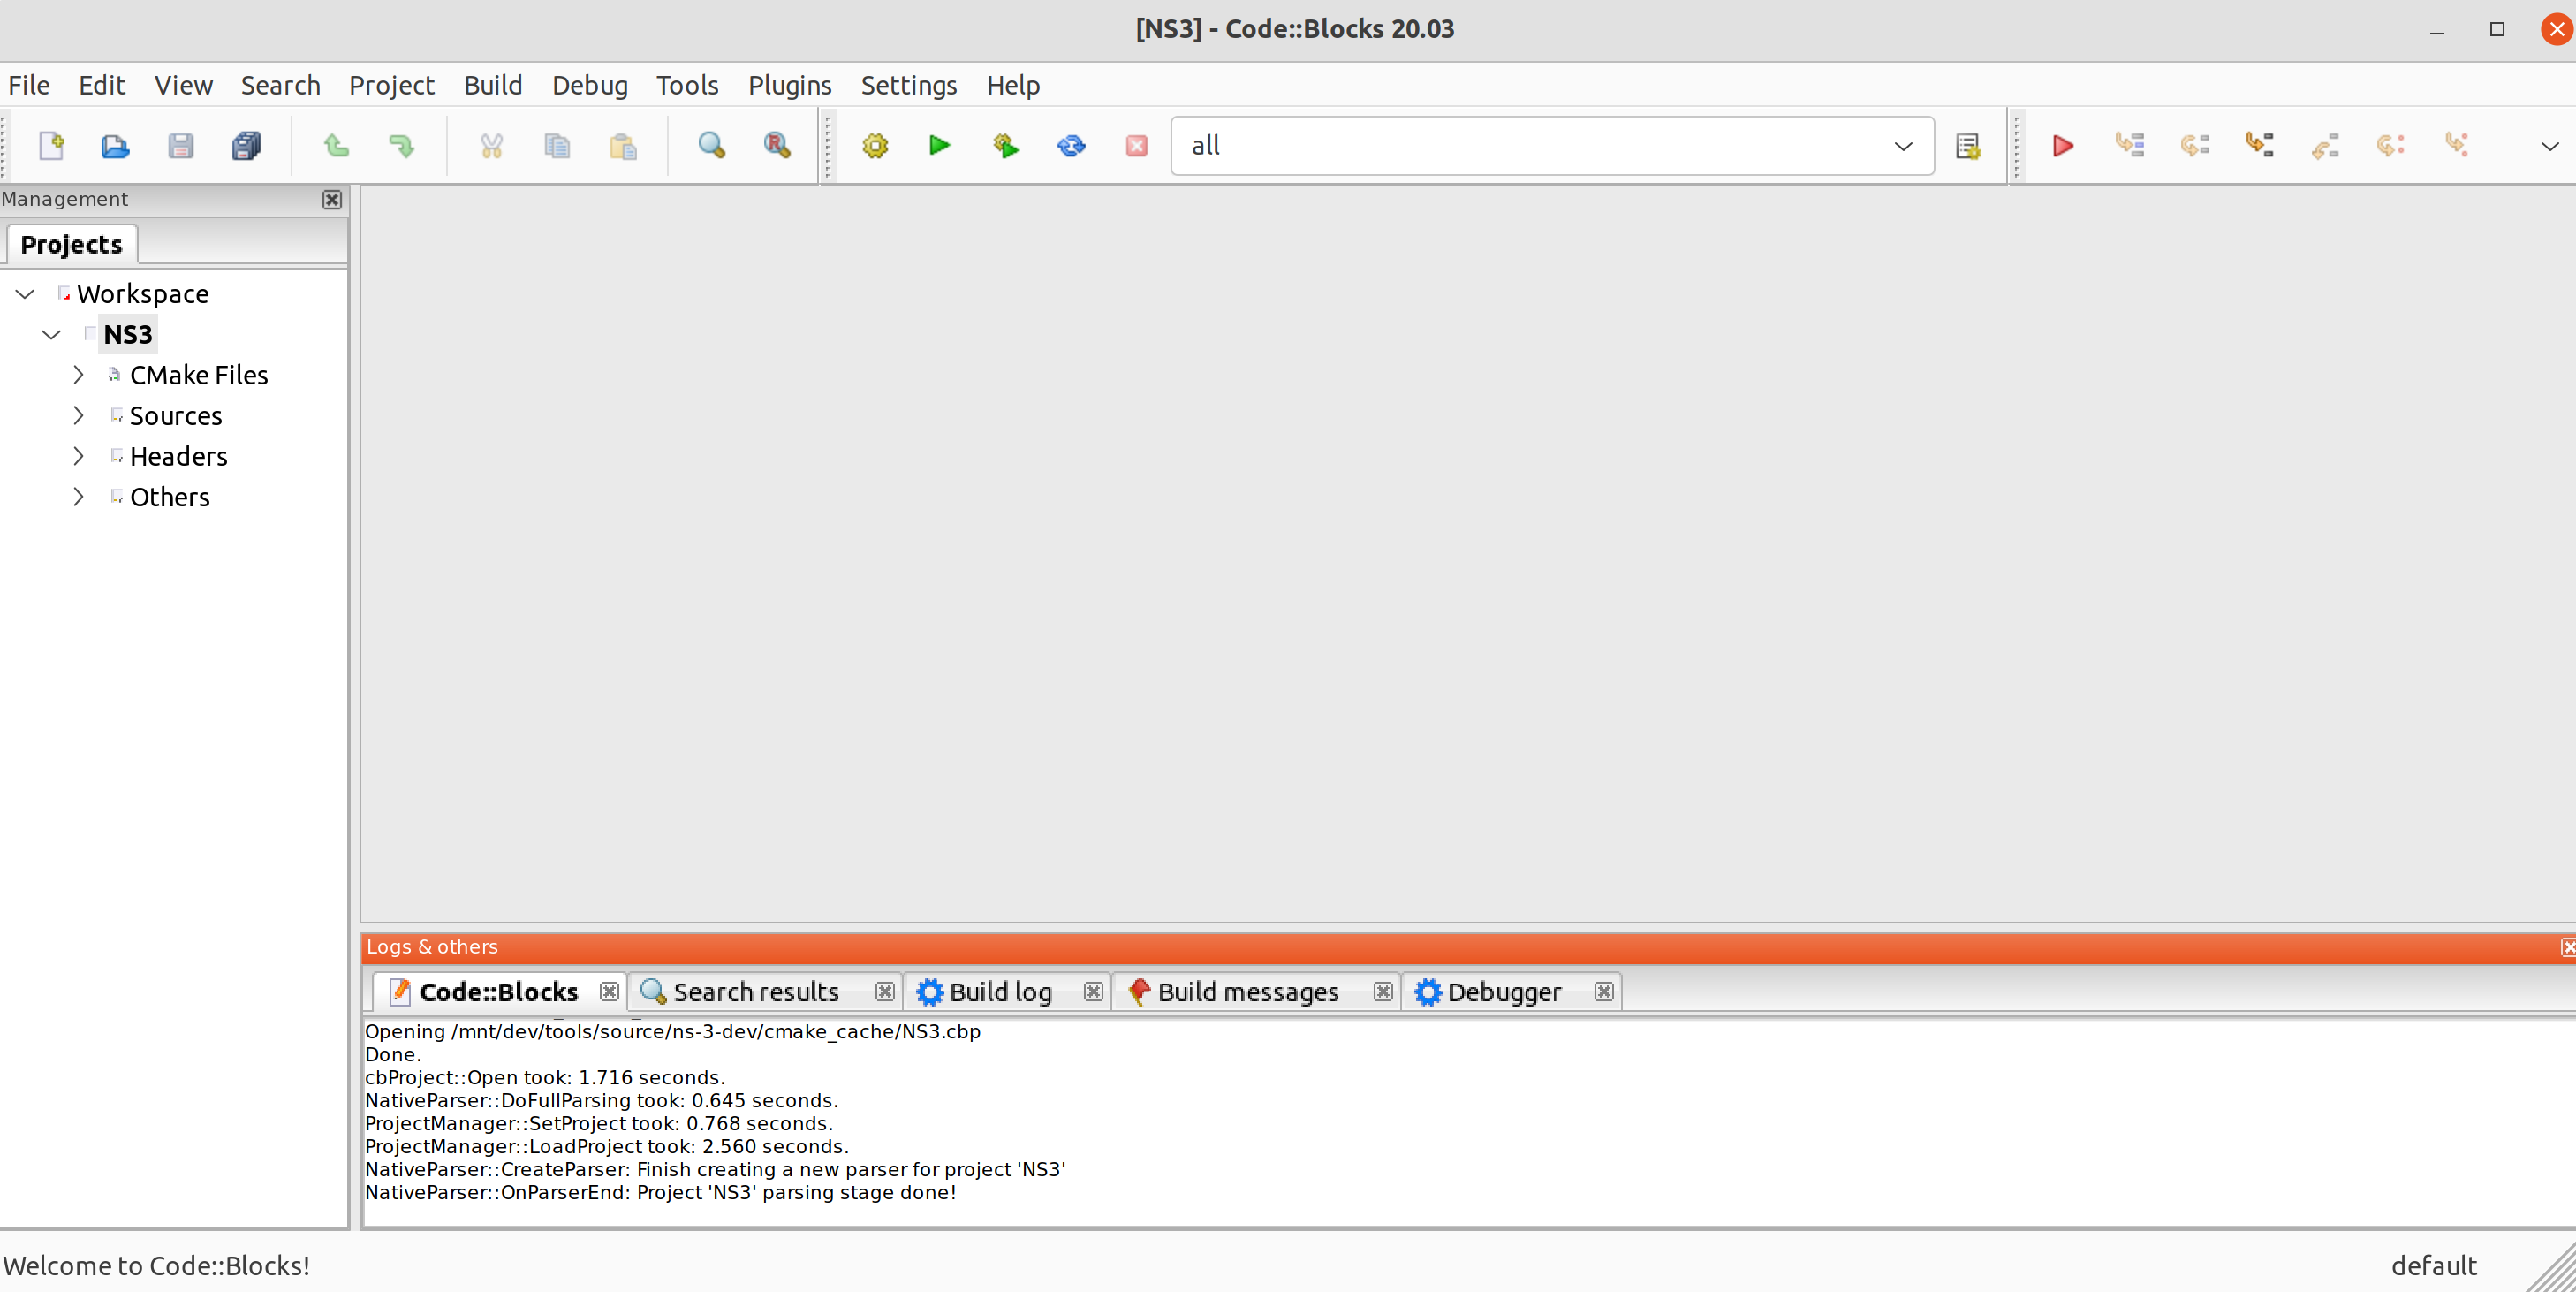
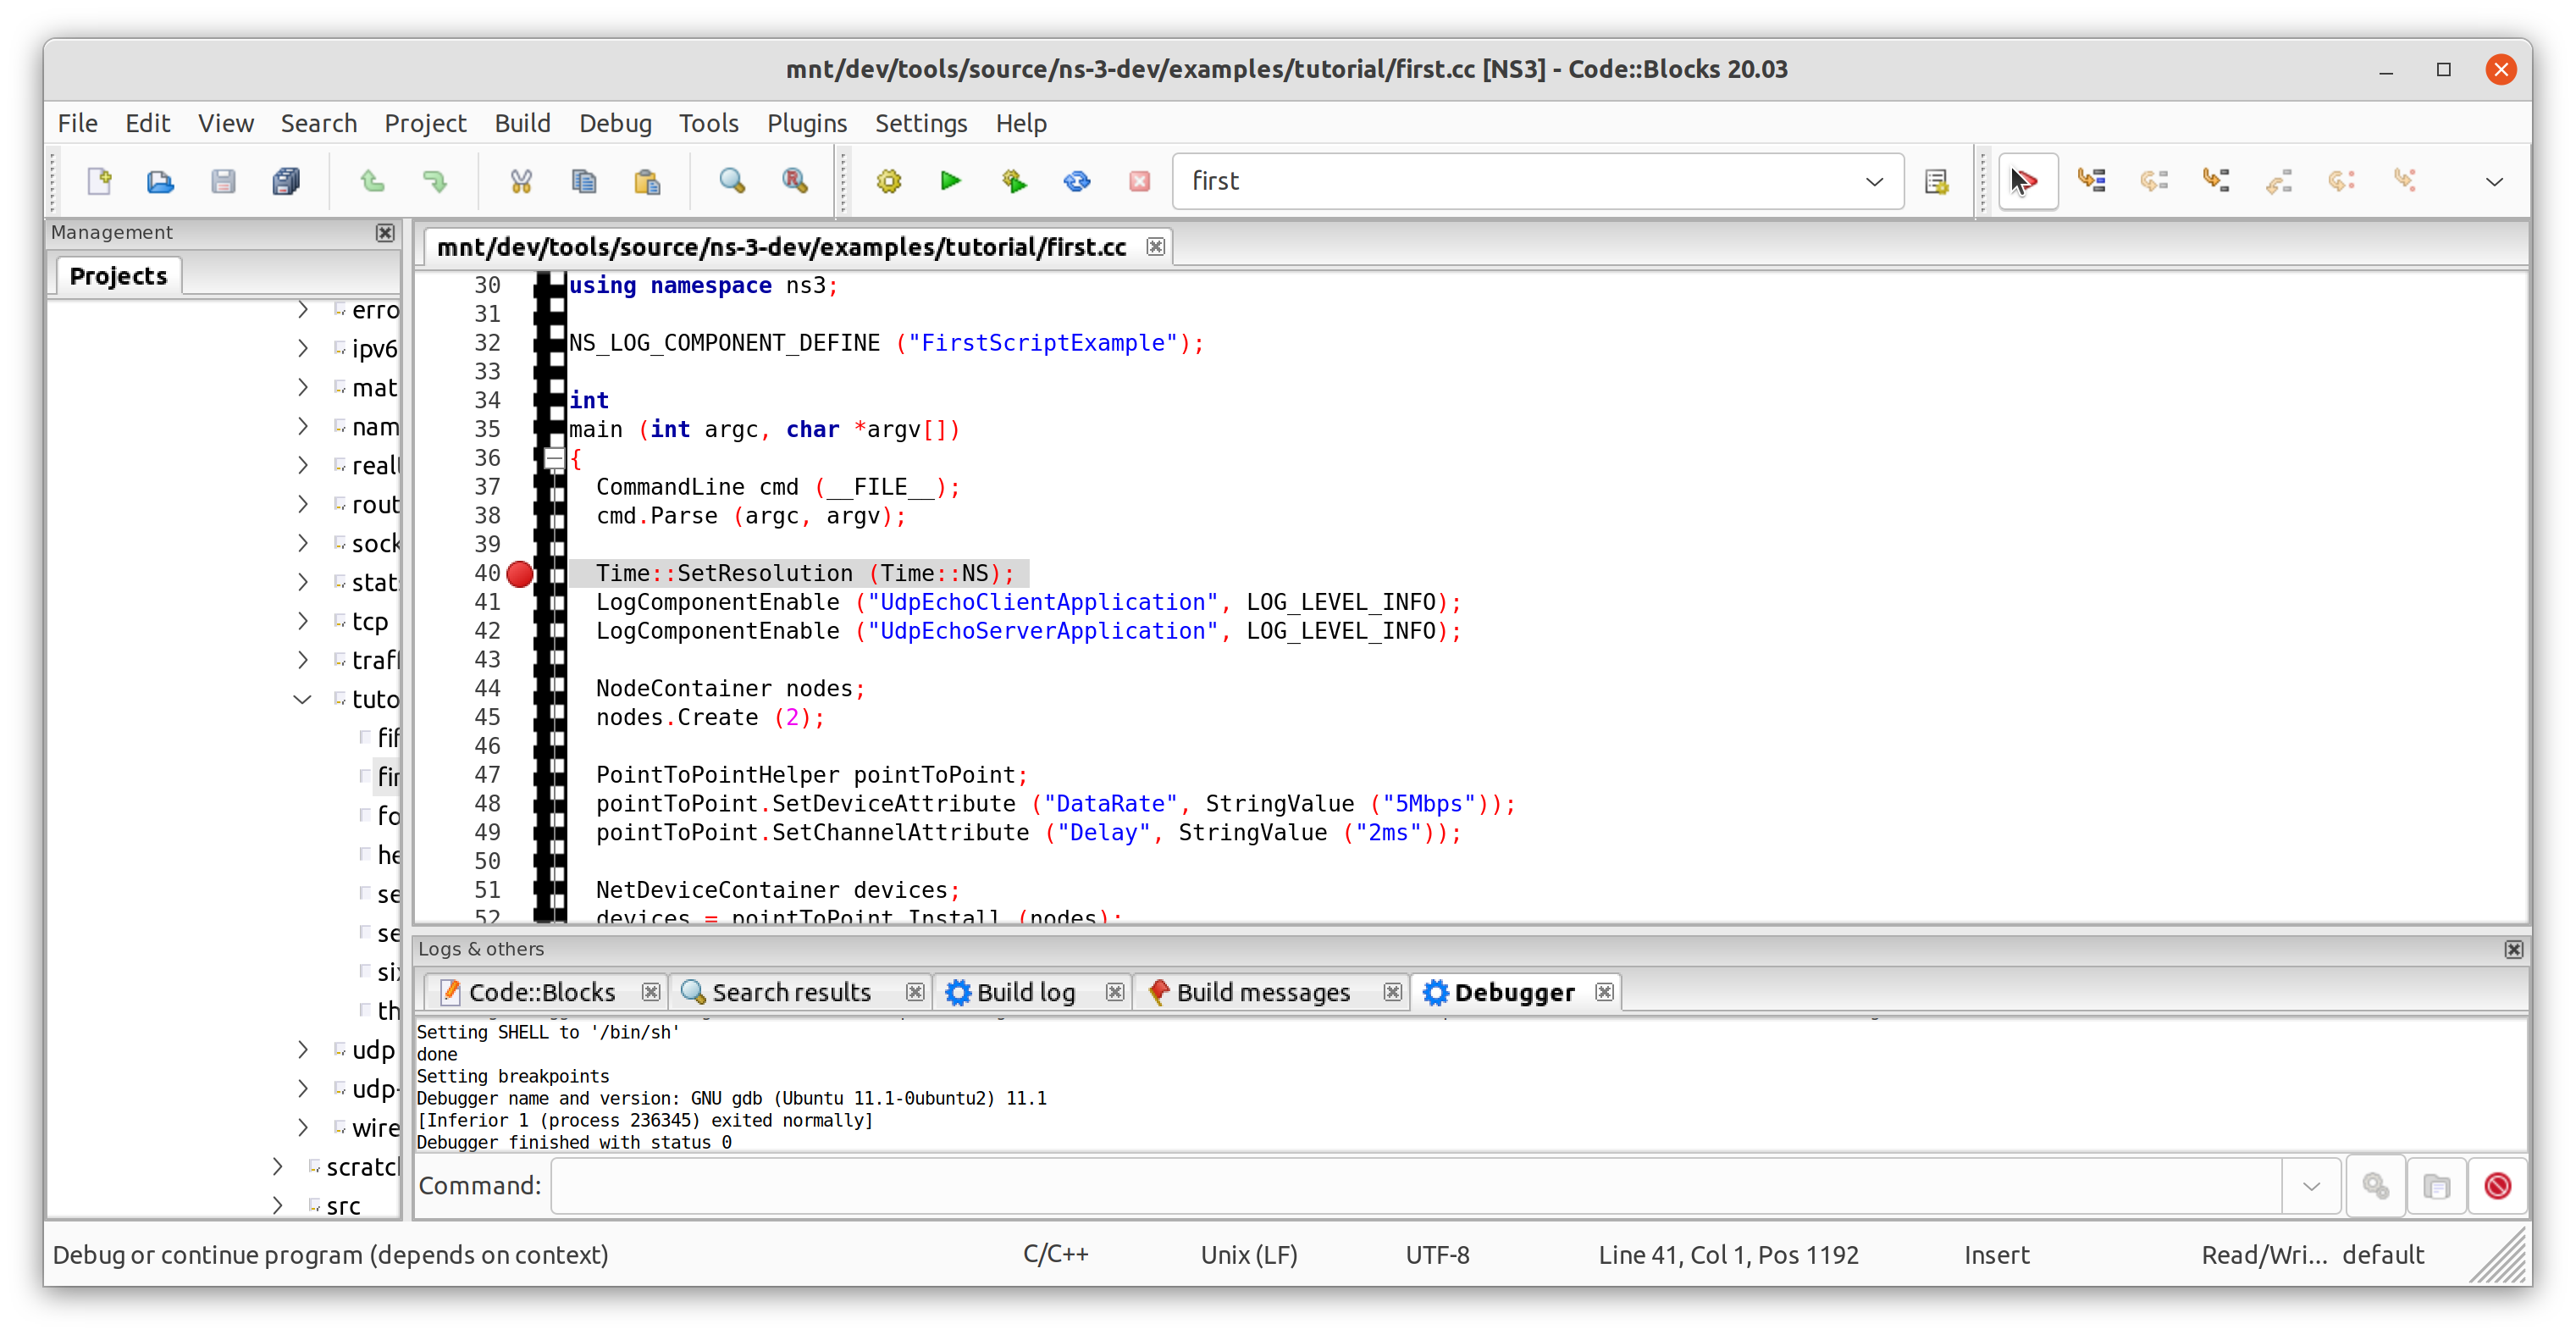
After that we can select a target in the top menu (where it says “all”) and click to build, run or debug. We can also set breakpoints on the source code.
After clicking to build, the build commands of the underlying build system will be printed in the tab at the bottom. If you clicked to debug, the program will start automatically and stop at the first breakpoint.
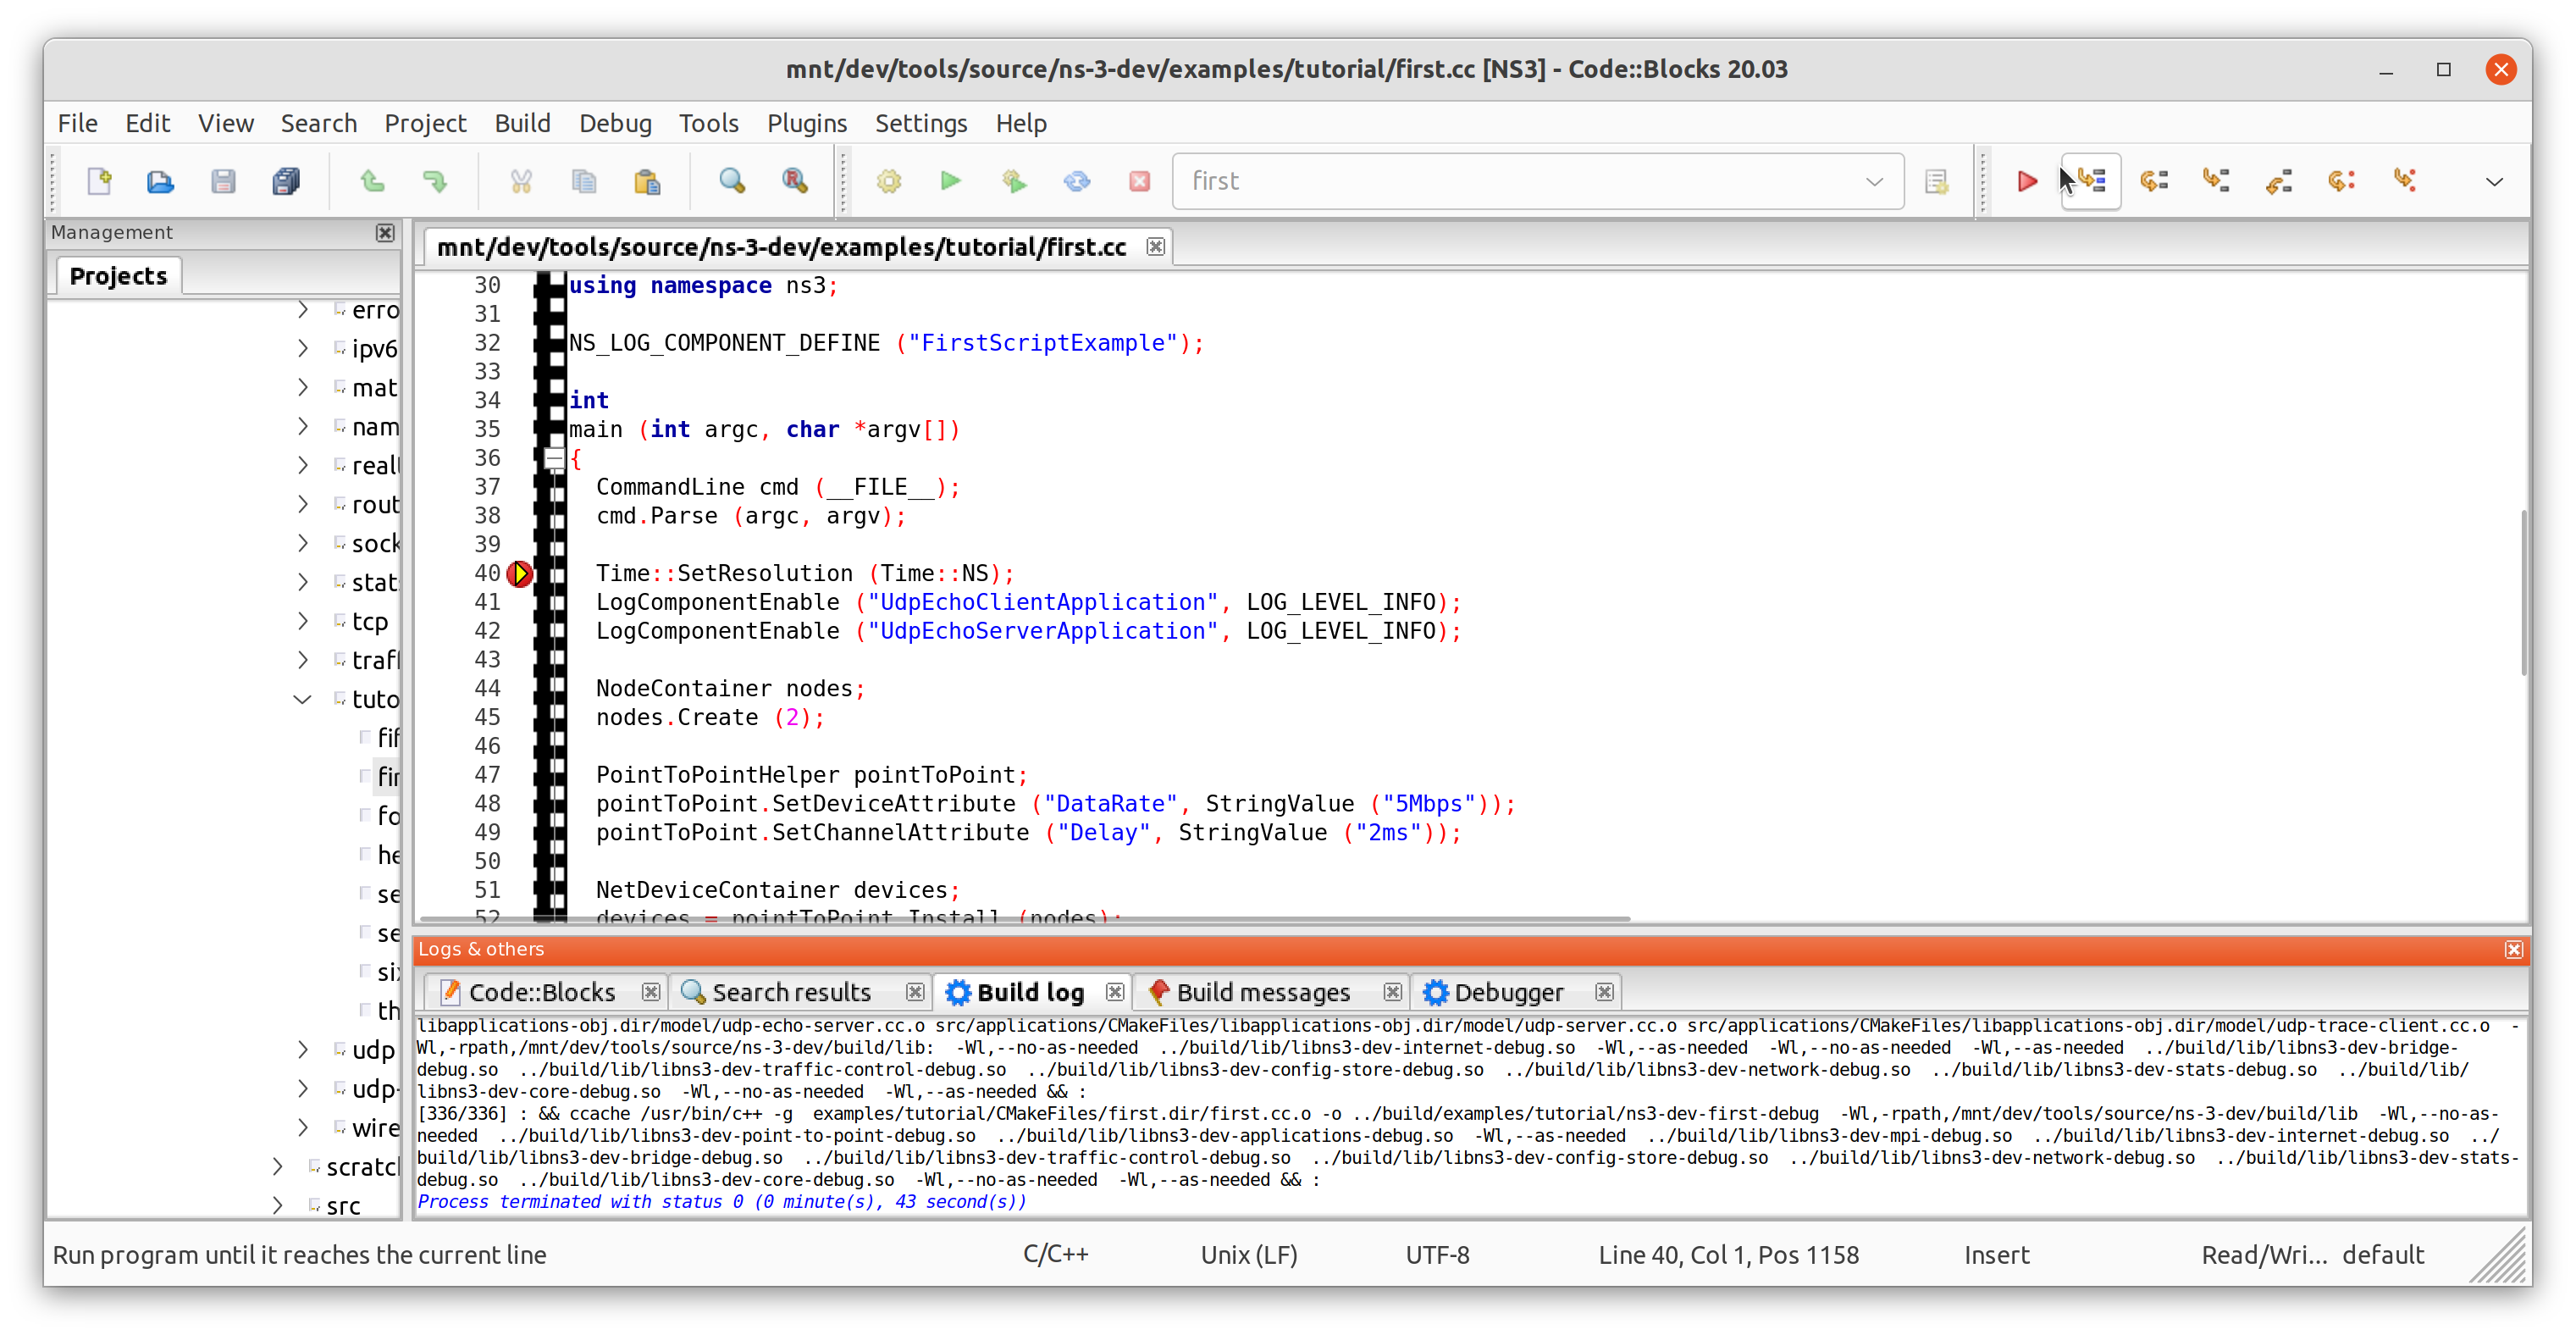
You can inspect memory and the current stack enabling those views in Debug->Debugging Windows->Watches and Call Stack. Using the debugging buttons, you can advance line by line, continue until the next breakpoint.
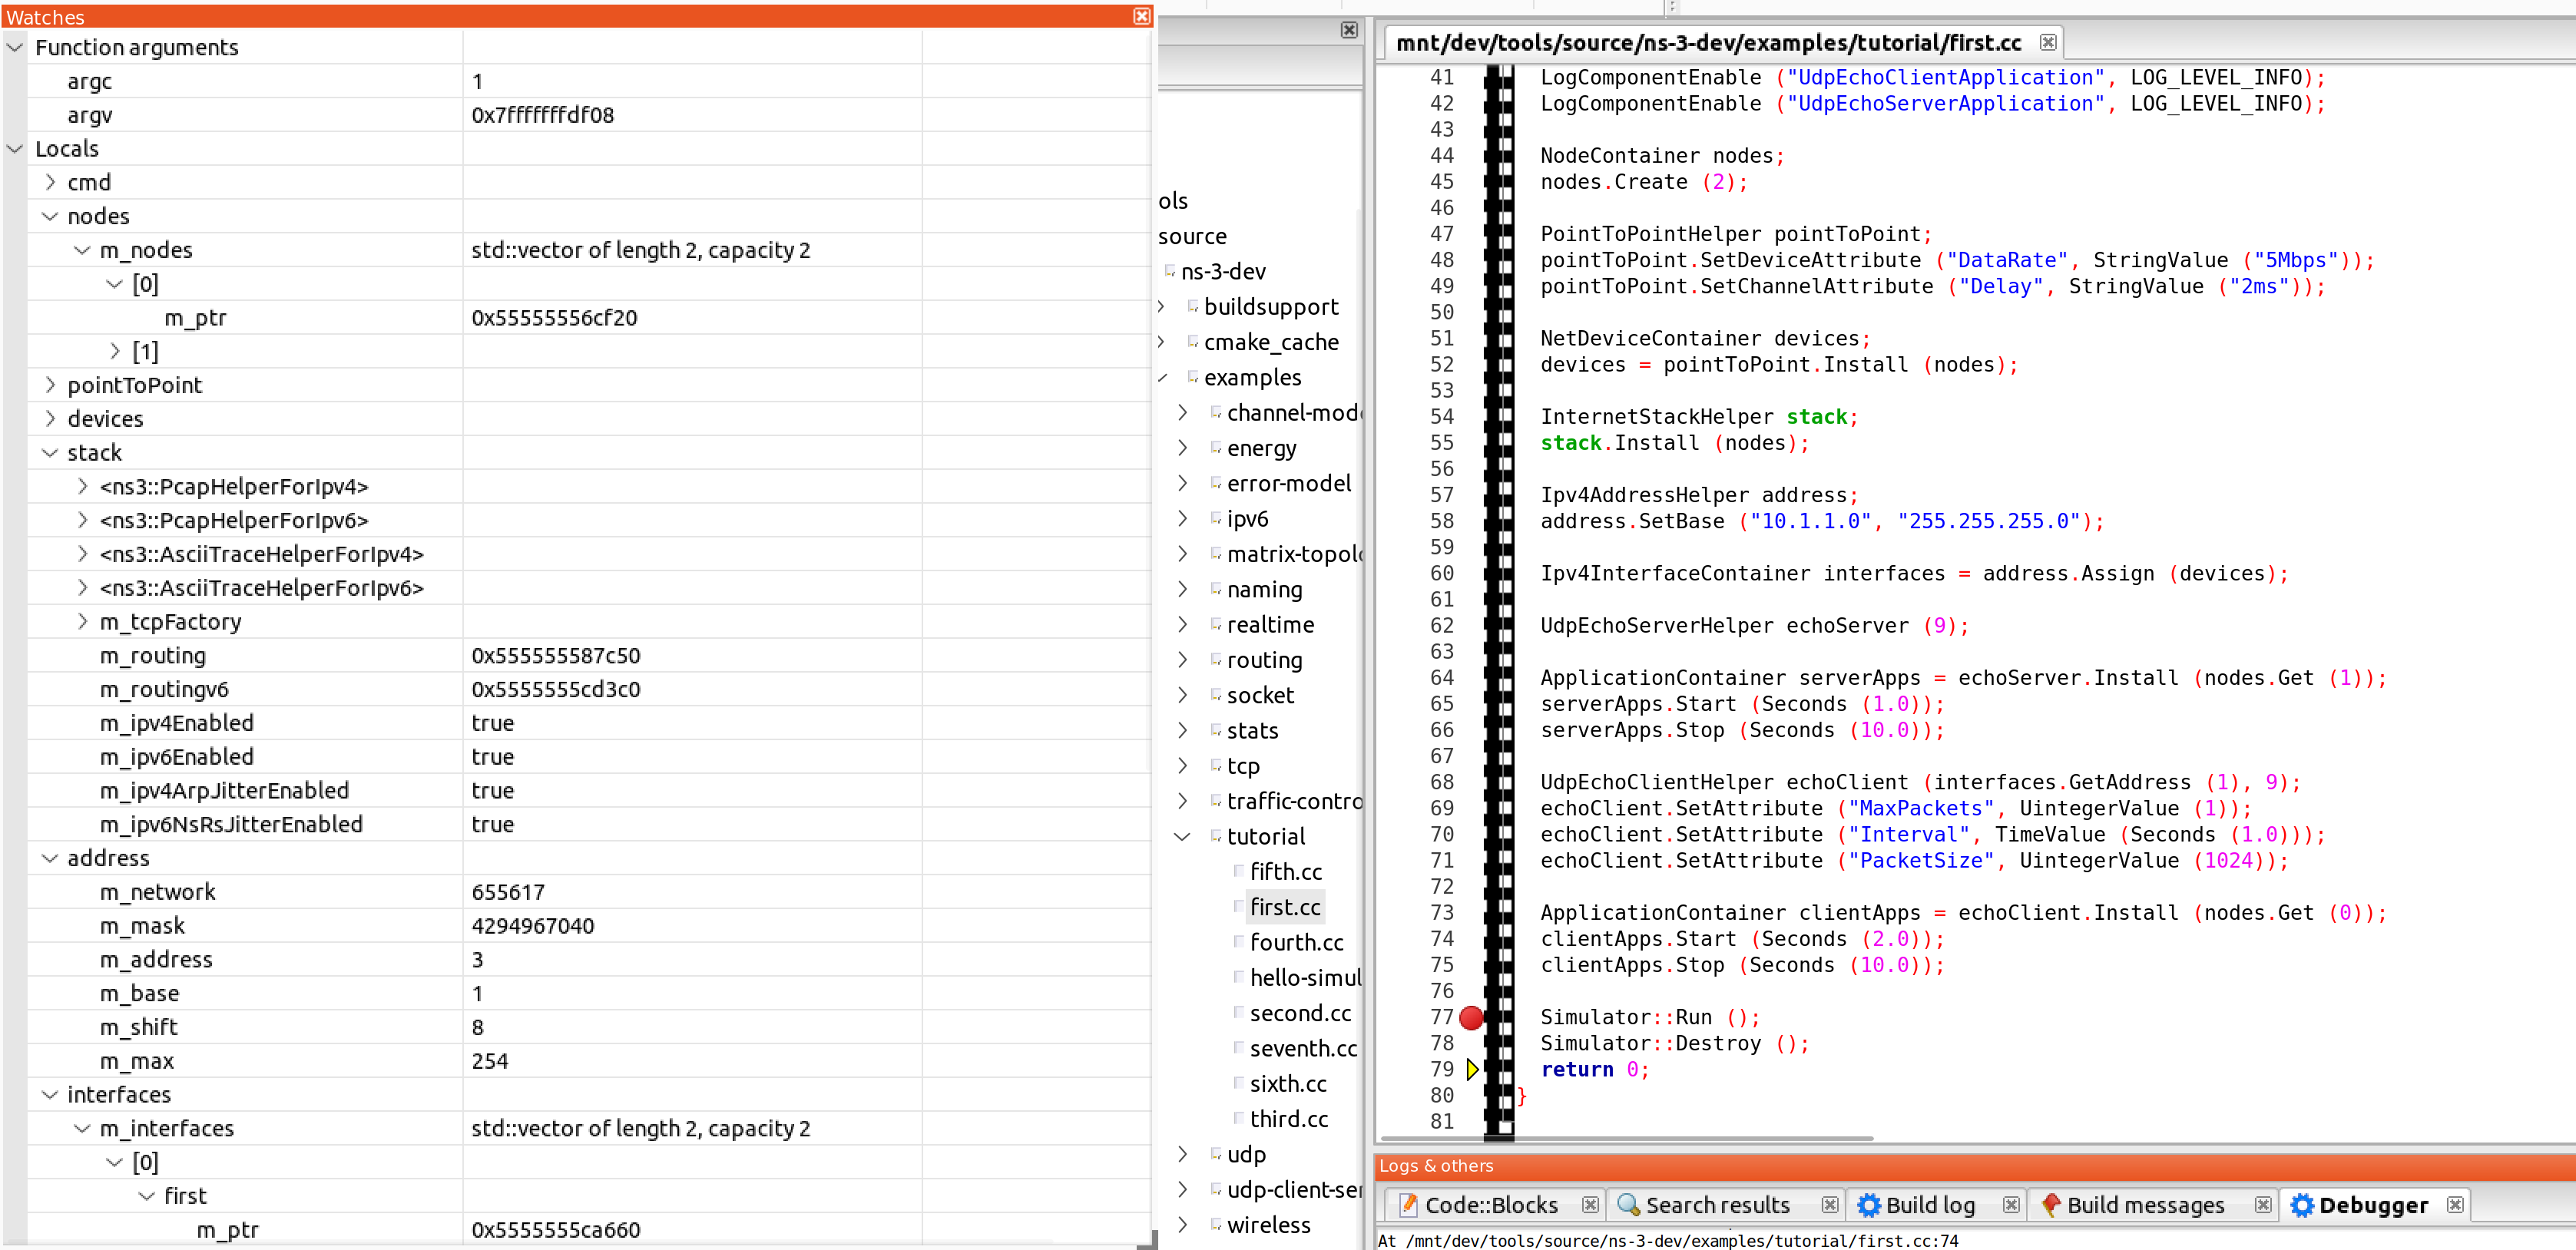
Note: as Code::Blocks doesn’t natively support CMake projects, it doesn’t refresh the CMake cache, which means you
will need to close the project, run the ./ns3 command to refresh the CMake caches after adding/removing
source files to/from the CMakeLists.txt files, adding a new module or dependencies between modules.
4.4.3.4. Apple XCode
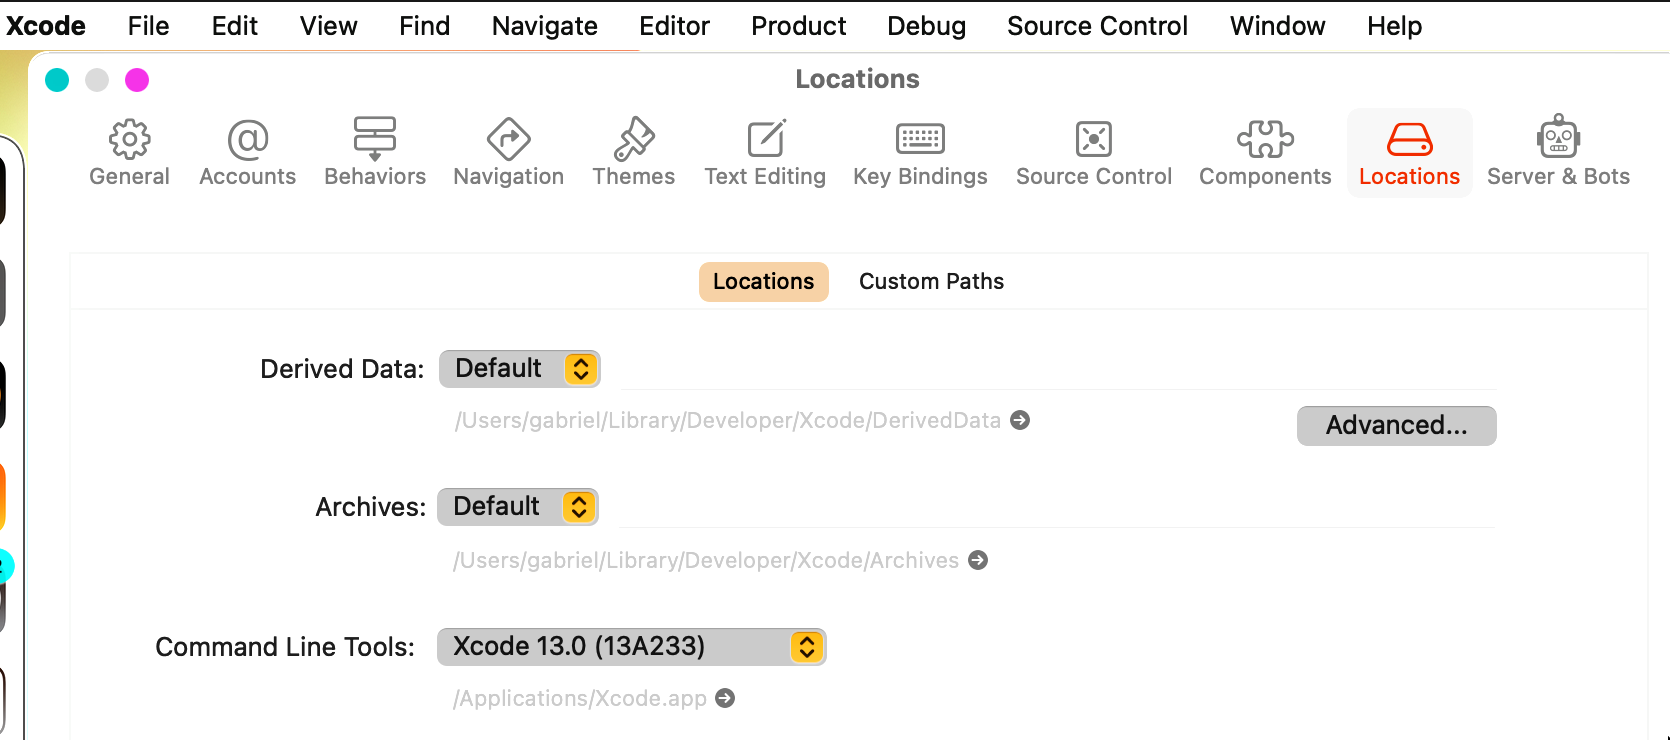
Start by installing XCode. Then open it for the first time and accept the license. Then open Xcode->Preferences->Locations and select the command-line tools location.
XCode does not support CMake project natively, but we can use the corresponding CMake generator to generate a project in order to use it. The generator name depends on the operating system and underlying build system. https://cmake.org/cmake/help/latest/generator/Xcode.html
$ ./ns3 configure -GXcode --enable-examples

...

$ -- Build files have been written to: /ns-3-dev/cmake-cache
There will be a NS3.xcodeproj file inside the cache folder used during configuration (in this case cmake-cache). This is a XCode project file that can be opened by the IDE.
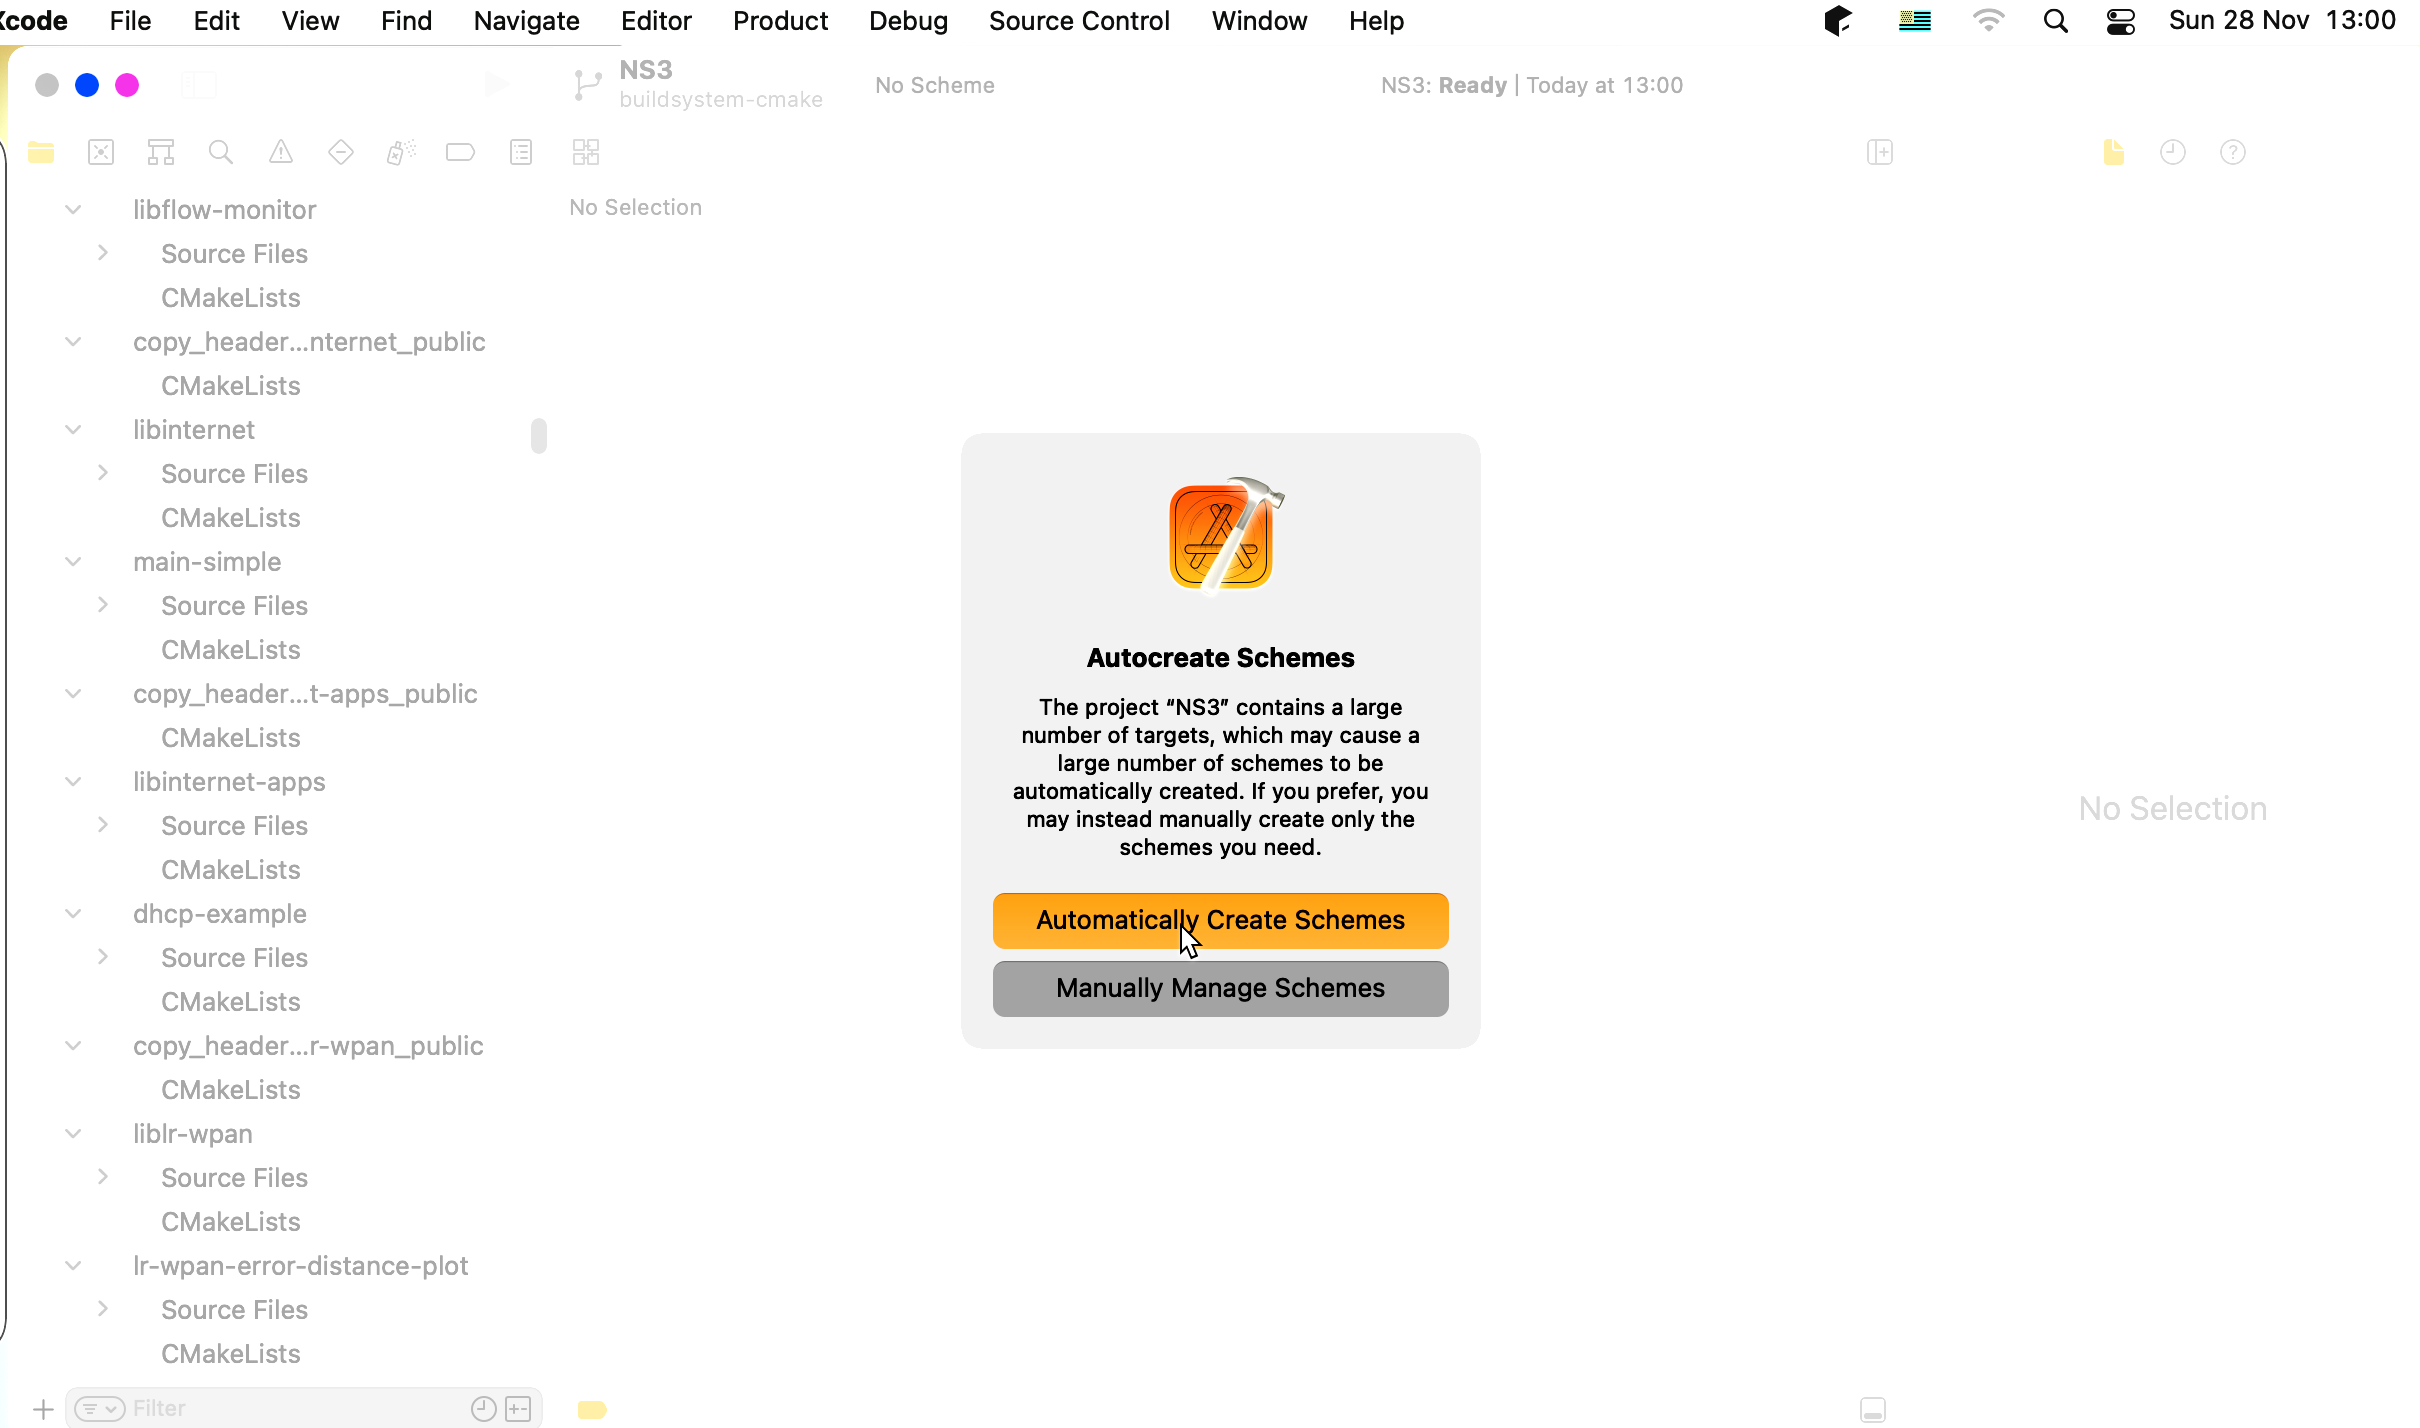
Loading the project will take a while, and you will be greeted with the following prompt. Select to automatically create the schemes.
After that we can select a target in the top menu and click to run, which will build and run (if executable, or debug if build with debugging symbols).
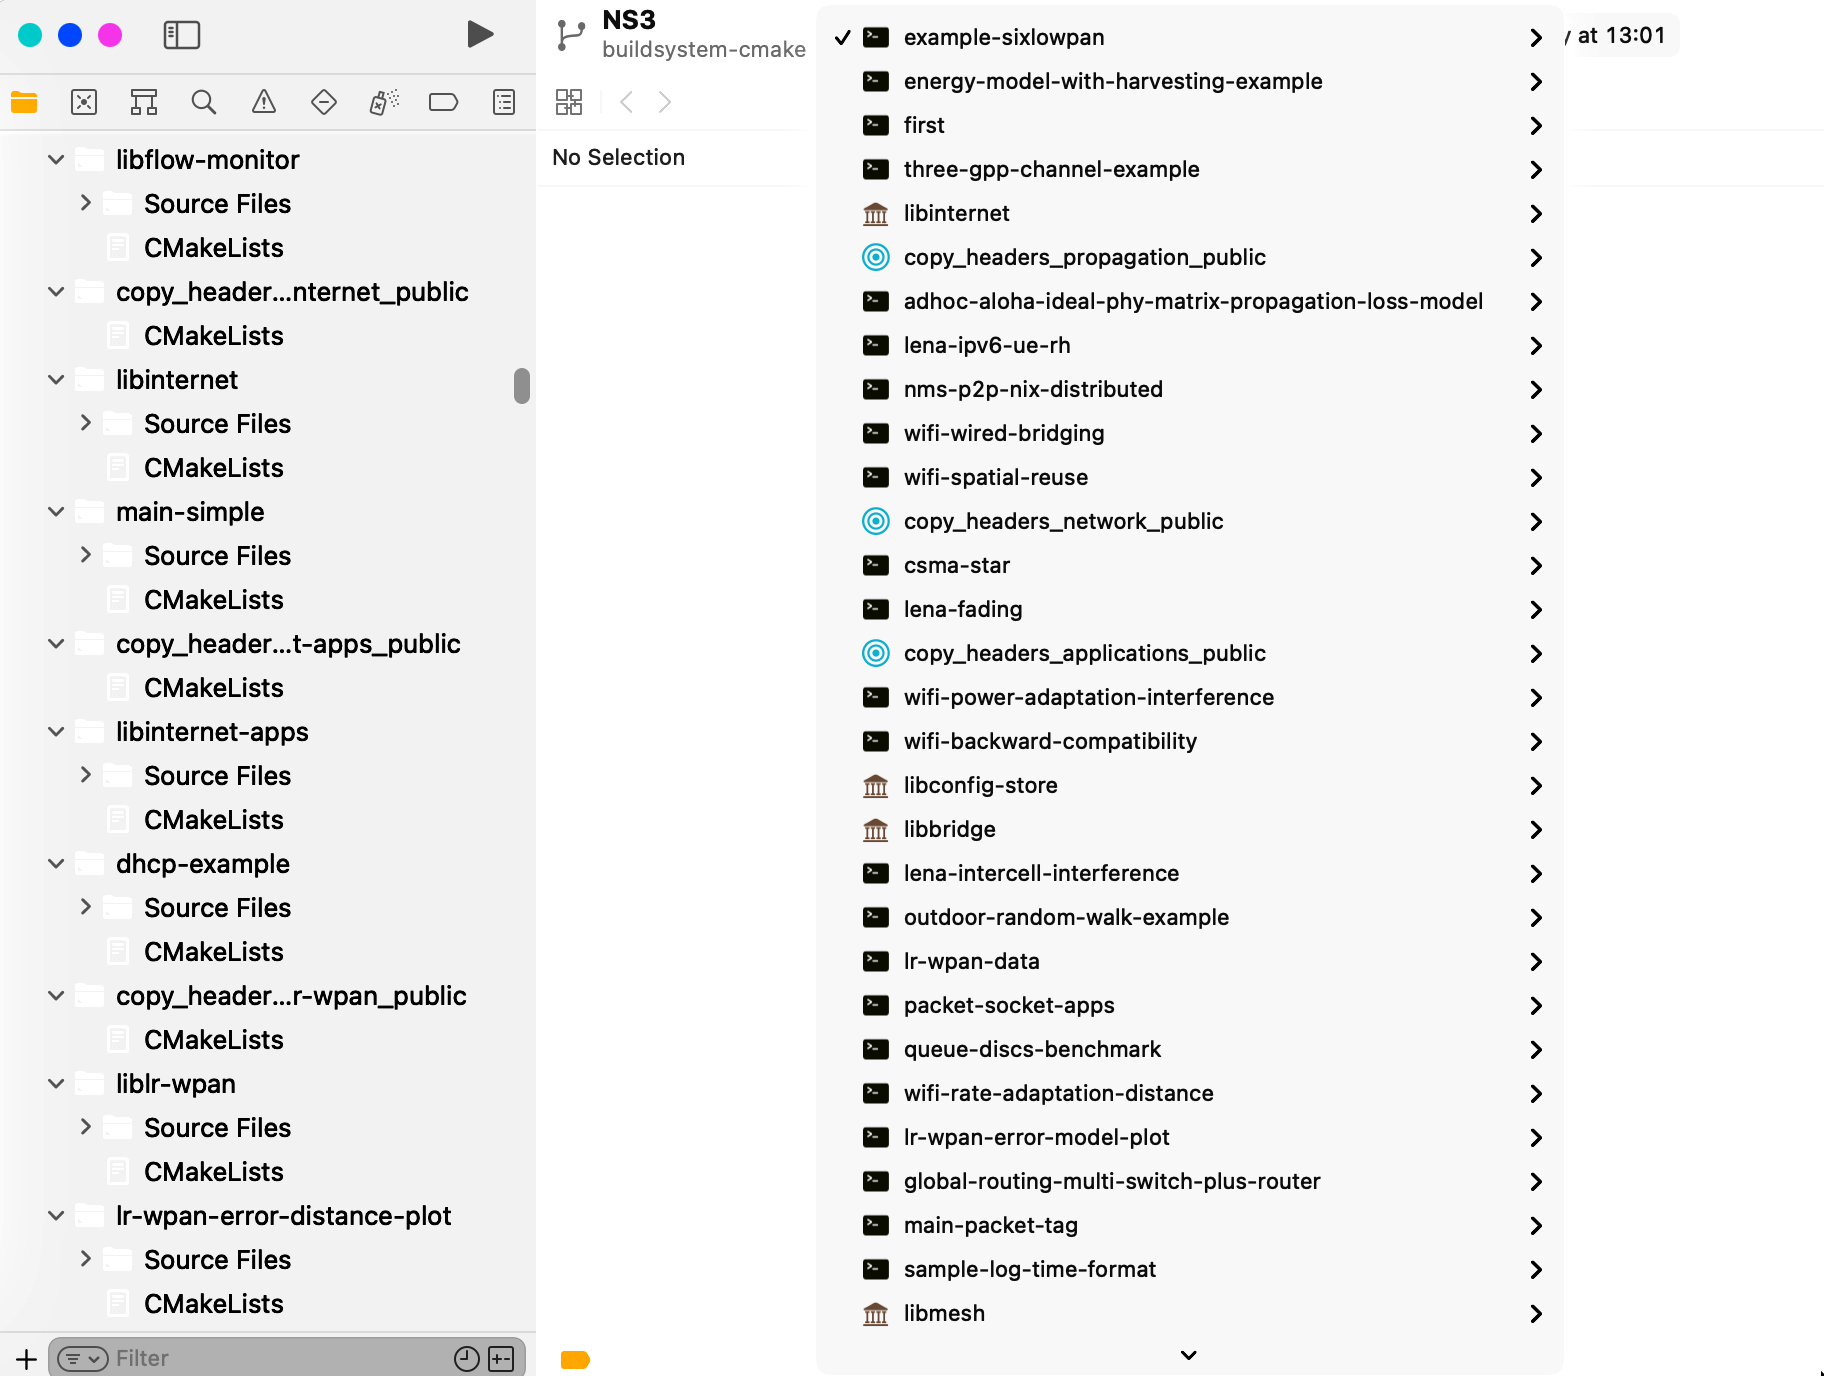
After clicking to build, the build will start and progress is shown in the top bar.

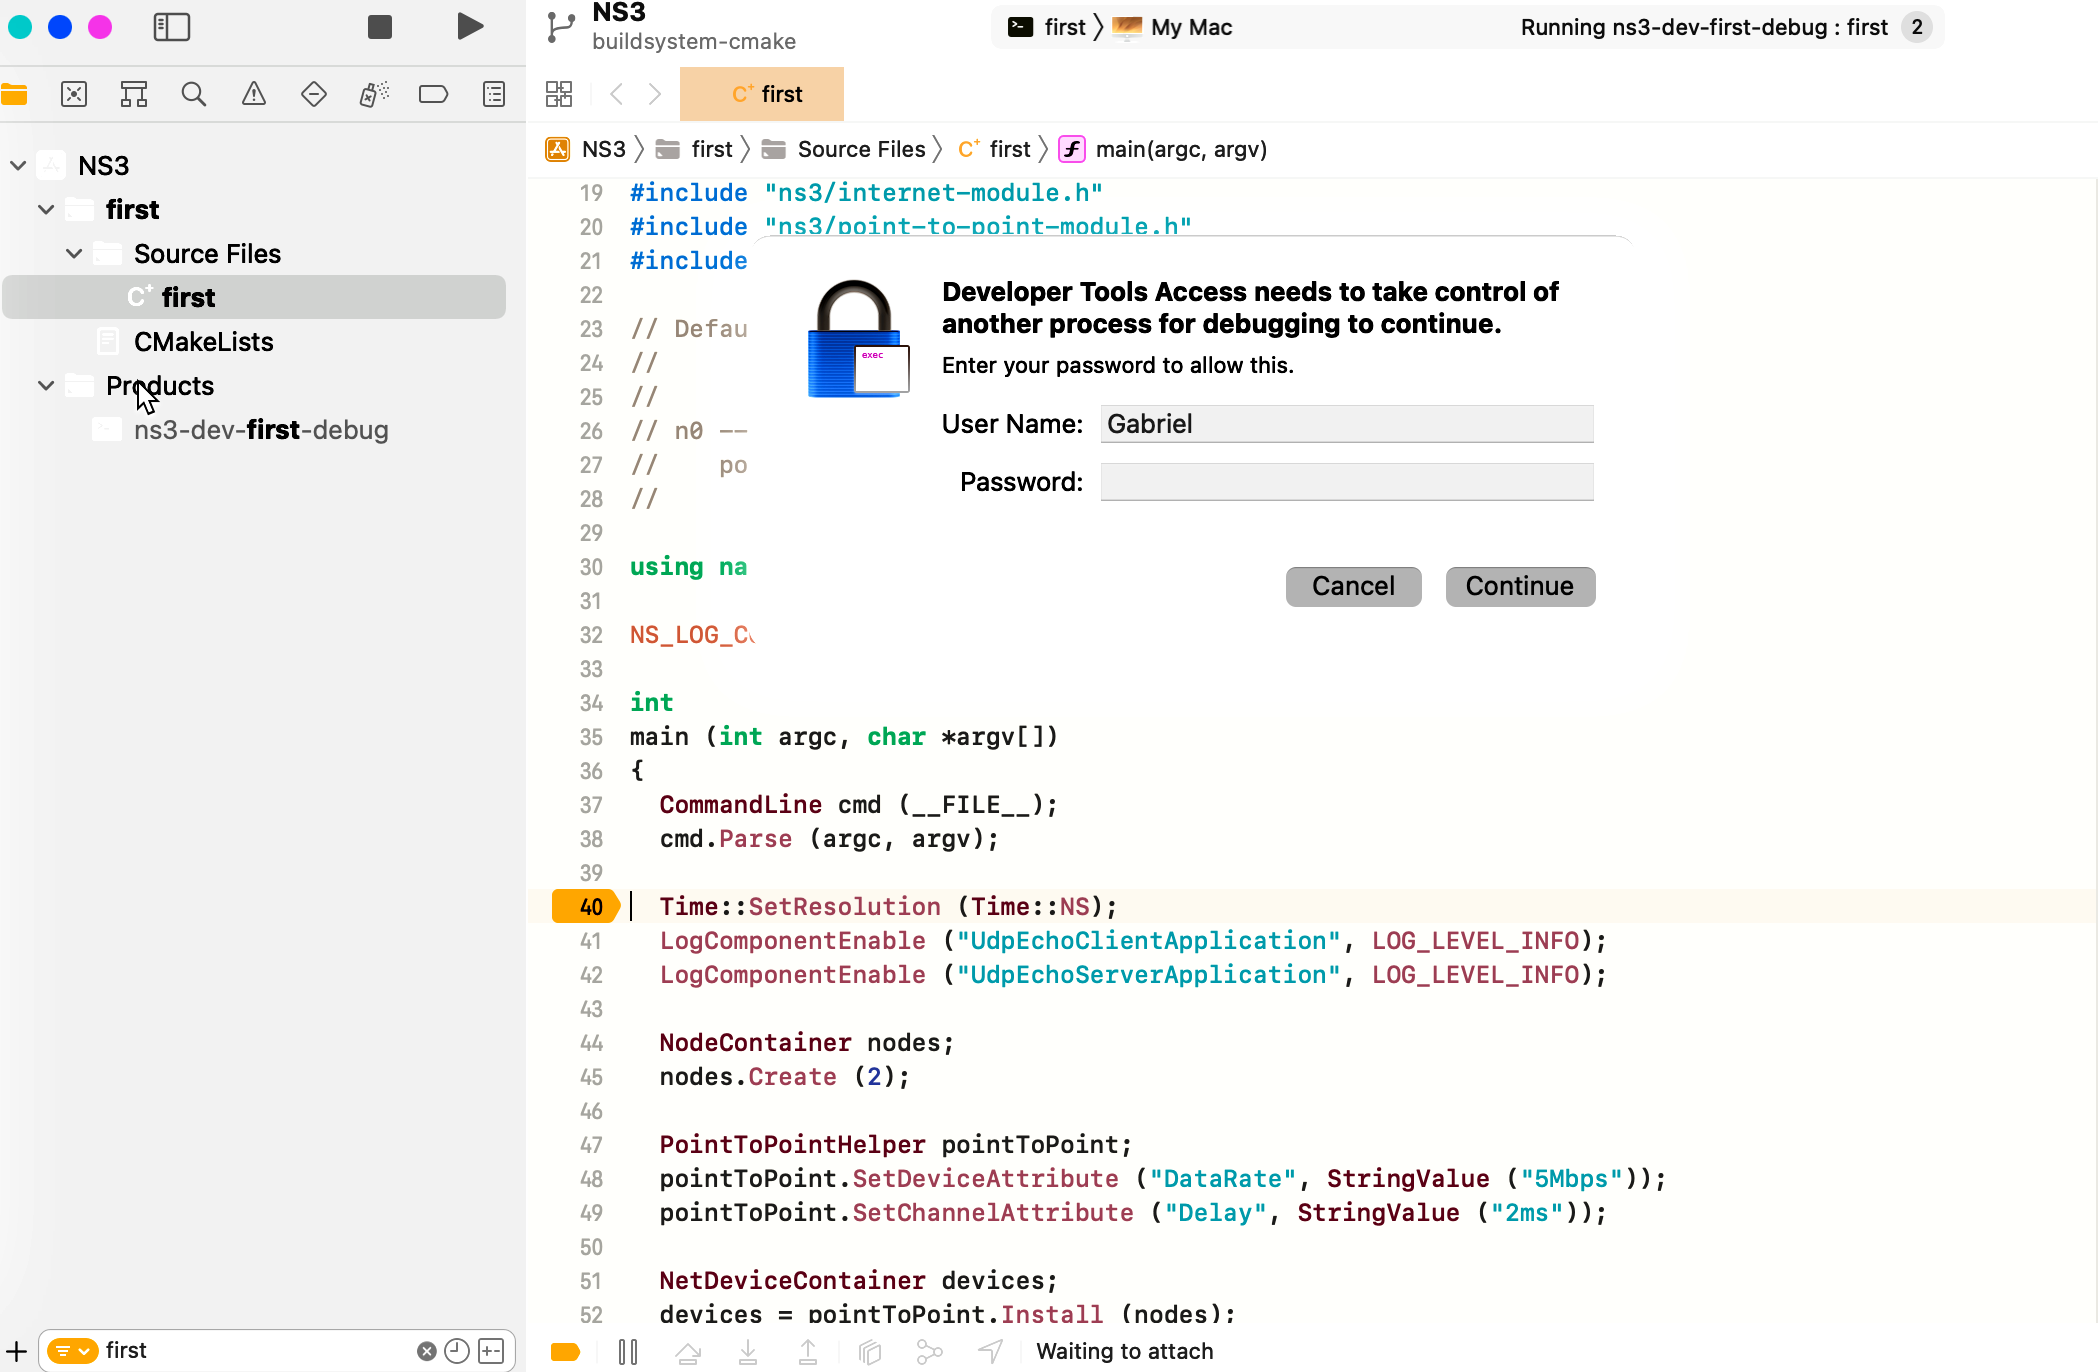
Before debugging starts, Xcode will request for permissions to attach to the process (as an attacker could pretend to be a debugging tool and steal data from other processes).
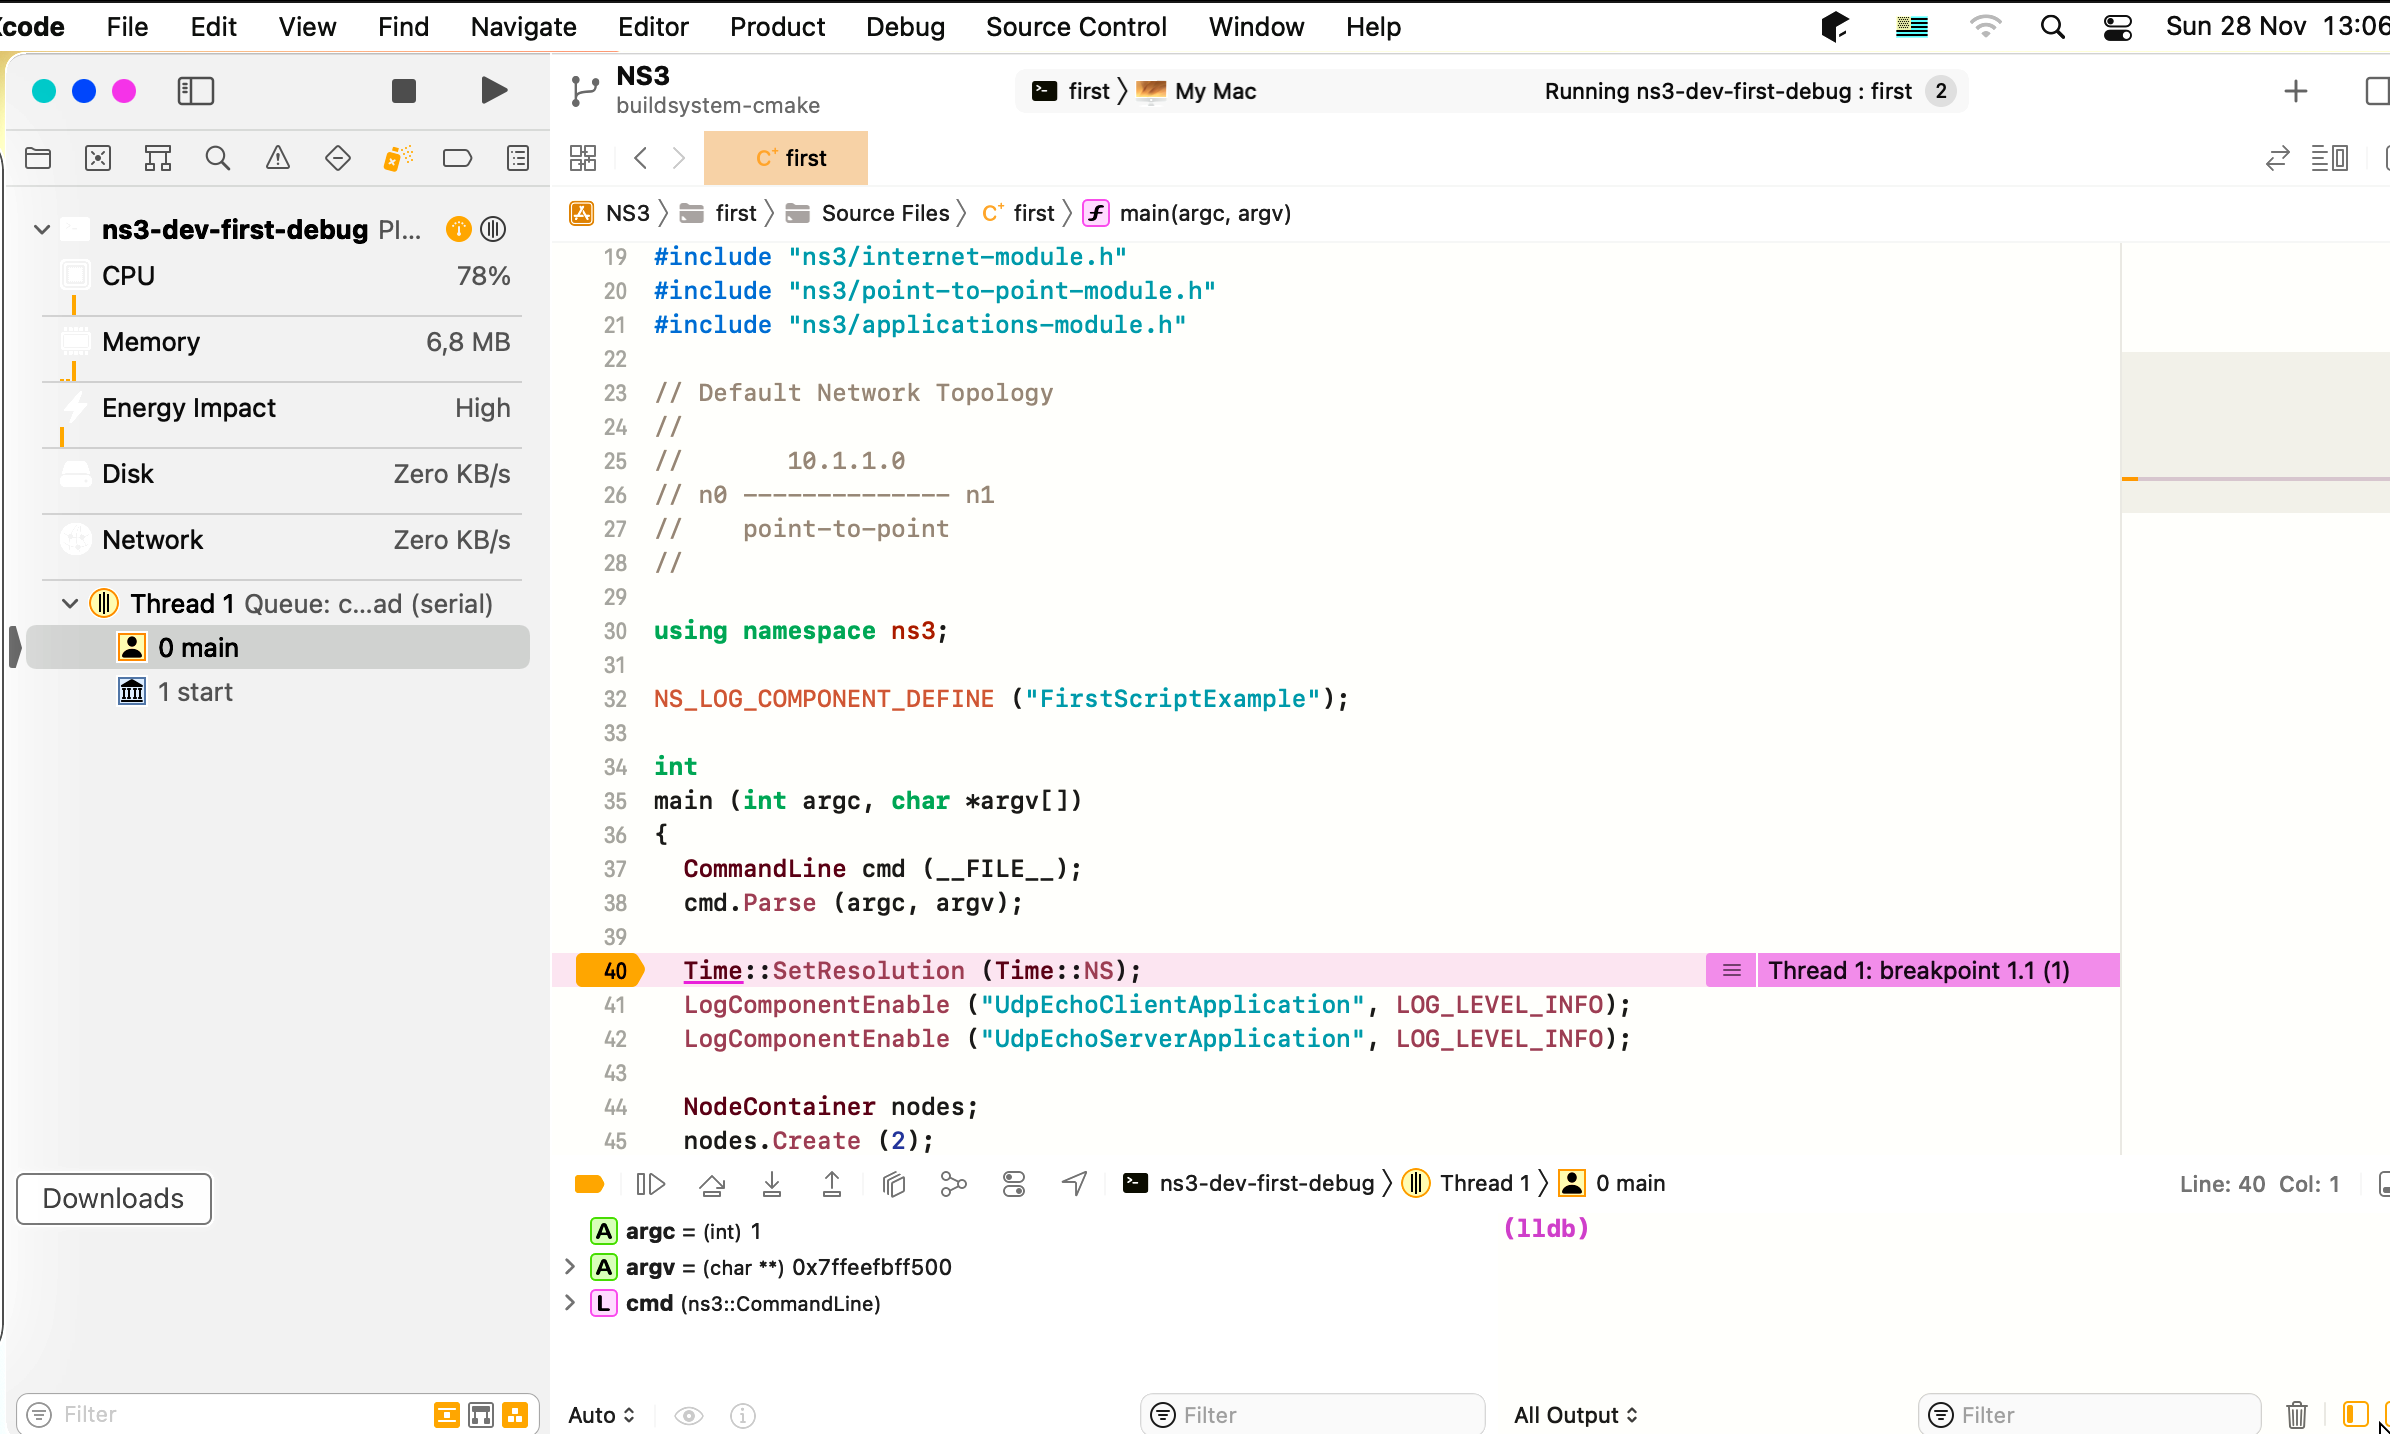
After attaching, we are greeted with profiling information and call stack on the left panel, source code, breakpoint and warnings on the central panel. At the bottom there are the memory watches panel in the left and the output panel on the right, which is also used to read the command line.
Note: as XCode doesn’t natively support CMake projects, it doesn’t refresh the CMake cache, which means you
will need to close the project, run the ./ns3 command to refresh the CMake caches after adding/removing
source files to/from the CMakeLists.txt files, adding a new module or dependencies between modules.
4.5. Testing ns-3
You can run the unit tests of the ns-3 distribution by running the
./test.py script:
$ ./test.py --no-build
These tests are run in parallel by ns3. You should eventually see a report saying that
92 of 92 tests passed (92 passed, 0 failed, 0 crashed, 0 valgrind errors)
This is the important message to check for; failures, crashes, or valgrind errors indicate problems with the code or incompatibilities between the tools and the code.
You will also see the summary output from ns3 and the test runner executing each test, which will actually look something like:
-- CCache is enabled
-- The CXX compiler identification is GNU 11.2.0
-- The C compiler identification is GNU 11.2.0

...

-- Configuring done
-- Generating done
-- Build files have been written to: /ns-3-dev/cmake-cache

...
Scanning dependencies of target tap-creator
[  1%] Building CXX object src/fd-net-device/CMakeFiles/tap-device-creator.dir/helper/tap-device-creator.cc.o
[  1%] Building CXX object src/tap-bridge/CMakeFiles/tap-creator.dir/model/tap-creator.cc.o
[  1%] Building CXX object src/fd-net-device/CMakeFiles/raw-sock-creator.dir/helper/creator-utils.cc.o
[  1%] Building CXX object src/tap-bridge/CMakeFiles/tap-creator.dir/model/tap-encode-decode.cc.o
[  1%] Linking CXX executable ../../../build/src/fd-net-device/ns3-dev-tap-device-creator

 ...

[100%] Linking CXX executable ../../../build/examples/matrix-topology/ns3-dev-matrix-topology
[100%] Built target manet-routing-compare
[100%] Built target matrix-topology
[1/742] PASS: TestSuite aodv-routing-id-cache
[2/742] PASS: TestSuite routing-aodv
[3/742] PASS: TestSuite uniform-planar-array-test
[4/742] PASS: TestSuite angles

...

[740/742] PASS: Example src/wifi/examples/wifi-manager-example --wifiManager=MinstrelHt --standard=802.11ax-6GHz --serverChannelWidth=160 --clientChannelWidth=160 --serverShortGuardInterval=3200 --clientShortGuardInterval=3200 --serverNss=4 --clientNss=4 --stepTime=0.1
[741/742] PASS: Example src/lte/examples/lena-radio-link-failure --numberOfEnbs=2 --useIdealRrc=0 --interSiteDistance=700 --simTime=17
[742/742] PASS: Example src/lte/examples/lena-radio-link-failure --numberOfEnbs=2 --interSiteDistance=700 --simTime=17
739 of 742 tests passed (739 passed, 3 skipped, 0 failed, 0 crashed, 0 valgrind errors)
This command is typically run by users to quickly verify that an
ns-3 distribution has built correctly. (Note the order of the PASS: ...
lines can vary, which is okay. What’s important is that the summary line at
the end report that all tests passed; none failed or crashed.)
Both ns3 and test.py will split up the job on the available CPU cores
of the machine, in parallel.
4.6. Running a Script
We typically run scripts under the control of ns3. This allows the build
system to ensure that the shared library paths are set correctly and that
the libraries are available at run time. To run a program, simply use the
--run option in ns3. Let’s run the ns-3 equivalent of the
ubiquitous hello world program by typing the following:
$ ./ns3 run hello-simulator
ns3 first checks to make sure that the program is built correctly and executes a build if required. ns3 then executes the program, which produces the following output.
Hello Simulator
Congratulations! You are now an ns-3 user!
What do I do if I don’t see the output?
If you see ns3 messages indicating that the build was
completed successfully, but do not see the “Hello Simulator” output,
chances are that you have switched your build mode to optimized in
the Building with the ns3 CMake wrapper section, but have missed the change back to
debug mode. All of the console output used in this tutorial uses a
special ns-3 logging component that is useful for printing
user messages to the console. Output from this component is
automatically disabled when you compile optimized code – it is
“optimized out.” If you don’t see the “Hello Simulator” output,
type the following:
$ ./ns3 configure --build-profile=debug --enable-examples --enable-tests
to tell ns3 to build the debug versions of the ns-3 programs that includes the examples and tests. You must still build the actual debug version of the code by typing
$ ./ns3
Now, if you run the hello-simulator program, you should see the
expected output.
4.6.1. Program Arguments
To feed command line arguments to an ns-3 program use this pattern:
$ ./ns3 run <ns3-program> --command-template="%s <args>"
Substitute your program name for <ns3-program>, and the arguments
for <args>. The --command-template argument to ns3 is
basically a recipe for constructing the actual command line ns3 should use
to execute the program. ns3 checks that the build is complete,
sets the shared library paths, then invokes the executable
using the provided command line template,
inserting the program name for the %s placeholder.
If you find the above to be syntactically complicated, a simpler variant exists, which is to include the ns-3 program and its arguments enclosed by single quotes, such as:
$ ./ns3 run '<ns3-program> --arg1=value1 --arg2=value2 ...'
Another particularly useful example is to run a test suite by itself.
Let’s assume that a mytest test suite exists (it doesn’t).
Above, we used the ./test.py script to run a whole slew of
tests in parallel, by repeatedly invoking the real testing program,
test-runner. To invoke test-runner directly for a single test:
$ ./ns3 run test-runner --command-template="%s --suite=mytest --verbose"
This passes the arguments to the test-runner program.
Since mytest does not exist, an error message will be generated.
To print the available test-runner options:
$ ./ns3 run test-runner --command-template="%s --help"
4.6.2. Debugging
To run ns-3 programs under the control of another utility, such as
a debugger (e.g. gdb) or memory checker (e.g. valgrind),
you use a similar --command-template="..." form.
For example, to run your ns-3 program hello-simulator with the arguments
<args> under the gdb debugger:
$ ./ns3 run hello-simulator --command-template="gdb %s --args <args>"
Notice that the ns-3 program name goes with the --run argument,
and the control utility (here gdb) is the first token
in the --command-template argument. The --args tells gdb
that the remainder of the command line belongs to the “inferior” program.
(Some gdb’s don’t understand the --args feature. In this case,
omit the program arguments from the --command-template,
and use the gdb command set args.)
We can combine this recipe and the previous one to run a test under the debugger:
$ ./ns3 run test-runner --command-template="gdb %s --args --suite=mytest --verbose"
4.6.3. Working Directory
ns3 needs to run from its location at the top of the ns-3 tree.
This becomes the working directory where output files will be written.
But what if you want to keep those files out of the ns-3 source tree? Use
the --cwd argument:
$ ./ns3 run program-name --cwd=...
We mention this --cwd command for completeness; most users will simply
run ns3 from the top-level directory and generate the output data files there.
4.6.4. Running without Building
As of the ns-3.30 release, a new ns3 option was introduced to allow the
running of programs while skipping the build step. This can reduce the time
to run programs when, for example, running the same program repeatedly
through a shell script, or when demonstrating program execution.
The option --no-build modifies the run option,
skipping the build steps of the program and required ns-3 libraries.
$ ./ns3 run '<ns3-program> --arg1=value1 --arg2=value2 ...' --no-build
4.6.5. Build version
As of the ns-3.32 release, a new ns3 configure option --enable-build-version
was introduced which inspects the local ns3 git repository during builds and adds
version metadata to the core module.
This configuration option has the following prerequisites:
The ns-3 directory must be part of a local git repository
The local git repository must have at least one ns-3 release tag
or
A file named version.cache, containing version information, is located in the src/core directory
If these prerequisites are not met, the configuration will fail.
When these prerequisites are met and ns-3 is configured with the
--enable-build-version option, the ns3 command show version can be
used to query the local git repository and display the current version metadata.
$ ./ns3 show version
ns3 will collect information about the build and print out something similar to the output below.
ns-3.33+249@g80e0dd0-dirty-debug
If show version is run when --enable-build-version was not configured,
an error message indicating that the option is disabled will be displayed instead.
Build version support is not enabled, reconfigure with --enable-build-version flag
The build information is generated by examining the current state of the git
repository. The output of show version will change whenever the state
of the active branch changes.
The output of show version has the following format:
<version_tag>[+closest_tag][+distance_from_tag]@<commit_hash>[-tree_state]-<profile>
- version_tag
version_tag contains the version of the ns-3 code. The version tag is defined as a git tag with the format ns-3*. If multiple git tags match the format, the tag on the active branch which is closest to the current commit is chosen.
- closest_tag
closest_tag is similar to version_tag except it is the first tag found, regardless of format. The closest tag is not included in the output when closest_tag and version_tag have the same value.
- distance_from_tag
distance_from_tag contains the number of commits between the current commit and closest_tag. distance_from_tag is not included in the output when the value is 0 (i.e. when closest_tag points to the current commit)
- commit_hash
commit_hash is the hash of the commit at the tip of the active branch. The value is ‘g’ followed by the first 7 characters of the commit hash. The ‘g’ prefix is used to indicate that this is a git hash.
- tree_state
tree_state indicates the state of the working tree. When the working tree has uncommitted changes this field has the value ‘dirty’. The tree state is not included in the version output when the working tree is clean (e.g. when there are no uncommitted changes).
- profile
The build profile specified in the
--build-profileoption passed tons3 configure
A new class, named Version, has been added to the core module. The Version class
contains functions to retrieve individual fields of the build version as well
as functions to print the full build version like show version.
The build-version-example application provides an example of how to use
the Version class to retrieve the various build version fields. See the
documentation for the Version class for specifics on the output of the Version
class functions.
The version information stored in the Version class is updated every time the
git repository changes. This may lead to frequent recompilations/linking of
the core module when the --enable-build-version option is configured.
build-version-example:
Program Version (according to CommandLine): ns-3.33+249@g80e0dd0-dirty-debug

Version fields:
LongVersion:        ns-3.33+249@g80e0dd0-dirty-debug
ShortVersion:       ns-3.33+*
BuildSummary:       ns-3.33+*
VersionTag:         ns-3.33
Major:              3
Minor:              33
Patch:              0
ReleaseCandidate:
ClosestAncestorTag: ns-3.33
TagDistance:        249
CommitHash:         g80e0dd0
BuildProfile:       debug
WorkingTree:        dirty
The CommandLine class has also been updated to support the --version
option which will print the full build version and exit.
./ns3 run "command-line-example --version" --no-build
ns-3.33+249@g80e0dd0-dirty-debug
If the --enable-build-version option was not configured, --version
will print out a message similar to show version indicating that the build
version option is not enabled.
4.6.6. Source version
An alternative to storing build version information in the ns-3 libraries
is to track the source code version used to build the code. When using
Git, the following recipe can be added to Bash shell scripts to
create a version.txt file with Git revision information, appended
with a patch of any changes to that revision if the repository is dirty.
The resulting text file can then be saved with any corresponding
ns-3 simulation results.
echo `git describe` > version.txt
gitDiff=`git diff`
if [[ $gitDiff ]]
then
    echo "$gitDiff" >> version.txt
fi
