PyViz: Difference between revisions
(add missing packages) |
|||
| Line 13: | Line 13: | ||
You will need to have certain python modules installed. Following installation instructions (for Ubuntu): | You will need to have certain python modules installed. Following installation instructions (for Ubuntu): | ||
sudo apt-get install python-pygraphviz python-kiwi python-pygoocanvas python-gnome2 python-gnomedesktop | sudo apt-get install python-pygraphviz python-kiwi python-pygoocanvas python-gnome2 python-gnomedesktop python-rsvg | ||
Optionally, you may install Interactive Python in order to have a Console button in the visualizer GUI: | Optionally, you may install Interactive Python in order to have a Console button in the visualizer GUI: | ||
Revision as of 17:01, 26 February 2010
Introduction
NS-3 PyViz is a live simulation visualizer, meaning that it uses no trace files. It can be most useful for debugging purposes, i.e. to figure out if mobility models are what you expect, where packets are being dropped, etc. There's also a builtin interactive python console that can be used to debug the state of the running objects. Although it is mostly written in Python, it works both with Python and pure C++ simulations.
Installation
PyViz is not integrated into mainline NS-3, it is found on a separate branch. There are actually 2 branches of PyViz:
- gjc/ns-3-pyviz: this branch is based on the old NS-3.2 version;
- gjc/ns-3-pyviz-dev: this branch is based on the current NS-3 development version, ns-3-dev.
You will have to select one of those branches (probably the latter), and merge it with your code.
You will need to have certain python modules installed. Following installation instructions (for Ubuntu):
sudo apt-get install python-pygraphviz python-kiwi python-pygoocanvas python-gnome2 python-gnomedesktop python-rsvg
Optionally, you may install Interactive Python in order to have a Console button in the visualizer GUI:
sudo apt-get install ipython
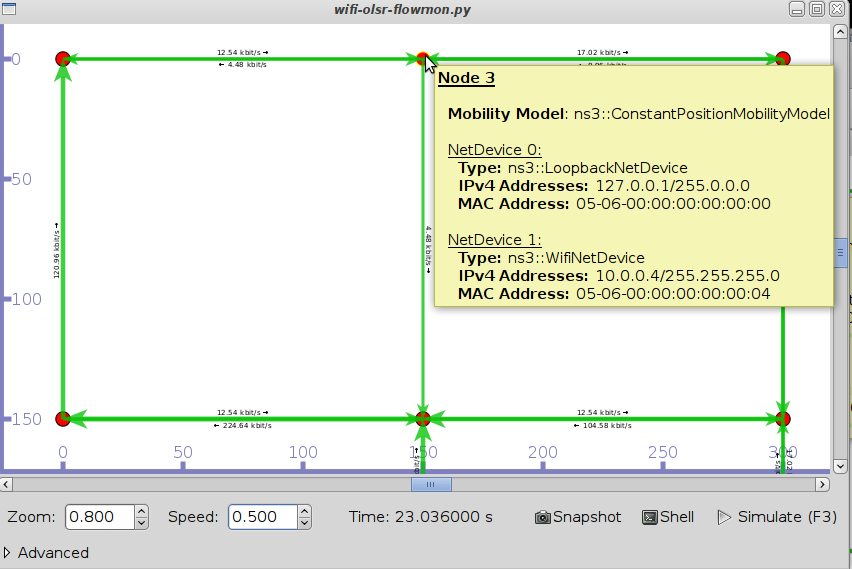
Configure and build your ns-3 tree as usual. You can test the visualizer for example with the FlowMonitor sample program:
./waf --pyrun examples/flowmon/wifi-olsr-flowmon.py
And the result should be:
Enabling the visualizer in your own simulation
For Python simulations, you have to import the visualizer module, and call visualizer.start() instead of ns3.Simulator.Run(). For example, like this.
For C++ simulations, #include "ns3/visualizer.h", and replace the call to Simulator::Run (); with Visualizer::Run ();. For example, like this.
